Caution: this email originated from outside of the organization
 ChatGPT
 Claude
 Gemini
 Perplexity
 Grok
GrokIn brief
"Caution: This email originated from outside of the organization" means the message is external, not that it is phishing. Here is what to check.
"Caution: This email originated from outside of the organization" means the recipient's mail system classified the message as coming from outside of the organization. It is an origin label, not a finding that the message is malicious, and it does not prove that SPF, DKIM, or DMARC failed. Verify unexpected requests through a contact method you already trust, especially before opening a file, following a link, or sending sensitive information.
At a glance
Quick takeaways
- The warning identifies an external origin. It does not classify the message as phishing.
- Legitimate mail from customers, vendors, and personal accounts can carry the warning.
- That exact sentence is always your own organization's mail flow rule. Microsoft's built-in feature adds an icon, not a sentence.
- An external-origin banner and an unverified-sender warning describe different evidence.
- Treat the message's request and context as the decision point, not the banner alone.
How the external email warning works
Two different mechanisms mark external mail in Outlook, and the wording tells you which one you are looking at.
Microsoft's built-in feature, configured through Set-ExternalInOutlook, adds an External icon in the area of the subject line in supported Outlook experiences, plus a limited allow list for exceptions. It contributes no text to the message body and no sentence of its own.
A sentence at the top of the message body comes from somewhere else: an Exchange Online mail flow rule. Microsoft's organization-wide disclaimer guidance describes how a rule prepends or appends text. So the exact sentence "Caution: This email originated from outside of the organization" was written by your own organization, not by Microsoft. The two can also stack, which is why Microsoft's own documentation says to disable rules that already tag external senders before enabling the built-in feature, to avoid duplication.
The practical tell: body text at the top of the message is your organization's rule; a small External tag beside the subject line is Microsoft's built-in feature.
The banner is an origin label, so it sits alongside the other email threats a recipient has to judge rather than replacing that judgement. Neither route makes the banner an authentication result. Outlook's separate unverified-sender warning concerns sender identity evidence. An external banner can appear on a legitimate message that authenticates correctly, while an internal-looking message without the banner can still require scrutiny if an account was compromised.
Use this distinction when recording the message:
Observed label: Caution: This email originated from outside of the organization
What it establishes: The message was classified as external to the recipient organization
What it does not establish: Phishing, malware, or an SPF, DKIM, or DMARC failure
Evidence to keep: Sender address, message time, request, links, attachments, and original headersDoes the warning mean the same thing for every sender?
The warning's basic meaning stays the same, but the right response depends on the sender and request.
- A known supplier sending an expected invoice is still external. Confirm that the sender address, amount, and payment route match the business process.
- A colleague using a personal account is also external. Confirm why they used that account before sharing internal information.
- An automated service may be expected even when its visible sender name resembles an internal system. Check the approved service and message purpose.
- A message without the warning is not automatically safe. The absence of a banner says nothing about whether the account or sending system is trustworthy.
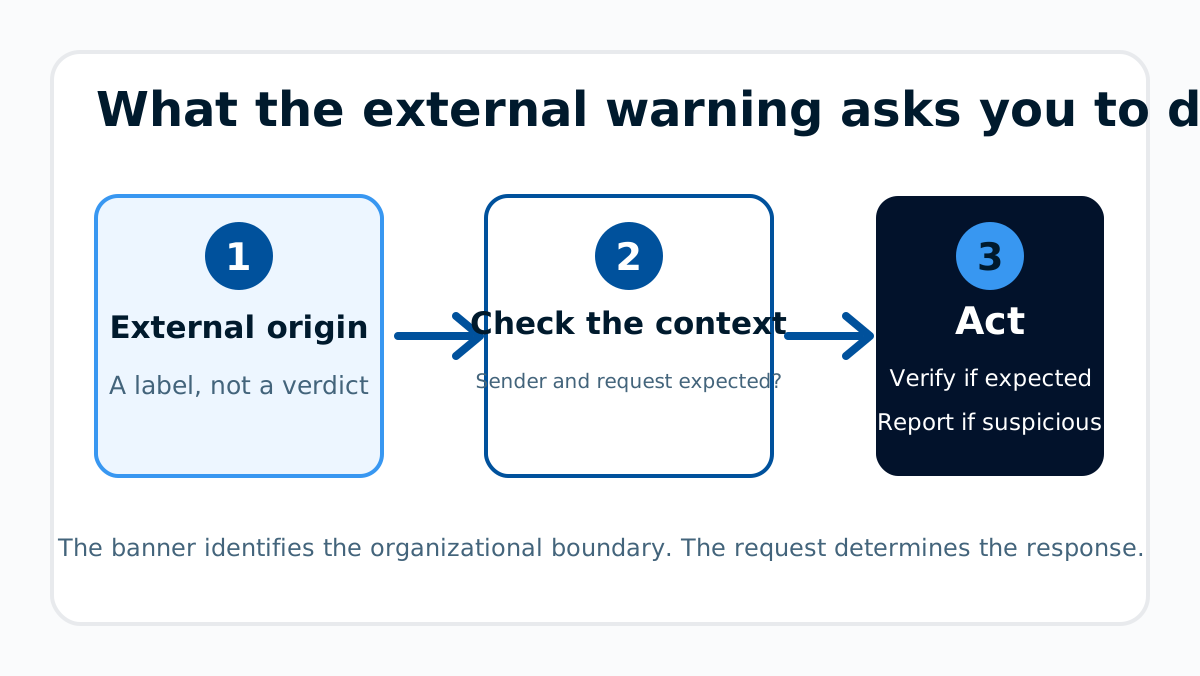
What should you do when the banner appears?
1. Read the complete sender address
Check the address, not only the display name. Look for a changed domain, extra word, substituted character, or reply address that does not match the expected contact. Do not assume a familiar name proves who sent the message.
2. Decide whether the request is expected
Compare the request with a purchase order, ticket, calendar event, or conversation you already know. A first-time request for credentials, gift cards, bank changes, or urgent payment deserves separate verification even when the sender looks familiar.
3. Verify through a separate trusted route
Use a phone number, chat account, or ticket record you already have. Do not use the phone number or login link supplied in the questionable message. Microsoft's guidance on protecting yourself from phishing describes messages that impersonate reputable companies or acquaintances to get you to reveal information, which is why the contact route has to come from somewhere other than the message.
If the message includes a file, follow the safe process for an unexpected attachment before opening it.
4. Report the original message when it remains suspicious
Use your organization's reporting control or security process. Preserve the original message so the security team can inspect its sender, links, attachments, and headers. Forwarding a screenshot alone removes much of that evidence.
If you can export the original message, Palisade's email header analyzer can organize its routing and authentication evidence for review. It cannot decide whether the sender's request is legitimate or reveal why your organization added the banner.
For a plain-language explanation of the underlying attack pattern, see what phishing is.
What should Microsoft 365 administrators check?
Identify the mechanism before changing the warning. For this sentence specifically, inspect the mail flow rules that prepend disclaimer text first, because that is where the wording lives. Then read the built-in feature's state with Get-ExternalInOutlook, the view counterpart to Set-ExternalInOutlook. Record the owner, exceptions, and reason for each configuration.
An exception should reflect a documented business boundary, not a request to make a sender look internal. Removing a banner does not authenticate the sender. Adding one does not inspect links, attachments, payment requests, or account compromise.
Test any change with messages from an external account, an allowed sender if one is configured, and an internal account. Confirm which messages receive the banner in every supported Outlook client your organization uses.
Evidence
Sources and further reading
Questions readers ask
Frequently asked questions
Does the external email warning mean the message is phishing?
No. The warning means the message was classified as coming from outside the recipient's organization. Use the sender address, request, links, attachments, and a separate verification route to decide whether it is trustworthy.
Can a legitimate message show the warning?
Yes. Expected mail from customers, suppliers, cloud services, and personal accounts is external and can carry the warning even when the sender is legitimate.
Can a recipient remove the warning?
Only an administrator can reliably identify and change the organization-wide feature or mail flow rule that added it. A recipient should not create a personal workaround that hides security context without approval.
Should I trust a link when the external message was expected?
Not solely because the message was expected. Confirm the sender address and destination, and use a known bookmark or official site when the message requests credentials or sensitive information.

Written by
Samuel ChenardCEO & Co-Founder, Palisade
Samuel Chenard is the CEO and co-founder of Palisade, agentic DMARC software for IT teams and MSPs, from one domain to thousands.
More from Samuel →