Generate a DKIM record
 ChatGPT
 Claude
 Gemini
 Perplexity
 Grok
GrokIn brief
Generate a DKIM record by creating a key pair in your sending service, then publishing its public key at the selector's DNS name for your domain.
Generate a DKIM record by using the system that signs your mail to create a DKIM key pair, then publishing the public key in DNS at the selector name that system supplies. Do not create a generic record by copying another sender's value. The selector, DNS hostname, record type, and public-key value must match the signing service that will add the DKIM-Signature header.
At a glance
Quick takeaways
- A DKIM record publishes a public key. The corresponding private key stays with the signing system.
- The standard DNS lookup name is
._domainkey. - Your email provider or mail server must supply the real selector and key material.
- A TXT record and a CNAME record can both support DKIM, but the provider determines which form to publish.
- A public DNS lookup confirms that a record is visible. It does not prove that a production message is being signed.
- DKIM is one part of email authentication, alongside other controls that a receiver can evaluate.
How DKIM record generation works
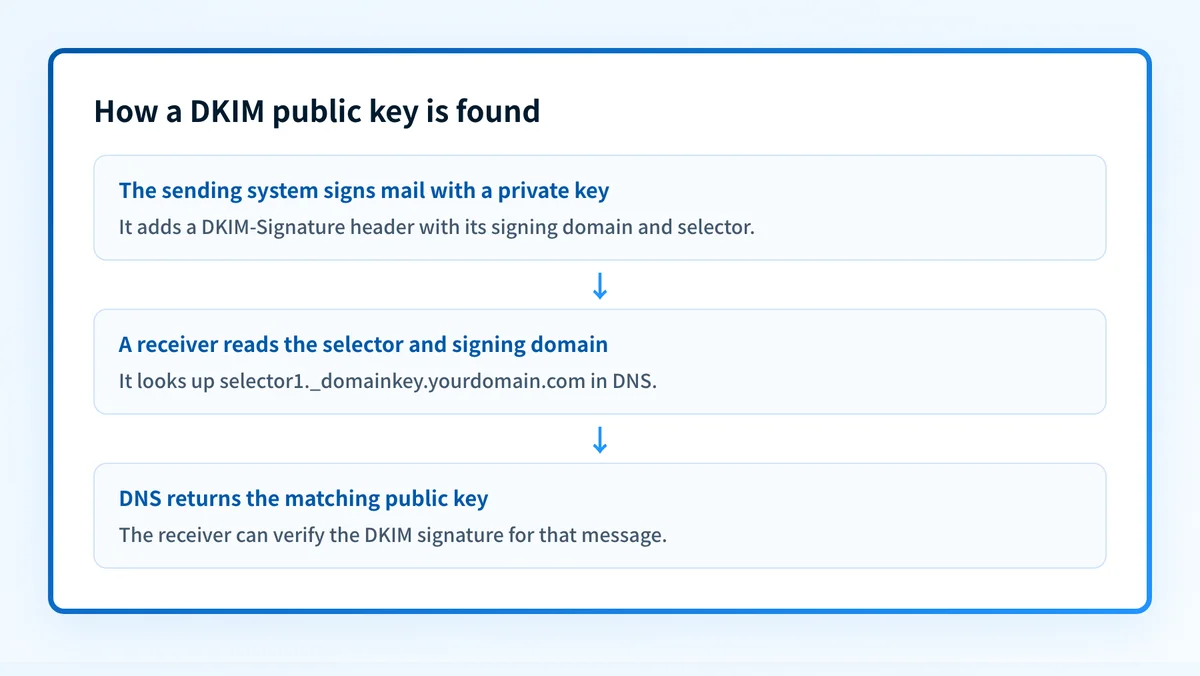
DKIM lets a signing domain associate a cryptographic signature with a message. The signer holds the private key and places a DKIM-Signature header on outgoing mail. A receiving system uses the signature's domain and selector to retrieve the matching public key from DNS.
The public-key lookup name combines two values from the sender's configuration:
<selector>._domainkey.<signing-domain>For example, if a sending platform assigns selector selector1 for yourdomain.com, the DNS name is:
selector1._domainkey.yourdomain.comRFC 6376 defines selectors as a way to support multiple keys for one domain. That lets a domain use separate keys for separate sending systems or replace a key without requiring all existing selectors to disappear at once. The selector is therefore part of the lookup identity, not a label you should guess.
A standard DKIM public-key record uses DNS TXT data. The record normally identifies the key type with k= and contains the encoded public key in p=. RFC 6376 also defines other key-record tags, including t= for flags and s= for service types. The signer, record, and signature header must agree.
For a fuller explanation of record lookup and testing, see the DKIM learning hub.
When the record format changes
The safe decision rule is: publish the exact DNS instructions generated by the service that signs the mail.
A provider may ask for a TXT record that contains the public key directly. Another provider may ask for a CNAME record that delegates the selector lookup to provider-managed DNS. Both approaches can support DKIM, but they are different DNS configurations. A CNAME is not interchangeable with a TXT record. See what a DKIM CNAME record is before replacing one record type with the other.
The signing domain can also differ from the visible From domain. DKIM permits a signing domain to identify the party taking responsibility for the signed message, while DMARC later evaluates whether the authenticated domain aligns with the visible From domain. Publishing a valid DKIM record alone does not establish that alignment.
Use this decision rule:
- If the sending service presents a DNS hostname, record type, and value, publish those exact values in the DNS zone for the domain it names.
- If the service offers DKIM setup for more than one sending domain, generate and publish the values for each intended domain. Do not reuse a selector target or public key from another account unless the service explicitly generated it for that domain.
- If DNS already has the required selector record, compare it with the provider's current instructions before editing. A duplicate or conflicting record can prevent verification.
- If the provider says DKIM is enabled but a lookup returns no usable selector record, investigate the missing record with how to diagnose a missing DKIM record.
Do not publish a private key in DNS, support tickets, or a shared document. DNS receives the public key or a provider-directed CNAME only.
Worked DKIM record shape
The following is a structural example, not a record to publish. Your sender generates the real selector and public-key value.
Type: TXT
Host: selector1._domainkey.yourdomain.com
Value: v=DKIM1; k=rsa; p=BASE64_PUBLIC_KEY_FROM_YOUR_SENDING_SERVICE
In this example:
selector1is the selector chosen or assigned by the signing system._domainkeyis the DKIM DNS namespace defined by the standard.yourdomain.comis the domain named by the signing configuration.v=DKIM1identifies the record as a DKIM key record.k=rsaidentifies the key type for this example.p=carries the public key. Replace the placeholder only with the exact public-key value generated for your sender.
A provider that uses CNAME delegation supplies a different shape, such as a selector hostname and a target hostname. It does not supply a universal public-key string for you to paste into a TXT record. If you manage DNS through GoDaddy, the separate guide on adding a DKIM record in GoDaddy DNS covers that DNS-provider task.
What to do after generating the record
Start with the evidence you have:
- If you have not configured a sender yet, open that sender's domain-authentication or DKIM settings and generate its DNS instructions. Keep the selector, type, hostname, and value together.
- If you have DNS access, publish the exact provider-generated record, then wait for the provider's own verification status before treating setup as complete.
- If you have a delivered test message, inspect its
DKIM-Signatureand receiver-added authentication results. A real message from the production path can show whether that path signed mail and whether the receiving system evaluated the signature. - If you only have a domain and selector, use Palisade's DKIM checker to look up the public DNS record.
Continue with the email authentication checks
After a DKIM record is published, confirm that the sending system reports the domain as verified and send a real message through the same production path. Then review the message headers and the domain's broader authentication configuration.
Review the email authentication checklist
An email-authentication guide and a DKIM lookup cannot repair a sender configuration, prove future messages will authenticate, or control a receiver's final inbox decision.
Evidence
Sources and further reading
Questions readers ask
Frequently asked questions
Can I generate a DKIM record myself?
You can generate the key pair yourself only if you run the mail-signing system and can protect its private key. On a hosted email service, generate DKIM from the provider's domain-authentication settings instead, then publish the DNS values it gives you. Whichever route you take, the system that signs your mail has to hold the private key matching the public key in DNS.
Is a DKIM record always a TXT record?
No, although TXT is the common form, because the standard describes public keys retrieved through DNS without fixing one record type. Some email providers instead ask you to publish CNAME records that point the selector at their own managed key records. Publish whichever form your provider's instructions specify.
What is a DKIM selector?
A DKIM selector is the label that identifies which public key a receiver should look up for a signature. The selector combines with _domainkey and the signing domain to form the DNS lookup name.
Can I use the same DKIM key for every sending service?
No, in almost every case, because each service generates its own selector and key pair and keeps its own private key. Copying one provider's record into another provider's setup leaves that stream unsigned or unverifiable. Publish a separate selector record for each service that signs mail for the domain.
Does a published DKIM record mean DKIM is working?
No, because a published record only shows that DNS returns public-key information for the selector you queried. Check the sending provider's own verification status, then inspect a delivered message from the exact production path to confirm it carries a DKIM-Signature and that the receiver verified it.

Written by
Dominic LandryDeliverability & DNS
Dominic Landry works on email deliverability and DNS configuration at Palisade, from SPF and DKIM records through to DMARC enforcement.
More from Dominic →