How do I set up SPF and DKIM for Klaviyo?
 ChatGPT
 Claude
 Gemini
 Perplexity
 Grok
GrokIn brief
How to set up SPF and DKIM for Klaviyo: configure a branded sending domain, publish Klaviyo's DNS records, verify it, and validate DMARC alignment.

Set up SPF and DKIM for Klaviyo by enabling a branded sending domain in Klaviyo's account settings, selecting the sending subdomain and routing method, then publishing the exact DNS records Klaviyo generates. Return to Klaviyo to verify the records and send a new campaign for header-level validation. The documented path is through Klaviyo's account domain settings, and the DNS values are specific to the selected account and domain.
At a glance
Quick takeaways
- Klaviyo's branded sending-domain workflow supplies the DNS records needed for its sending configuration.
- Copy each DNS host and value from the Klaviyo account that will send the campaigns.
- Choose the routing option Klaviyo offers for the selected domain and DNS provider.
- Do not create a second SPF record for Klaviyo unless Klaviyo specifically instructs you to do so in its generated records.
- A verified Klaviyo domain does not prove a delivered campaign has SPF, DKIM, and DMARC results you expect.
- DMARC needs alignment with the visible From domain, not only a passing authentication result.
What should I check before configuring Klaviyo?
First, confirm the mail path in scope. This workflow covers marketing messages sent through Klaviyo. It does not configure authentication for employee mail, transactional messages sent by another platform, or mail sent directly by an application.
You need access to the Klaviyo account that owns the sending domain, permission to manage its domain settings, and access to the authoritative DNS zone for the domain or subdomain. Identify the From domain that campaigns use and a mailbox where you can inspect the raw source of a delivered test message.
If another team manages DNS, prepare a change request that includes the exact record type, host, and value shown in Klaviyo. Do not use a screenshot, another brand's records, or an online example as the source of the final values.
Copy DNS values from the account and domain you are configuring. Do not publish selectors, targets, tokens, or hostnames from another account or from an online example.
For related vendor workflows, see the Amazon SES SPF and DKIM setup guide and the Customer.io SPF and DKIM setup guide.
Which setup method should I use?
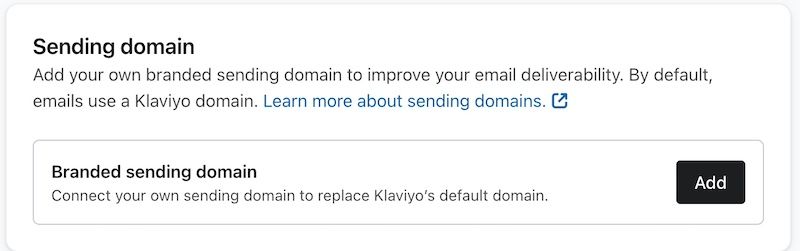
Use the branded sending-domain routing option that Klaviyo presents for your domain and DNS provider. Klaviyo's domain settings start the branded sending-domain process and direct you to the applicable DNS setup steps in its branded sending-domain guidance.
Dynamic routing delegates part of a sending subdomain to Klaviyo through the generated DNS records. Static routing uses the generated records directly in your DNS zone. The right choice depends on what your DNS provider accepts and what Klaviyo displays for the selected route.
Do not choose a route based on a record count from another account. Generate the records first, then review the complete set before making the DNS change.
How do I configure SPF and DKIM for Klaviyo?
1. Open the branded sending-domain settings
Open the account domain settings in Klaviyo and begin the branded sending-domain workflow described in Klaviyo's domain settings documentation. Confirm that you are in the intended account before selecting a domain.
Use a subdomain dedicated to Klaviyo when that is what the account workflow requests, such as send.yourdomain.com. Keep a record of the selected From domain, DNS zone owner, and test mailbox.
2. Select the sending domain and routing method
Enter or select the domain or subdomain that Klaviyo will authenticate. Choose the available routing method that suits your DNS provider.
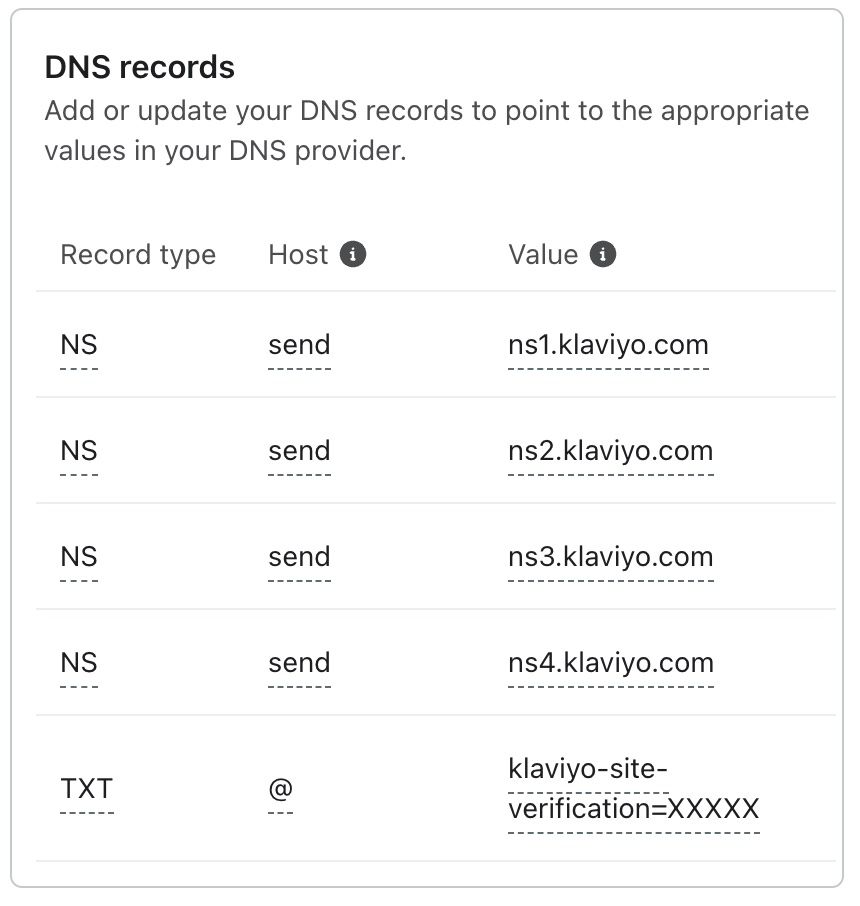
Klaviyo then generates the DNS records for that domain. Those values can include delegation, verification, or authentication-related records, depending on the route. Treat every generated value as account-specific configuration.
3. Publish the DNS records Klaviyo generates
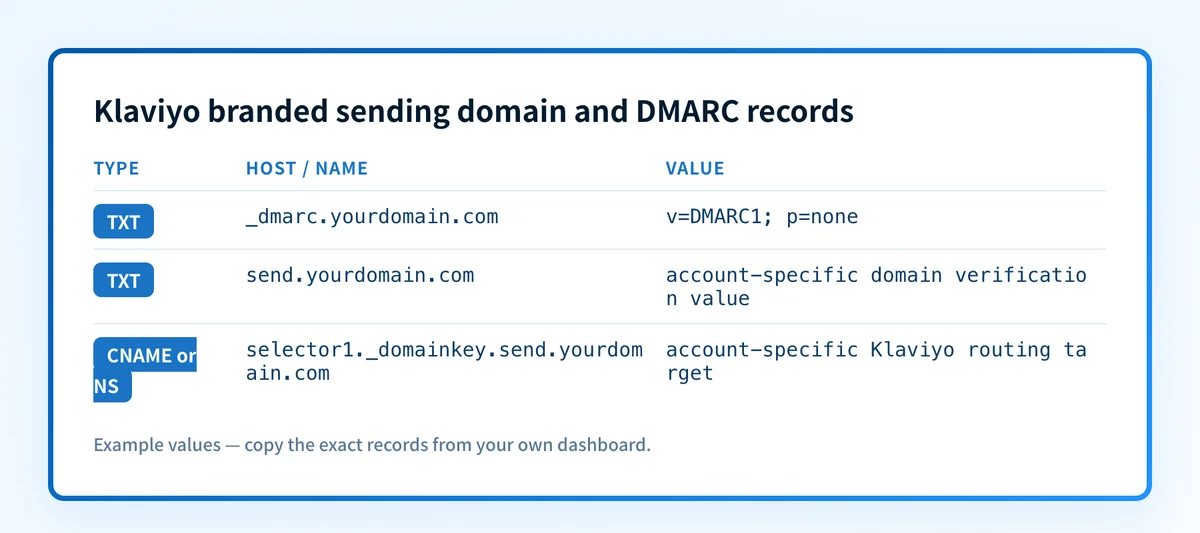
Add each record in the authoritative DNS zone exactly as Klaviyo displays it. The following shapes are illustrative only. They are not Klaviyo values and must not be published.
Record type: TXT
Host (illustrative only):
send.yourdomain.comValue (illustrative only):
klaviyo-domain-verification=example-valueRecord type: CNAME or NS
Host (illustrative only):
selector1._domainkey.send.yourdomain.comValue (illustrative only):
account-specific-target.exampleDo not publish these examples. Copy the complete record set generated in your Klaviyo account for the selected sending domain.
Some DNS providers append the zone name automatically. If the zone is yourdomain.com, entering send.yourdomain.com in a host field can create send.yourdomain.com.yourdomain.com. Check the final fully qualified owner name before saving.
Do not replace an existing SPF TXT record at the same owner with a second SPF policy. SPF evaluation expects one applicable SPF record. Follow Klaviyo's generated record set and resolve any conflict in the DNS zone before continuing.
4. Verify the domain in Klaviyo
After DNS answers publicly, return to the branded sending-domain workflow and use Klaviyo's verification action. Klaviyo's branded-domain troubleshooting guidance covers DNS-record and verification issues.
If verification fails, run a DNS lookup on that hostname and compare the public DNS answer with the generated record one character at a time. Check the selected domain in Klaviyo, the DNS zone, record type, host, target, and any accidental duplicate suffix.
5. Send a real test campaign
Send a new campaign through the exact production configuration to a mailbox where you can view raw message headers. Do not use a message sent before verification.
Record the visible From domain, the return-path domain if present, the DKIM signing domain and selector, and the receiver's authentication result. That message is the evidence for the actual path, not the vendor status indicator alone.
How does this setup affect DMARC?
SPF and DKIM contribute to DMARC only when their authenticated domains align with the visible From domain under the receiving system's DMARC evaluation. A Klaviyo domain can be verified while a particular campaign still needs message-level confirmation of its alignment.
Use the Palisade DMARC checker to inspect the public DMARC policy for the visible From domain before changing enforcement. A public record check cannot prove that a Klaviyo campaign used the expected return path, DKIM selector, or receiver evaluation.
How do I validate the setup?
Check public DNS
Query the exact owners Klaviyo generated through the authoritative DNS service and at least one public resolver. Confirm that the returned record type and value match the Klaviyo account.
dig +short TXT send.yourdomain.com
dig +short CNAME selector1._domainkey.send.yourdomain.com
Replace these illustrative names with the actual owners Klaviyo generated. Public DNS confirms what is published. It does not prove that a campaign uses those records.
Check the Klaviyo status
Return to the selected branded sending domain in Klaviyo and confirm that its verification status is successful. This shows that Klaviyo accepted the current DNS configuration for that domain.
A green vendor indicator is not a delivered-message check. It does not establish that every campaign path has the same authentication outcome.
Inspect a delivered message
Open the raw source of the new test campaign. Look for a DKIM-Signature header and the receiver's Authentication-Results header. Confirm that the receiver reports the expected SPF and DKIM outcome, then compare the authenticated domains with the visible From domain for DMARC alignment.
Save a redacted header copy with the DNS change record. Remove recipient addresses, message content, tracking URLs, and identifiers before sharing it.
Review DMARC reports
After DMARC aggregate reports arrive, review whether Klaviyo traffic passes and aligns for the intended From domain. Keep Klaviyo separate from other sources that send with the same organizational domain.
It analyzes DMARC aggregate-report data, identifies sending sources and alignment issues, and creates prioritized remediation tickets. It can propose a next policy step when evidence supports it, while a human reviews the evidence and applies the DNS change.
Troubleshooting
Klaviyo cannot verify the records
Compare the public answer with the exact generated record set. A missing character, wrong record type, or duplicated DNS suffix can prevent verification. Klaviyo's troubleshooting instructions are the provider-specific reference for this state.
The DNS provider rejects a generated record
Check whether the DNS provider supports the route and record type Klaviyo generated. Do not substitute a different target or convert record types. Return to Klaviyo and select a supported route if the provider cannot host the required records.
SPF passes but DMARC fails
Inspect the receiver's message headers and compare the SPF authenticated domain with the visible From domain. A pass alone does not establish DMARC alignment. Check DKIM alignment as well before changing the DMARC policy.
DKIM is absent or fails in a delivered campaign
Confirm that the campaign was sent after domain verification and that it used the expected From domain. Compare the d= and s= values in the message with the current DNS records. If the test uses a different sending path than production, retest through the production path.
The record looks correct but the domain still fails verification
Check the authoritative DNS response, not only the DNS provider's editor. DNS changes may take time to appear to public resolvers. Avoid repeatedly replacing a record that already matches the Klaviyo-generated value.
Check the DMARC policy after Klaviyo verification
Once Klaviyo verifies the domain and you have a delivered test message, inspect the visible From domain's DMARC record. That check follows from the evidence you just collected because it shows the public policy that receives Klaviyo's aligned authentication results.
A DMARC record check cannot prove that Klaviyo signed a specific message, repair an incorrect DNS record, monitor later sender changes, or guarantee inbox placement. For an ongoing inventory of sending sources and DMARC alignment across domains, Start with Palisade. Palisade analyzes DMARC reports and proposes prioritized remediation work, but a human reviews the evidence and applies policy changes.
Evidence
Sources and further reading
Questions readers ask
Frequently asked questions
Does Klaviyo give me the SPF and DKIM values to publish?
Yes. Start the branded sending-domain workflow in the Klaviyo account that sends the campaigns, then copy its generated DNS records exactly. Do not reuse values from another Klaviyo account or example.
Do I need to add Klaviyo to my existing SPF record?
Only if Klaviyo's generated instructions for your selected setup explicitly require it. Do not publish a separate second SPF TXT record at the same DNS owner because that can make SPF evaluation fail.
Can a verified Klaviyo domain still fail DMARC?
Yes. Klaviyo verification confirms its domain configuration, but DMARC also requires an aligned SPF or DKIM result for the visible From domain. Inspect a newly delivered campaign's headers to confirm the actual result.
Should I use a root domain or a subdomain for Klaviyo?
Yes. Use the domain or subdomain requested in Klaviyo's branded sending-domain workflow and approved by the team that owns your DNS and sender architecture. A dedicated sending subdomain can keep the Klaviyo configuration distinct from other mail paths.
Does a public DNS lookup prove that Klaviyo is signing my campaigns?
No. A public lookup shows the records that resolve in DNS. Send a new campaign and inspect its raw headers to confirm the DKIM signature, SPF result, and DMARC alignment for the production path.

Written by
Johanie DupontBrand & Ecommerce Email
Johanie Dupont works on brand and ecommerce email at Palisade: BIMI and verified marks, sender requirements, and getting marketing mail into the inbox.
More from Johanie →