Cloudflare DKIM setup
 ChatGPT
 Claude
 Gemini
 Perplexity
 Grok
GrokIn brief
Cloudflare DKIM setup starts with sender-generated DNS values, then requires DNS, sender, delivered-message, and DMARC validation for each sending path.

Cloudflare DKIM setup means publishing the exact DKIM DNS record generated by the email sender for one sending domain. Cloudflare is the DNS publishing layer. It does not provide a universal DKIM selector, public key, CNAME target, or sender-verification process. Because current official Cloudflare DNS workflow documentation was not available for this guide, confirm the authenticated DNS controls and your sender's current instructions before you save any change.
At a glance
Quick takeaways
- Obtain the DKIM record from the service that sends the mail, not from another Cloudflare account or tutorial.
- Keep the sender's record type, owner name, and value together as one account-specific instruction set.
- Stop if an active record already uses the same owner name.
- A public DNS result does not prove the sender signed a production message.
- A sender verification status does not replace inspection of a newly delivered message.
- Cloudflare belongs in the DNS-publication part of the broader vendor email authentication workflow.
Scope and prerequisites
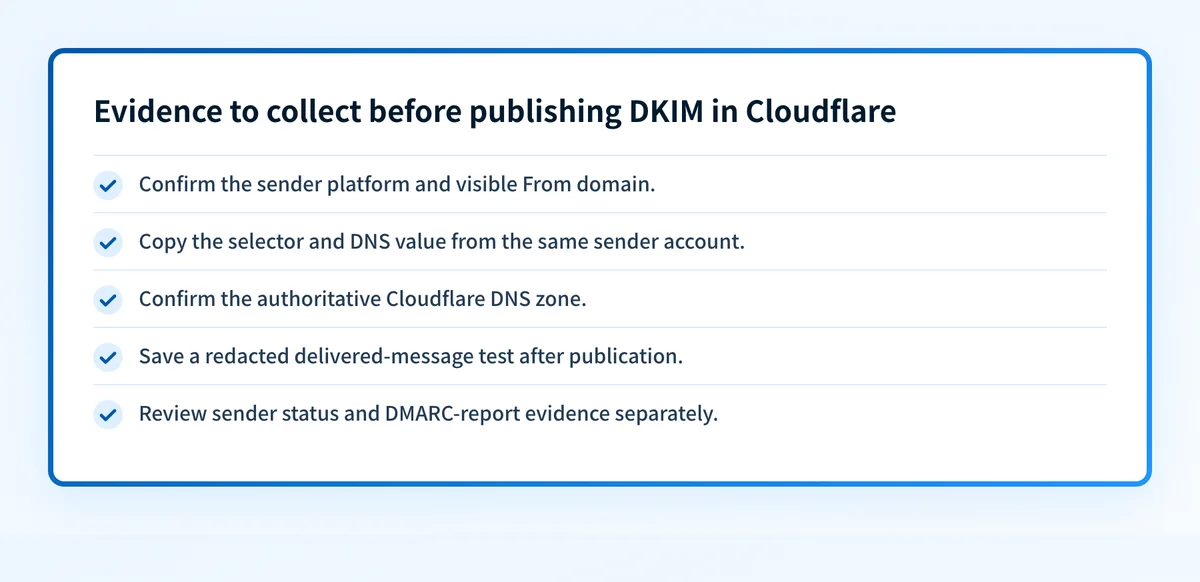
Choose one production sending path before changing DNS. Employee mail, marketing mail, transactional mail, and mail that passes through a security gateway can each have separate DKIM settings. Record the visible From domain, the sender platform, the DNS zone owner, the person authorized to approve DNS changes, and a test mailbox that can show full message headers.
The email sender must provide the record values for the exact domain and account in scope. Those values can include a selector, record owner, record type, public-key value, CNAME target, or verification token. Do not borrow any of them from another account. Public DNS can expose a DKIM public key, but the sender's private signing key must stay in the sending system.
Confirm that the domain's authoritative DNS is actually managed in the Cloudflare account you plan to use. Cloudflare's public site confirms that it has a Login entry point, but that page does not document the current DNS dashboard path, record-entry fields, or DKIM-specific behavior. Verify the current path in Cloudflare's authenticated documentation or in the account that owns the zone.
If the visible From address uses a subdomain, determine whether that subdomain is a separate sending identity before you request records. Does a subdomain need its own DKIM setup? covers that decision in more detail.
Set a rollback condition before opening the DNS editor: if the sender's supplied owner name already has a record that supports active mail, or if you cannot identify the sender and domain that generated the new value, do not replace it. Get the sender's documented rotation or migration procedure first.
Do not overwrite an existing selector, CNAME target, or TXT value because a new sender asks for DKIM. An active record may still be needed to verify mail already in transit or mail from another production path.
_Source: Palisade._
Choose the implementation approach
Use the exact approach the sending service generated for the selected domain. The record shape is sender-specific. Do not convert a sender-provided CNAME instruction into a TXT instruction, and do not invent a value because another sender used a similar selector.
Use these decision rules:
- If the sender gives a complete DNS record set, publish that record set only after confirming it belongs to the selected account and domain.
- If the sender gives more than one record, treat the set as one configuration request. Do not assume one record is optional.
- If the sender asks you to edit an existing record, compare the current DNS answer with the sender's documented migration instructions before making any replacement.
- If the sender also supplies SPF guidance, handle it as a separate review. Do not replace an existing SPF TXT record without understanding how the existing policy and the sender's required authorization fit together.
- If the sender cannot identify the domain it will sign with, pause the DNS change. DNS publication alone cannot answer that question.
_Source: Palisade._
Cloudflare-specific interface labels and record-entry behavior can change. This guide therefore does not prescribe a dashboard menu path, proxy setting, field name, or save control. Use the current authenticated Cloudflare experience and the sender's official domain-authentication instructions as the source of those details.
For a comparable DNS-provider workflow, see how to add a DKIM record in GoDaddy. The record values must still come from your own sender account.
How to configure Cloudflare DKIM
1. Identify the exact sending path
Select one application or sender that produces mail with the domain you are configuring. Confirm the From domain used by that path and the person responsible for the sender account.
Do not group unrelated mail streams into one unverified change. A successful configuration for a marketing sender does not establish that transactional messages, employee mail, or gateway-relayed mail use the same signing identity.
2. Obtain the sender-generated DKIM instructions
Open the domain-authentication or DKIM configuration area in the sender that sends the selected mail. Collect the complete instruction set for the account and domain: record type, owner name, content or target, expected signing domain, and the sender's own verification action.
The sender generates these values. Cloudflare publishes them in the DNS zone. If the sender's instructions conflict with an old ticket, screenshot, or copied record, use the sender's current account-generated values and investigate the discrepancy before publishing.
The following is an illustrative shape only. It is not a Cloudflare record and must not be published.
Illustrative only
Record type: <sender-generated TXT or CNAME>
Owner name: <sender-generated selector or owner under yourdomain.com>
Value: <sender-generated public key, target, or verification value>
Expected signing domain: <sender-generated domain>
Do not publish placeholders or substitute a selector, target, token, or public key from another tenant. Copy the real values only from the sender account that will sign this domain's mail.
3. Open the authoritative Cloudflare DNS zone
Sign in to the Cloudflare account that controls the authoritative zone for the selected domain. Confirm the zone name before creating or editing a record.
The current authenticated navigation path, record form, supported record types, and save behavior were not verified by the available primary source. Confirm those details in current Cloudflare documentation or directly in the authenticated account. If the account does not clearly show that it controls the intended zone, stop and identify the authoritative DNS provider before making a change.
4. Publish the sender's record without altering its meaning
Enter only the sender-generated record type, owner name, and value or target. Check the final owner name that the Cloudflare interface displays before saving, especially if the sender supplied a fully qualified name.
Do not merge separate DKIM records into one value. Do not place another record beside a sender-provided CNAME at the same owner name without confirming that the sender's documentation permits it. If a record already exists at the owner name, compare it with the sender's documented rotation path rather than overwriting it.
Keep the DNS change narrowly scoped. Record the time, the intended owner name, the sender account, and the approver. These details let you match later sender status and message-header evidence to the change you actually made.
5. Use the sender's current verification action
Return to the sending service after the DNS record is visible as expected. Use the verification action and status described by that sender's current documentation or account interface.
Treat the sender's status as sender-specific evidence. It can show what that service sees for its domain configuration. It cannot prove that every production mail path signs with the intended identity or that a recipient accepted a particular message.
How to validate the setup
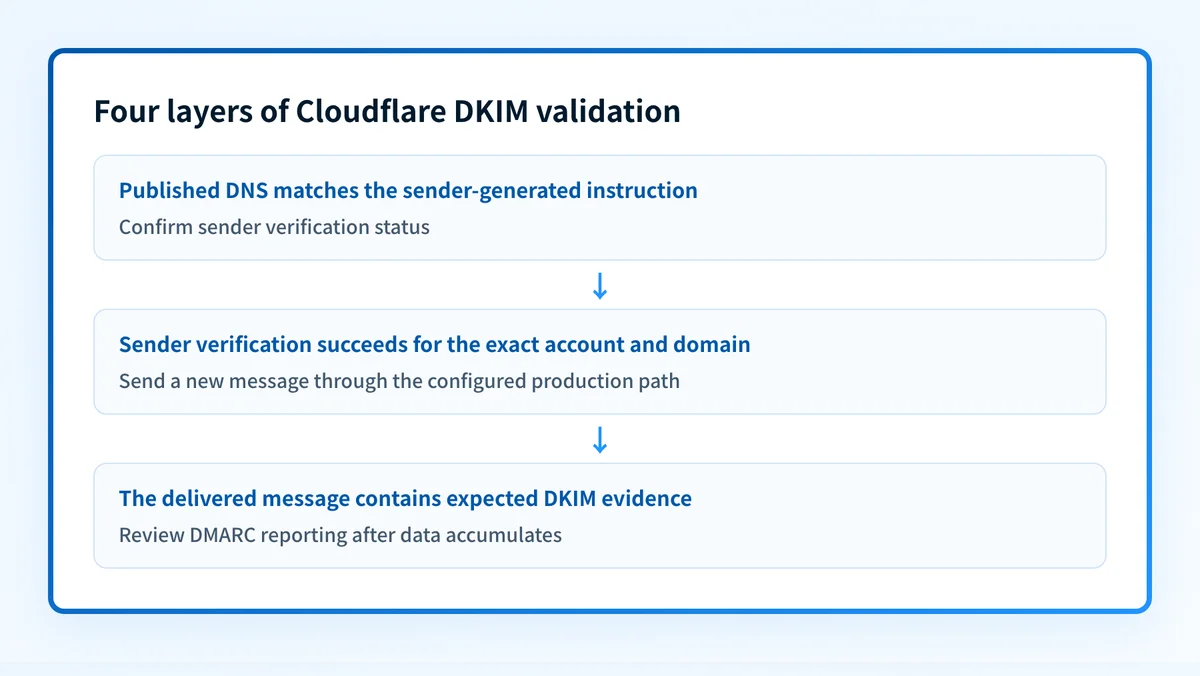
A working Cloudflare DKIM setup needs separate evidence at four layers. Do not mark the change complete from a single green status or public lookup.
- DNS: Inspect the published owner name through the authoritative DNS path and at least one public resolver. Compare the observed record type and value or target with the sender-generated instruction. A public lookup can show only public DNS state.
- Sender: Record the sender's current verification or authentication status for the exact account and domain. This connects the published record to the service that is expected to sign.
- Message: Send a new message through the exact production path. Inspect its complete headers in the receiving mailbox and retain a redacted copy of the authentication evidence. Do not use an older message that predates the DNS change.
- DMARC: After reports accumulate, review the source and authentication results for the configured mail stream. A delivered-message check is evidence for one tested path and time. Reporting helps identify whether additional sources or alignment problems remain.
sending_path: <application or sender>
from_domain: <visible From domain>
dns_owner: <sender-generated owner name>
dns_result: <observed record type and value or target>
sender_status: <sender-reported result>
test_message: <timestamp and redacted header reference>
dmarc_reporting: <observed source and status after reports accumulate>
rollback_status: <unchanged or restored prior configuration>
The DKIM checker can inspect public DKIM DNS after publication. Compare the result with the sender's record instruction, then continue with sender status and a delivered-message test. A DNS lookup cannot prove that the private key is installed, that the intended application signed a production message, that DMARC aligned, or that a receiver will place future mail in the inbox.
A correct DKIM record also does not replace SPF. The two controls evaluate different parts of the sending path. Keep their evidence separate when you review the final message.
Troubleshooting
The sender cannot verify the published record
Start with the sender-generated instruction set and the DNS answer for the exact owner name. Confirm that the selected Cloudflare zone is the authoritative zone and that the record type matches the sender's current instruction.
Then compare the owner name and complete value or target with the sender account. Do not assume that a copied value, a record from a prior domain, or a record from another account is interchangeable.
The DNS result differs from the sender's instruction
Stop before making another change. Confirm whether the Cloudflare interface rendered a different final owner name than intended, whether an existing record is still present, and whether the sender generated a replacement as part of a rotation.
Use the sender's documented migration guidance for any replacement. Avoid deleting a known working record while the cause is unknown.
The sender reports success but the delivered message lacks expected evidence
Send a new message through the exact application and route you configured. Check that the message was not sent by a different platform, alias, or gateway.
Collect the raw headers in redacted form and compare the visible From domain, sending route, and authentication evidence with the sender configuration. Do not conclude that Cloudflare DNS is wrong from sender status alone.
DKIM evidence exists but the DMARC result remains unresolved
Keep the DNS, sender, message, and reporting layers separate. A published record or a sender status does not show how every source using the domain behaves over time.
Review the mail stream in DMARC aggregate reports once data accumulates. For recurring multi-sender or multi-domain work, Palisade autonomously analyzes DMARC aggregate-report data, identifies sending sources and authentication or alignment issues, and creates prioritized remediation tickets. It proposes the next policy step based on evidence, while a human reviews the evidence and applies any policy change.
Inspect the published DKIM record before the message test
Check the exact domain after you publish the sender-generated record, then compare the public result with the sender's account instructions. This catches an incorrect public DNS owner or value before you rely on the sender's status.
The checker inspects public DNS only. It does not repair a record, monitor later DNS drift, prove that a specific sender signed production mail, or guarantee recipient placement. If your team needs to follow the same unresolved sources and alignment issues across domains after reports arrive, Start with Palisade. Palisade analyzes report data and proposes remediation work for human review. It does not autonomously change your DNS or DMARC policy.
Evidence
Sources and further reading
Questions readers ask
Frequently asked questions
Can Cloudflare generate my DKIM record?
No. The sending service that signs the mail must generate the account-specific DKIM record instruction. Cloudflare's role in this setup is publishing the sender-provided DNS record in the authoritative zone.
Can I copy a DKIM selector from another Cloudflare account?
No. A selector, public key, CNAME target, or verification value can be tied to a different sender account or domain. Use only the values generated for the exact sender and domain you are configuring.
Does a public DKIM lookup prove my sender is working?
No. A public lookup can inspect the published DNS record. It cannot prove that the sender has the matching private key, that the application signed a new production message, or that DMARC aligned.
Should I replace an existing DKIM record with a new sender's value?
Not without the sender's documented rotation or migration procedure. An existing selector can support active mail, delayed messages, or another sending path. Compare the sender-generated owner name with the current record before changing anything.
Does Cloudflare DKIM setup also configure SPF?
No. SPF and DKIM are separate sender-authentication controls. Review any SPF instruction separately and do not replace an existing SPF record until its effect on the current policy is understood.

Written by
Samuel ChenardCEO & Co-Founder, Palisade
Samuel Chenard is the CEO and co-founder of Palisade, agentic DMARC software for IT teams and MSPs, from one domain to thousands.
More from Samuel →