Master Guide: Obtaining your blue verified Gmail checkmark


In today's fast-paced digital world, authenticity and credibility are paramount. It's no surprise, then, that since its introduction by Gmail in May 2023, the blue verified checkmark has become a critical asset for brands seeking to build trust. This symbol, tied to BIMI (Brand Indicators for Message Identification), showcases your brand’s legitimacy in email inboxes. Acquiring it, however, involves a detailed process requiring patience and precision.
As business owners ourselves, we know how vital securing and optimizing email deliverability is for success. We've crafted this comprehensive guide to help companies of all technical skill levels navigate the pathway to the checkmark. We'll lead you through these crucial steps:
The process spans email authentication, a compatible brand logo, and the certificate requirements that apply to your logo type. Palisade's AI-first DMARC agent can help with the authentication work. Trademark and certificate work remains with the relevant legal and certificate providers.
Step 1→ Configuring your DNS and Preparing to set up your BIMI record – laying the necessary groundwork.

In this initial stage, we'll lay the groundwork for your verified checkmark by preparing your BIMI (Brand Indicators for Message Identification) records—a technically intensive but essential step. BIMI is an ever-evolving email standard and may change over time. To prepare, you’ll need:
SPF, DKIM, DMARC, and BIMI are interlinked protocols enhancing email communication security and authenticity. SPF and DKIM verify email origins, DMARC builds on these checks, dictating actions when checks fail, while BIMI, relying on DMARC, visually validates your emails with your logo. These protocols not only secure but also visually enhance your emails, building trust with recipients.
DNS Records: What They Are, Why They Matter, and How to Set Them Up
Simply put, DNS (Domain Name System) records are a crucial part of how the internet functions; they serve as the internet’s address book. They help connect your website’s domain name to the appropriate server IP address, making your website accessible to users. For protocols like BIMI, you need to add these DNS records to your domain provider’s management console. These records, particularly TXT records, carry vital information about your domain for external servers. Understanding DNS records and their roles, such as connecting your domain name to its IP address for accurate email routing, is a key part of setting up email authentication protocols like BIMI.
Why Set Up SPF, DKIM, and DMARC for Your Domain?
Setting up SPF, DKIM, and DMARC records for your domain is crucial for improving email deliverability and trustworthiness. These protocols authenticate your email messages, ensuring they come from a legitimate source. This authentication helps prevent your emails from being flagged as spam or rejected by email servers. By implementing SPF, DKIM, and DMARC, you increase the likelihood of your emails reaching the intended recipients’ inboxes.
Understanding Propagation
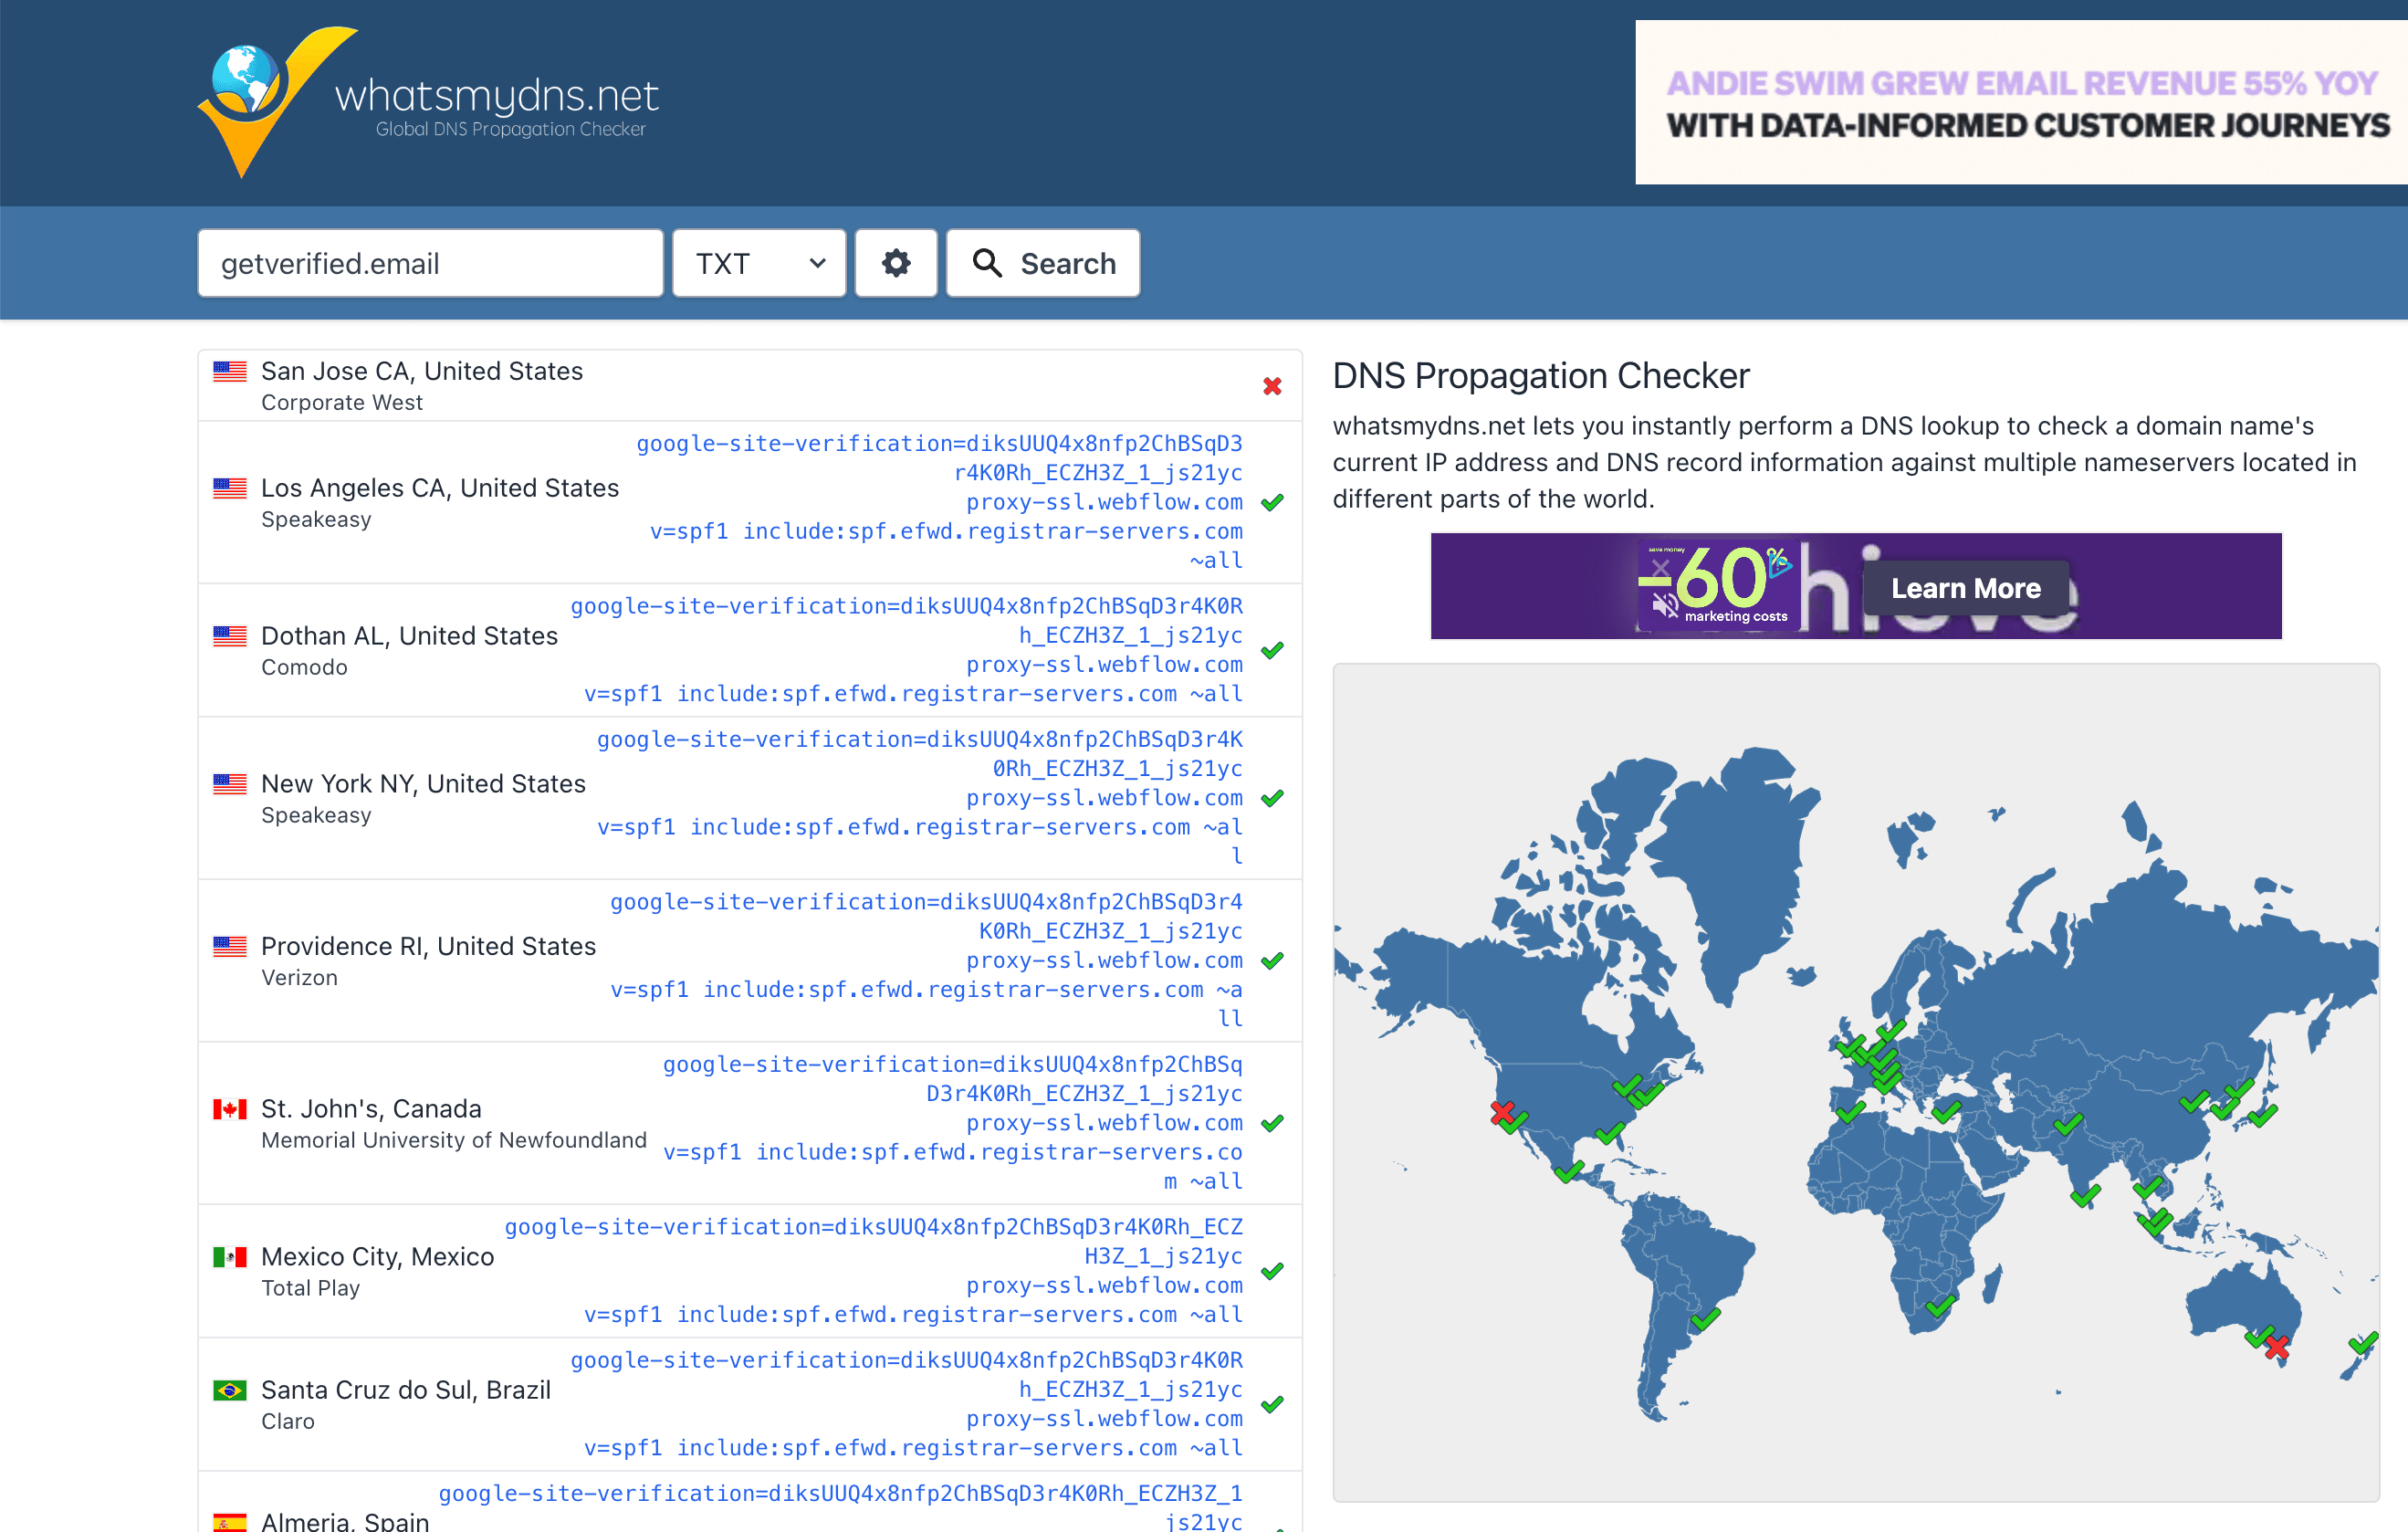 When adding a new DNS record, bear in mind that it can take up to 48 hours for it to fully propagate across all DNS servers globally. If you're encountering verification hiccups during this period, it's likely due to this propagation period. However, remember, propagation isn't the sole source of potential issues.
If you're curious about your DNS propagation status, use a tool like the one linked below. Keep in mind, though, that propagation times can vary, and delays don't necessarily signal a problem with your record itself.
*Don’t forget to select “DNS” in the drop-down next to domain name
Gathering Your DNS Manager Credentials
To set up your DNS records, you will need to access your DNS Manager. There are two common methods depending on your domain host: signing in directly to the domain host's sign-in portal or logging in via your third-party DNS Manager. These steps ensure smooth access to the necessary settings for managing your domain's DNS configuration.
If you have a website developer or an IT person on your team, they might be the ones managing your domain. Don't hesitate to ask them for this information.
Here are some of the most popular domain hosts:
- GoDaddy
- Google Domain
- Bluehost
- NameCheap
- DreamHost
- Cloudflare
- Google Cloud DNS
- Amazon Route 53
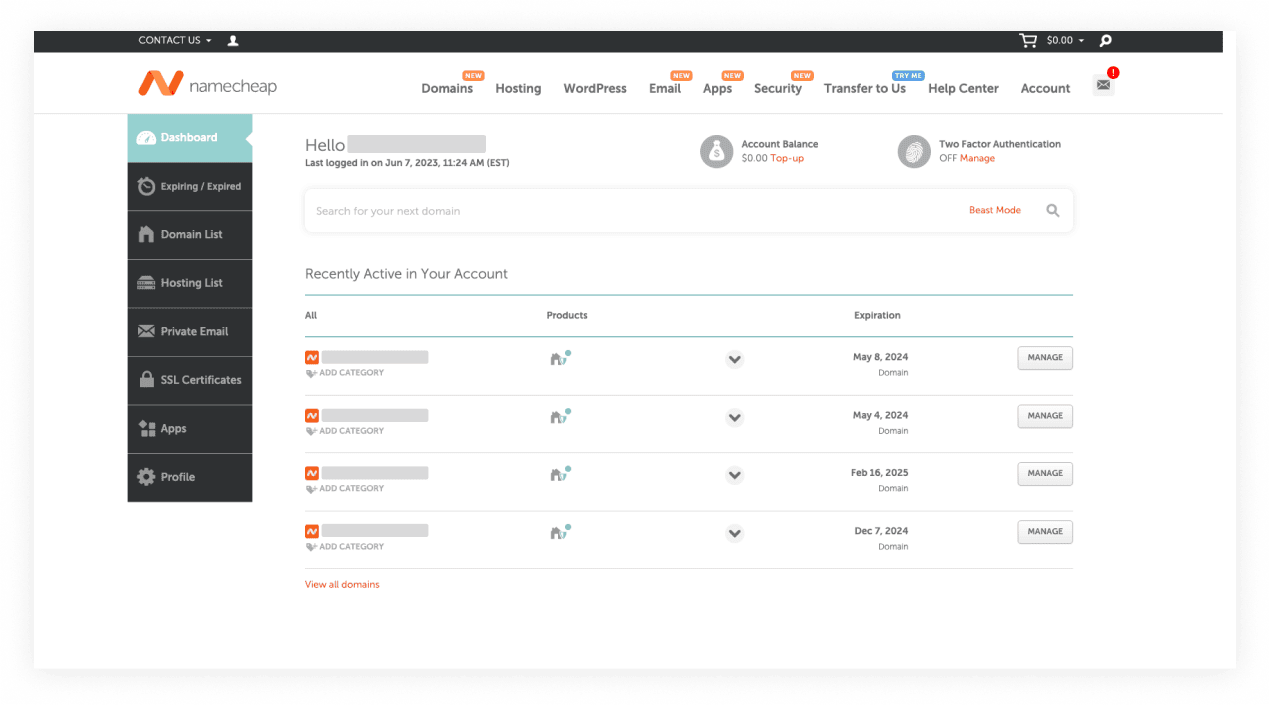
Once you’ve signed in, your domain host provider's dashboard look should similar to this:
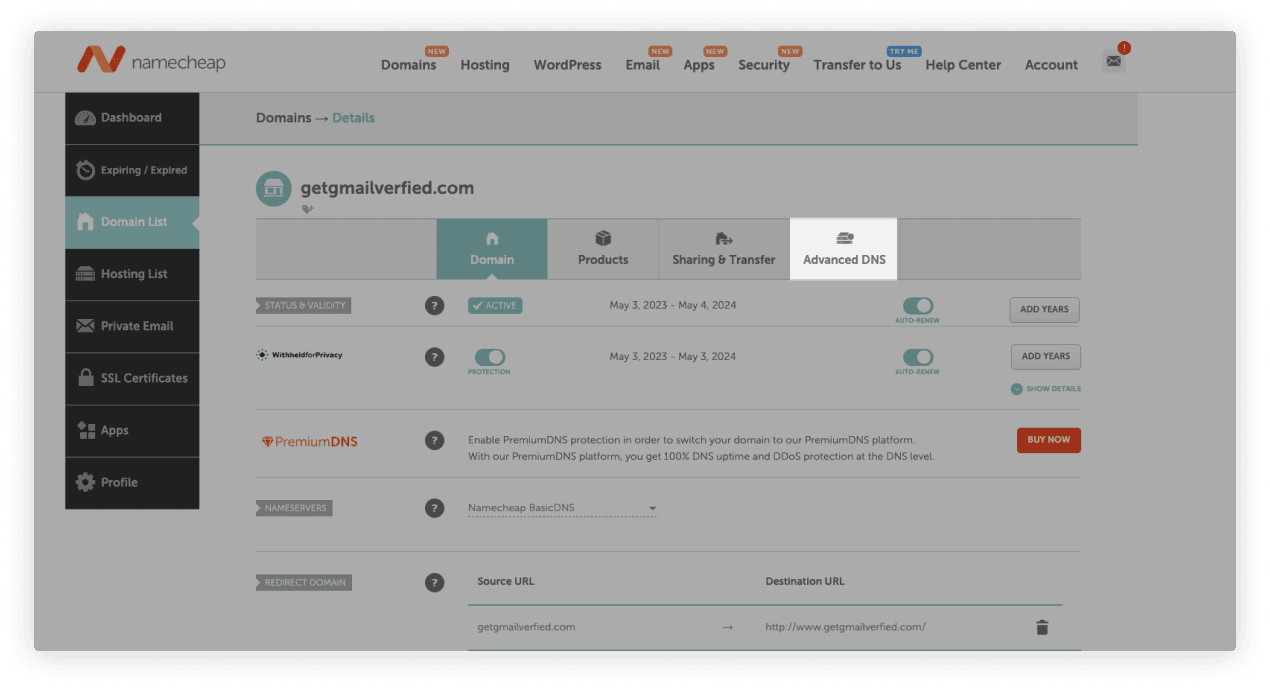
 You can also use your domain hosting provider’s internal Domain Manager to check out your DNS. Many of them have an interface that looks similar to this:
 Third-Party DNS Manager
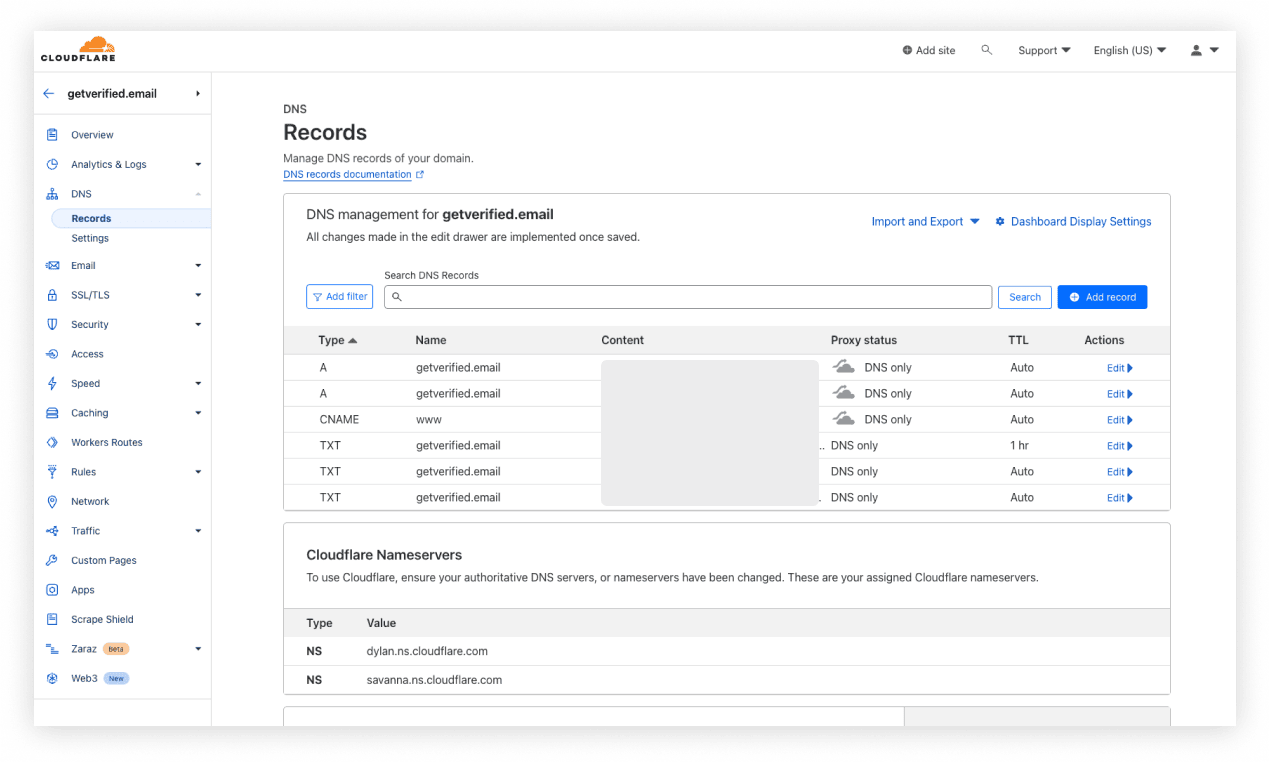
If you are using a free third-party DNS Manager like Cloudflare, which we highly recommend, your DNS interface would look like this.
Setting up your SPF Record
An SPF record is a line of text that specifies which domains or IP addresses are allowed to send emails on behalf of your domain.
Setting up an SPF (Sender Policy Framework) record for your company's domain is like putting a seal of authenticity on your outgoing emails. It helps prevent others from sending emails pretending to be from your domain. Here are the steps it will take to set it up:
1. Identify the Third Party Services your Company is Using
Make a list of all the mail servers that send emails on behalf of your domain. These could include your company's internal mail servers and any external email marketing services.
You may include either the domain name or the IP address of the third party service in the SPF record. Depending on the specific circumstances. Here's how:
2. Domain name: If a third-party provider is sending mail on your behalf and they have an SPF record published for their own domain, you could use the include mechanism followed by their domain name. This will include their SPF record in your own.
An example of this would be v=spf1 include:thirdpartydomain.com -all, where thirdpartydomain.com is the domain of the third-party mail service.
3. IP Address: If you know the specific IP address or range of IP addresses that the third-party provider uses to send mail, you can specify these directly in your SPF record using the ip4 or ip6 mechanisms.
An example of this would be v=spf1 ip4:192.0.2.0/24 -all, where 192.0.2.0/24 is the IP range used by the third-party provider.
4. Create Your SPF Record
Replace the sample IP addresses in the example with your actual ones. Here's an example SPF record for a domain using
Google Workspace for email (Gmail) example:
v=spf1 include:_spf.google.com ~all
Setting Up Your SPF Record
An SPF record is a line of text that specifies which domains or IP addresses are allowed to send emails on behalf of your domain. Setting up an SPF (Sender Policy Framework) record for your company’s domain is like putting a seal of authenticity on your outgoing emails. It helps prevent others from sending emails pretending to be from your domain, protecting against spoofing. Here are the steps it will take to set it up:
1. Identify the Third-Party Services Your Company is Using Make a list of all the mail servers that send emails on behalf of your domain. These could include your company’s internal mail servers and any external email marketing services.
2. Domain Name If a third-party provider is sending mail on your behalf and they have an SPF record published for their own domain, you could use the include mechanism followed by their domain name. This will include their SPF record in your own. An example of this would be v=spf1 include:thirdpartydomain.com -all, where thirdpartydomain.com is the domain of the third-party mail service.
3. IP Address If you know the specific IP address or range of IP addresses that the third-party provider uses to send mail, you can specify these directly in your SPF record using the ip4 or ip6 mechanisms. An example of this would be v=spf1 ip4:192.0.2.0/24 -all, where 192.0.2.0/24 is the IP range used by the third-party provider.
4. Create Your SPF Record Replace the sample IP addresses in the example with your actual ones.
Here’s an example SPF record for a domain using Google Workspace for email (Gmail): v=spf1 include:_spf.google.com ~all
Add include:_spf.domain.com for every third-party tool using your domain for sending emails.
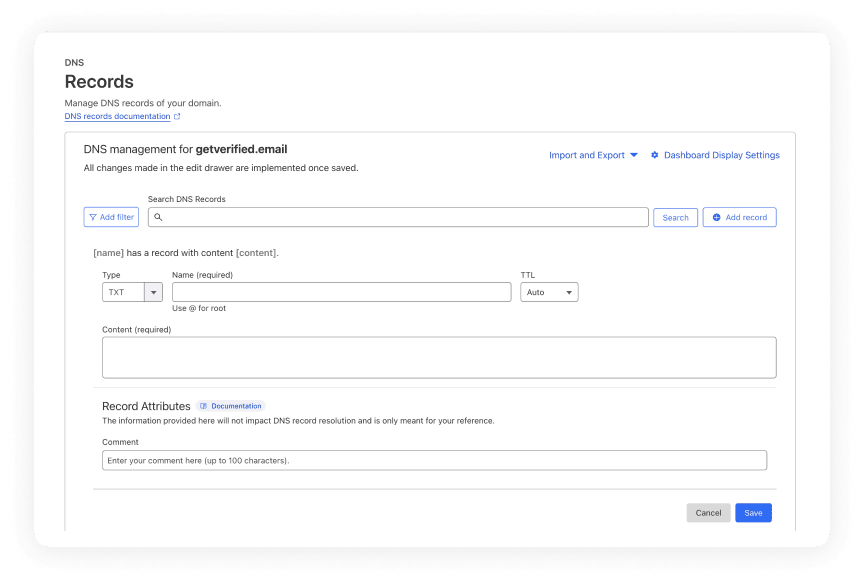
5. Add the SPF Record to Your DNS
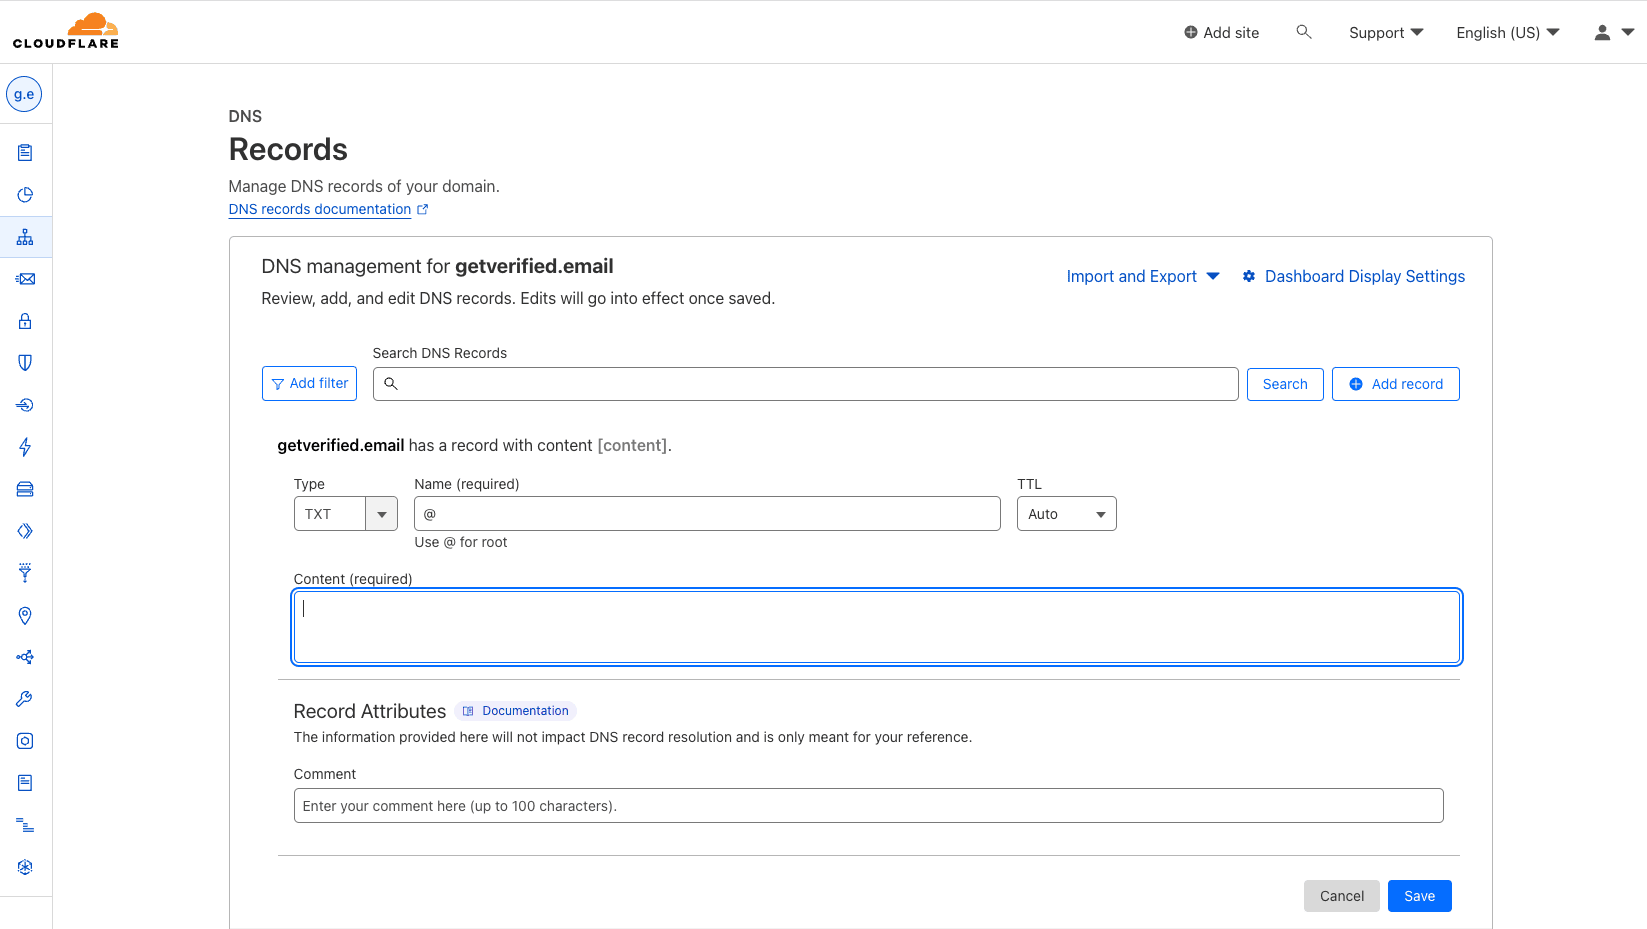 Log in to your DNS management interface and add TXT records for your domain like discussed previously. Don’t forget to add @ for the root domain and set the TTL to Auto or, alternatively, use 8 hours if you don’t intend on updating your SPF record often.
**6. Test Your SPF Record **After the new record propagates (which may take up to 48 hours), use an online SPF record checker to verify if it’s set up correctly. You can use Palisade's SPF Checker.
Setting up your DKIM DNS record
DKIM (DomainKeys Identified Mail) is a method to verify that the emails you send are genuine and haven't been changed along the way. It works by adding a special digital signature to your email.
Here’s how to set it up:
1. Generate a DKIM Key
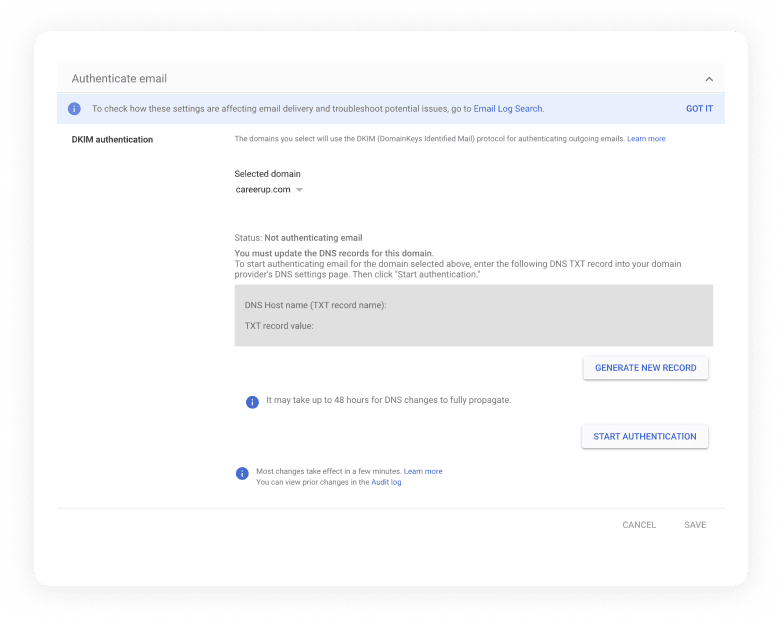
You need to create a special key pair. If you use services like Google Workspace for using Gmail with your work email for example, they will provide you with a part of the key called the public key. They will keep the other part, called the private key, secure to sign your outgoing emails.
Example using the Google Workspace Authentication Generator:
 2. Add the DKIM record to your DNS
The host for the DKIM record will usually look something like selector._domainkey, where selector is a name you choose (it could be anything like "mail", "google", etc.). The value will be the DKIM value provided by the third party.
Adding a new TXT record to your DNS settings. Use the following example for each value:
The DNS Record creator should look similar to this Cloudflare example:
 Test your DKIM
After the DKIM record propagates, you can use an Palisade' DKIM record checker to verify that it's set up correctly. Just enter your domain and the selector you used, and it should return your DKIM record. Your DKIM setup depends on the sending provider. Palisade's AI-first DMARC agent can identify failing sources and help work through alignment, but you must use the selector and DNS value generated for your own provider account.
Setup DMARC for your Domain
DMARC (Domain-based Message Authentication, Reporting, and Conformance) is an email protocol that uses SPF and DKIM to check if an email is legitimately from the domain it says it’s from.
Specifically: It tells the receiving email server what to do if the checks fail (like sending a report, quarantining the email, or rejecting the email), and can stop fraudulent emails before they even get to the recipient, protecting against spoofing.
Typically, each service will provide you with a single DMARC record to input into your DNS Manager. Let’s say you use Mailjet for marketing emails, Google Apps (Gmail) for user emails, and Hubspot CRM for transactional emails. In this case, each of these services requires its own DMARC TXT record in your DNS manager. This ensures that the DMARC policies are correctly applied and enforced for each specific email service you utilize.
Note that you’ll first need SPF and/or DKIM deployed for a minimum of 48 hours (Propagation!) before you can set up DMARC.
Special Requirements for your DMARC policy settings for BIMI
To enable BIMI, your DMARC policy must meet certain requirements.
- The policy option (p) must be set to either quarantine or reject. BIMI does not support DMARC policies with the p option set to none.
- Additionally, the percent option (pct) must be set to 100 to apply the DMARC policy to all outgoing mail from your domain.
1. Create a DMARC policy
Your DMARC policy is a DNS record that tells receiving mail servers how to handle emails from your domain if they fail SPF or DKIM checks. Here's a simple example of a DMARC policy:
In this case, v=DMARC1 specifies the version of DMARC. The p=quarantine tells the mail server to moves suspicious emails into a different folder, like your recipient’s spam folder, instead of the inbox.
rua=mailto:postmaster@example.com specifies that aggregate reports should be emailed to postmaster@example.com.
If you would like to reject suspicious emails outright, you would change p=quarantine to p=reject. However, we recommend using caution when using p=reject as you would need to be absolutely sure to whitelist all of your email sending services.
To be compliant for BIMI, your DMARC record cannot use the p=none policy.
2. Add the DMARC record to your DNS
Add a new TXT record to your DNS settings. The host for the DMARC record will be _dmarc. The value will be the DMARC policy you just created. So, your DNS entry might look like this:
Type: TXTHost: _dmarcValue: v=DMARC1; p=quarantine; rua=mailto:postmaster@getverified.emaiTTL: 3600 (or your provider's default)
Hit save, then your DMARC record should show up in your DNS record. This can take up to 24 hours to update.
3. Test your DMARC record
After the DMARC record propagates, you can use Palisade's DMARC checker to verify that it's set up correctly. Just enter your domain and it should return your DMARC record.
Remember to monitor your DMARC reports regularly, as they will provide valuable insight into whether any malicious entities are attempting to send emails on behalf of your domain.
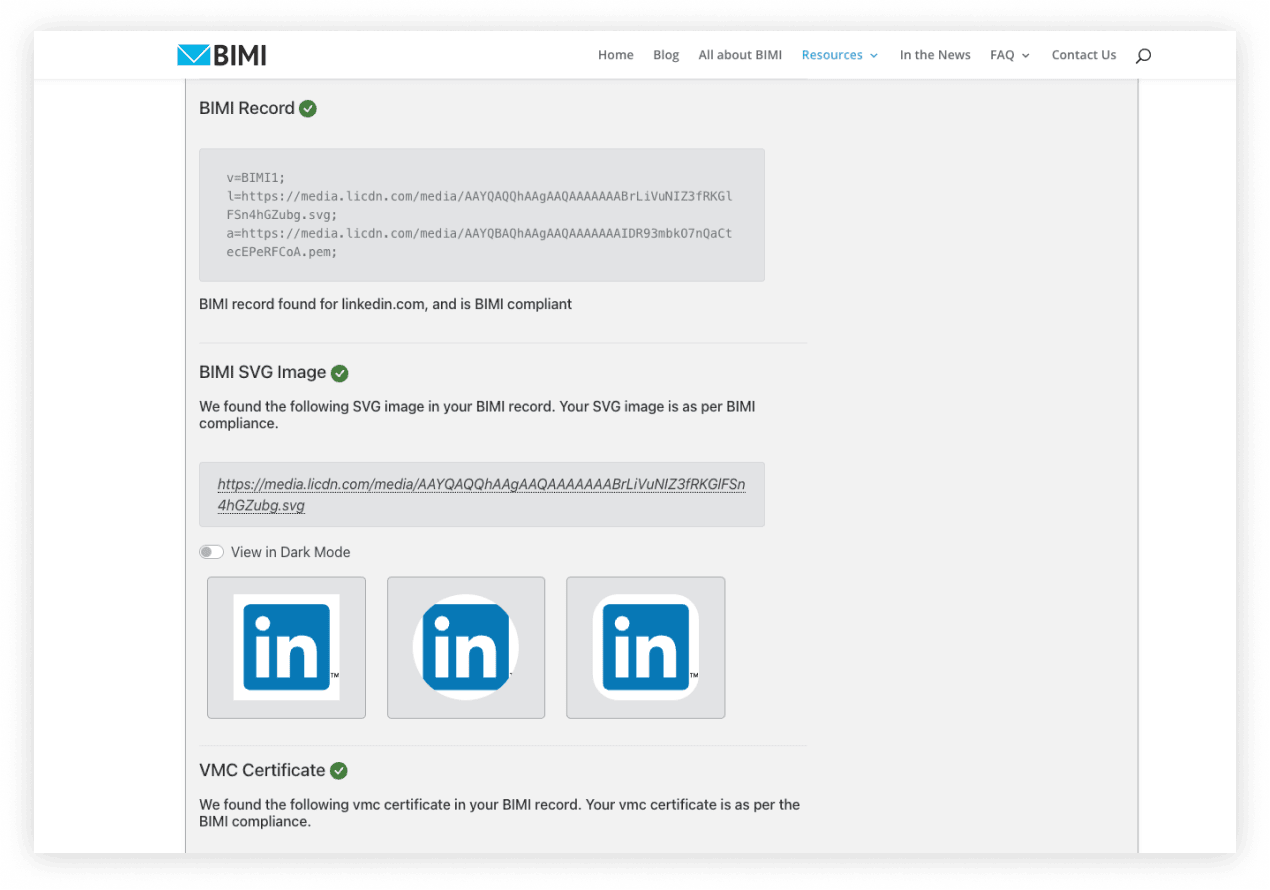
Checking for an existing BIMI record
You can check if your domain has an existing BIMI record by using Palisade's BIMI checker. This tool checks for the BIMI record and the BIMI image SVG file associated with your domain and will generate a report with the results of the checks.
 If authentication is the blocker, Palisade's AI-first DMARC agent can help you work through SPF, DKIM, and DMARC before you return to the BIMI requirements.
Step 2 → Logo - SVG & Trademark
The second step for obtaining your verified blue Gmail checkmark will consist of you uploading your company logo in a specific SVG format on your public server and securing a trademark for your logo.
The process of creating a BIMI-compliant SVG logo includes multiple technical and design steps that might require the assistance of a specialist.
Obtaining a trademark includes researching existing trademarks to ensure that your logo is unique, filing a trademark application with the appropriate government agency, and waiting for the trademark to be approved.
Latest news: The BIMI standard currently requires a registered trademark for your logo to be eligible for a Verified Mark Certificate (VMC). However, the standard is being expanded to include logos that are not trademarked.
Here’s a breakdown of the different steps:
Step 1 - Obtaining & Configuring Your Company's Logo SVG
- Understand what an SVG is
- Determining if your company logo is already in SVG format
- Converting your logo to an SVG format
- Creating a BIMI-compliant SVG logo
Step 2 - Trademarking Your Logo
- Understanding what a logo trademark is
- Applying for a logo trademark
- Understanding the timeline for trademark registration
- Work with a reputable company to get your logo trademarked
Obtaining & Configuring Your Company's Logo SVG
Understanding what an SVG is
SVG stands for Scalable Vector Graphics. Imagine a picture you can zoom in on indefinitely without it ever getting blurry, and that's essentially what an SVG is.
This means no matter how much you increase the size of an SVG, it will always look sharp and clear because it stores the image via mathematical formulas and does not stretch pixels.
Here are some of the most popular software programs for creating SVG graphics:
- Adobe Illustrator
- Figma
- Sketch
- Inkscape
Determining if your company logo is already in SVG format
To find out if your company logo is already in SVG format, start by checking where your digital assets are stored. This could be on your company server, a cloud storage platform, or even an email thread from when the logo was first created. The SVG file will end with the extension ".svg" in the filename.
If you're unsure, you can also ask your design team, the design agency or freelancer who originally created your logo, or the person responsible for your company's branding. Any of these sources may still have the original design files and can provide you with the SVG if it was created. It's important to maintain an SVG version of your logo, as it provides flexibility and scalability for different digital applications.
BIMI SVG file requirements and recommendations
To ensure that your logo is verified and can be displayed properly at various resolutions, it must meet BIMI's brand logo requirements. This ensures that your logo passes security checks and can be displayed accurately.
In order to be properly displayed in the recipient's inbox, your SVG file must adhere to certain specifications.
- It must be in SVG Tiny Portable/Secure (SVG Tiny PS) format- baseProfile attribute of tiny-ps- version attribute of 1.2
- The
element should reflect your organization's name</li> <li>The logo should not include external links or references, scripts, animations, or interactive elements.</li> <li>The <svg> root element should not include x= or y= attributes.</li> <li>To ensure compatibility with email clients that support BIMI, the logo should be centered in a square on a solid color background, have a small file size of no larger than 32 KB, and include a <desc> element for accessibility.</li> </ul> <h2 id="creating-your-brand-logo-svg-file">Creating your Brand Logo SVG file</h2> <img src="/images/cms/64d2d76e1c7443da13c0402a_649c7eb0cb6b77009f88ceee_getting-your-logo-in-svg-format.png" alt="" loading="lazy" decoding="async" /> <h3 id="converting-your-logo-to-an-svg-format">Converting your logo to an SVG format</h3> <p>If your company logo isn't already in SVG format, you'll need to convert it. This process should ideally be carried out by a professional graphic designer to ensure the quality and accuracy of your logo are maintained.</p> <p>If you're unsure how to proceed, <a href="https://www.palisade.email/contact-us">get in touch with our team</a> so we can help!</p> <p>It is possible to find online tools that claim to automatically convert JPG files to SVG format. However, we strongly advise against using these tools, as the results are usually poor and inaccurate. Here’s an example of a logo that has been automatically converted: <img src="/images/cms/64d2d76e3918948ea8bc764f_649c7ec6925a6e93249a9c07_jpg-to-svg-converter-example.png" alt="" loading="lazy" decoding="async" /> <strong>Tips for better results:</strong></p> <ul><li>Optimal image presentation is achieved with a square aspect ratio (1:1).</li> <li>It's recommended that the image be positioned in the center to ensure ideal visibility in various shapes such as a square, a rounded square, or a circle.</li> <li>Using non-transparent backgrounds is advisable due to the inconsistent and unpredictable display outcomes with transparent backgrounds.</li> </ul> Your logo will display in different sizes and formats, so it’s important to consider that when designing your logo: <img src="/images/cms/64d2d76e3918948ea8bc7648_649c7ed13230615831ec31c1_different-ways-your-logo-can-display-2.png" alt="" loading="lazy" decoding="async" /> Make sure your logo is 80px by 80px and that it has padding around it. This ensures that any cropping in different shapes doesn’t affect the design: <img src="/images/cms/64d2d76e3918948ea8bc763d_649c7edc050a996013aa7b99_size-and-padding-on-your-logo-svg-1.png" alt="" loading="lazy" decoding="async" /> Currently, there are no tools available that can create an SVG format file suitable for BIMI that meets all the requirements. Typically, SVG files for BIMI need to be modified manually using a text editor or a special-purpose script. <p>Here is a useful tool provided by the BIMI organization to help you convert your SVG 1.2 to the SVG P/S format:</p> <p><a href="https://bimigroup.org/svg-conversion-tools-released/" target="_blank" rel="noopener noreferrer">https://bimigroup.org/svg-conversion-tools-released/</a></p> <p>To obtain a Verified Checkmark, you must have a company logo in a BIMI-compliant SVG format and a trademark for your logo. The logo must be based on the Scalable Vector Graphic (SVG) Tiny 1.2 format specified by the W3C, with fewer allowed elements, and in "SVG Tiny Portable/Secure" (SVG P/S) format supported by BIMI.</p> <h3 id="heres-a-step-by-step-guide-on-how-to-create-your-svg-file-using-adobe-illustrato">Here’s a step-by-step guide on how to create your SVG file using Adobe Illustrator</h3> <img src="/images/cms/64d2d76e3918948ea8bc7639_649c7ee6a8baca4c35000c3d_using-adobe-illustrator-to-vectorize-your-logo.png" alt="" loading="lazy" decoding="async" /> <strong>1.</strong> Launch Adobe Illustrator and open your original vector image. <p><strong>2.</strong> Ensure that your vector image doesn't contain bitmaps, external file links, text, or grouped objects. If you have text to preserve as a shape, use the 'Create outlines' option in Illustrator.</p> <p><strong>3.</strong> Click on 'File' and choose 'Save As…'.</p> <p><strong>4.</strong> In the 'Save As' dialog:</p> <ul><li>Type the desired filename in the 'Save As' field. Stick to lowercase letters and hyphens, for instance: mybusiness-bimi.svg. Avoid using special characters.</li> <li>In the 'Format' drop down menu, choose 'SVG (svg)'. Do not select 'SVG Compressed (svgz)'.</li> <li>Hit the 'Save' button</li> </ul><img src="/images/cms/64d2d76e1c7443da13c04032_649c7ef7b1e737f991f9ae28_saving-to-svg-in-adobe-illustrator.png" alt="" loading="lazy" decoding="async" /> <strong>5.</strong> In the resulting 'SVG Options' dialog: <ul><li>In the 'SVG Profiles' dropdown, choose 'SVG Tiny 1.2'.</li> <li>In 'Image Location', opt for 'Preserve'.</li> </ul><img src="/images/cms/64d2d76e3918948ea8bc7641_649c7f005012cbccffe2c210_choosing-the-right-svg-format-in-adobe-illustrator.png" alt="" loading="lazy" decoding="async" /> <strong>6.</strong> Click 'OK' to finalize saving the file. <p><strong>7.</strong> Open the file in a text editor like Text Edit on MacOS. You will be editing the first part of the file, which should look like this:</p> <p><strong>8.</strong> Change these items the text file:</p> <ul><li>svg version value is 1.2. If it’s not, change it to 1.2.- base Profile value to tiny-ps.- x and y attributes and values.</li> <li>Add a <title> tag and value as shown in the example in Step 7. The title must come after <svg and before <g>.</li> </ul> <strong>9.</strong> Once you’re done, verify that the first part of the file appears similar to this: <p><strong>10</strong>. Save your changes to the text file. The file extension must be .svg.</p> <p>Next, upload the SVG file to your domain’s public web server.</p> <p><strong>Uploading the SVG file to your public web server</strong></p> <p>Once your SVG file is ready, the next step is to upload it to your public web server. The exact process may vary depending on your web hosting service, but generally, you would use an FTP (File Transfer Protocol) client or your hosting service's file manager.</p> <p>In the FTP client or file manager, navigate to the root directory or the desired location where you want to store the SVG file.</p> <p>Next, locate the SVG file on your local machine and select 'Upload' to transfer it to the server. Make sure the file permissions are set correctly so that it's publicly accessible.</p> <p>Lastly, verify that the file can be viewed in a web browser by typing the file's URL directly into the browser's address bar. If everything is set up correctly, your SVG logo should now be visible and ready for use on the internet.</p> <p>The web server must be in the same domain as your outgoing email server. You can do this by adhering to the instructions provided in the <a href="https://support.google.com/a/answer/10911321" target="_blank" rel="noopener noreferrer">Add a BIMI TXT record</a> section, specifically designed for your domain provider.</p> <p>Your web server should share the same domain as your outgoing email server. This is the specific domain where you will activate BIMI once all the steps have been completed.</p> <p></p> <h3 id="somewhat-challenging">Somewhat challenging?</h3> <p>Setting up DMARC and managing email authentication protocols like SPF and DKIM can be technically complex. If you find yourself in need of assistance with these steps, we're here to help. Our experienced team can provide you with the guidance and support you need to properly configure DMARC, SPF, and DKIM for your domain.</p> <p>Whether you have questions, need clarification, or require hands-on assistance, don't hesitate to reach out to us. <a href="https://www.palisade.email/contact-us">Get in touch with our team</a>, and we'll ensure you receive the right pointers to help you establish a robust email authentication setup and get your SVG logo done right.</p> <h2 id="step-2---trademarking-your-logo">Step 2 - Trademarking Your Logo</h2> <img src="/images/cms/64d2d76f1c7443da13c0403a_649c7f0e797dfd6122860e99_trademarking-your-logo.png" alt="" loading="lazy" decoding="async" /> Securing a Verified Mark Certificate (VMC) is crucial. A VMC is a digital certificate given by a certificate authority, serving as proof of your logo's ownership. To qualify for a VMC, your logo must already be a registered trademark. <p><strong>Latest news: Google has announced changes are underway as the standard is set to broaden its scope to accommodate logos that lack trademark registration.</strong></p> <h3 id="understanding-what-a-logo-trademark-is">Understanding what a Logo Trademark is</h3> <p>A logo trademark is a legally recognized and protected design or symbol that distinguishes a company's products or services from those of other entities. It serves as a unique identifier of the company's brand, enhancing its recognizability and establishing trust with customers.</p> <p>Once a logo is trademarked, it means the company has exclusive rights to use it in relation to its goods or services. Any unauthorized use by other parties can be legally challenged, preventing potential confusion in the marketplace. This protection typically extends to similar logos that could potentially be mistaken for the trademarked logo, depending on the laws of the specific jurisdiction. Trademarking a logo is a critical step in safeguarding a company's brand identity.</p> <p>Logo trademarks are enforceable per country of registration. Protection is not automatically worldwide. You need to register in multiple countries to have multiple protections.</p> <h3 id="before-applying-for-your-logo-trademark">Before applying for your Logo Trademark</h3> <p>Before applying for a VMC, verify that your logo is a registered trademark on the World Intellectual Property Organization’s (WIPO) <a href="https://www.wipo.int/branddb/en/" target="_blank" rel="noopener noreferrer"><strong>Global Brand Database</strong></a>, which provides information on active registered trademarks.</p> <h3 id="how-to-apply-for-your-logo-trademark-for-your-vmc-certificate">How to Apply <strong>for your Logo Trademark for your VMC Certificate</strong></h3> <p><strong>1. Conduct a Trademark Search:</strong> As a company with a logo and SVG file ready, your first step is to conduct a thorough trademark search. This ensures that your logo does not infringe upon any existing trademarks. Online resources such as the<a href="https://www.uspto.gov/trademarks/search" target="_blank" rel="noopener noreferrer"> United States Patent and Trademark Office's (USPTO) Trademark Electronic Search System (TESS)</a> can be used to start your search.</p> <p><strong>2. Prepare and Submit Your Application:</strong> Following the verification of your logo's uniqueness, compile all the necessary information about your logo and the goods or services it represents. You can typically submit your application online via the trademark office's website of your country.</p> <p><em>*It is important to verify if your country is recognized by the major VMC issuers. Please contact </em><a href="https://www.digicert.com/tls-ssl/verified-mark-certificates" target="_blank" rel="noopener noreferrer"><em>Digicert</em></a><em> or </em><a href="https://www.entrust.com/digital-security/certificate-solutions/products/digital-certificates/verified-mark-certificates" target="_blank" rel="noopener noreferrer"><em>Entrust</em></a><em> to make sure you are registering your logo in the right country.</em></p> <p><strong>3. Cost and Turnaround Time:</strong> Costs of logo trademark application vary depending on the country. In the U.S., it usually ranges from $225 to $400 per class of goods or services. In the UK, it's approximately £200, while in Australia, it's about $250 AUD. Keep in mind that your business might span multiple classes, which will necessitate separate fees for each. The turnaround time also varies, usually ranging from several months to more than a year, based on factors such as logo complexity, objections, and more.</p> <p><strong>4. Respond to Correspondences:</strong> If the trademark office contacts you regarding your application, make sure to respond promptly to prevent your application from being abandoned.</p> <p><strong>5. Trademark Approval and Maintenance:</strong> Upon approval, you'll receive a certificate of registration. To maintain your trademark rights, you need to continuously use your logo in commerce and file the required maintenance documents as dictated by your country's trademark office.</p> <p><strong>6. Apply for a VMC:</strong> With a registered logo trademark, you're now eligible to apply for a Verified Mark Certificate (VMC). This digital certificate, issued by a certificate authority, verifies your legal ownership of the logo.</p> <h3 id="timeline-for-a-logo-trademark-application">Timeline for a Logo Trademark Application</h3> <p>The duration it takes to complete a logo registration can vary greatly from one country to another, primarily due to the unique processes, rules, and resources of the respective trademark offices. For instance, in the United States, the process can take anywhere from 8 to 10 months, given no oppositions or queries are raised. The United Kingdom's Intellectual Property Office typically completes the process within 4 months if no objections are raised. In Australia, the trademark registration process generally takes approximately 7.5 months.</p> <p>However, in India, the process could stretch up to 18-24 months due to the volume of applications and the multi-step process. In the European Union, trademark registration with the EUIPO can take about 5-6 months if there are no objections. Please remember these are approximate durations and actual times may vary depending on a variety of factors including the complexity of your logo, the efficiency of the trademark office, and any objections that might be raised. Always check with your local trademark office for the most accurate information.</p> <h3 id="cost-of-obtaining-your-logo-trademark">Cost of Obtaining Your Logo Trademark</h3> <p>Below is a table that illustrates the cost of obtaining a logo trademark in several major countries around the world. The costs are provided in their respective local currencies:</p> <p>These figures are based on basic filing fees and can vary depending on a range of factors, such as the number of classes under which you want to register your logo and the specifics of your application. Please check with your local trademark office or a legal professional for the most accurate and current information.</p> <h3 id="seems-like-a-lot-to-do-on-your-own"><strong>Seems like a lot to do on your own?</strong></h3> <p>Palisade does not register trademarks. Use qualified legal counsel for trademark work. After that, Palisade can help verify the email-authentication and DNS requirements that support <a href="https://palisade.email/learning/what-is-bimi">BIMI</a>.</p> <h2 id="step-3-obtaining-your-verified-mark-certificate-vmc">Step 3→ Obtaining your Verified Mark Certificate (VMC)</h2> <img src="/images/cms/64d2d76e078eb7a1e83d5bc8_649c8a4b635380642bb8949c_pali-bimi-cellphone.png" alt="" loading="lazy" decoding="async" /> The third step of obtaining your blue verified Gmail checkmark is to apply for a Verified Mark Certificate. To be able to do that, you need to have Step 2 completed. <h2 id="what-will-be-covered-in-step-3">What will be covered in Step 3?</h2> <ul><li>What is a Verified Mark Certificate (VMC)?</li> <li>Applying for a VMC</li> <li>Understanding the Costs and Timelines for VMC</li> <li>Future of VMC: Including Non-Trademarked Logos</li> <li>Frequently Asked Questions about the VMC</li> </ul> <h2 id="what-is-a-verified-mark-certificate-vmc">What is a Verified Mark Certificate (VMC)?</h2> <p>In the digital era, establishing brand identity and ensuring the legitimacy of communication channels have become pivotal for businesses. One tool that assists in these goals is the Verified Mark Certificate (VMC). This comprehensive guide provides an overview of VMC, its importance in email marketing, the steps to obtain one, and future updates on VMC eligibility. Obtaining your VMC is the holy grail to get finally getting your BIMI record.</p> <p>A Verified Mark Certificate (VMC) is a digital certificate that verifies the ownership of a logo. Issued by a Certificate Authority, it validates that the organization is the legal owner of the brand logo.</p> <h2 id="applying-for-a-vmc">Applying for a VMC</h2> <p><strong>1. Select a Certified Authority (CA):</strong></p> <p>Verified Mark Certificates (VMC) can be obtained from recognized Certificate Authorities (CA). This certificate is a key that unlocks the ability to display your logo on verified emails and showcases the verified checkmark in email clients that support this feature, such as Gmail.</p> <p>If you need help deciding which Certificate Authorities to work with, complete our short form <a href="https://www.palisade.email/contact-us">here</a> and our team will help you figure out which CA is the best fit for your company.</p> <p><strong>2. Establish DMARC Enforcement (Explained in Step 1):</strong></p> <p>Before your logo can be displayed, email clients need assurance that your organization is adhering to <a href="https://palisade.email/learning/what-is-dmarc">Domain-based Message Authentication, Reporting, and Conformance (DMARC)</a> standards. These standards help curb <a href="https://palisade.email/learning/what-is-phishing">phishing</a> and <a href="https://palisade.email/learning/what-is-spoofing">spoofing</a> attacks, providing your organization with more control over its email communications.</p> <p><strong>3. Upload Your Trademarked and Validated Logo:</strong></p> <p>After demonstrating compliance with DMARC, you're eligible to upload your validated and trademarked logo for display within supporting email clients. If your company uses multiple logos, you can specify which one should appear for each type of communication.</p> <p><strong>4. Decide on Logo Hosting:</strong></p> <p>You have the option to either self-host your logo or have the chosen CA manage the hosting for you. Consider your organization's resources and technical capabilities when making this decision. Either way, your logo needs to be easily accessible and retrievable by email clients for the BIMI standard to work effectively.</p> <h2 id="understanding-the-costs-and-timelines-for-vmc">Understanding the Costs and Timelines for VMC</h2> <p>The process of obtaining a VMC involves both financial and time investments, which can vary depending on the Certificate Authority (CA) you choose and the country in which your organization operates.</p> <ul><li><strong>Costs:</strong> The price of a VMC is set by the CA you choose. As of 2023, costs can range from several hundred to over a thousand dollars annually. It's important to consult directly with your chosen CA for accurate pricing details. Remember, this is an annual cost that you will need to budget for if you plan on continuing to use BIMI and VMC.</li> <li><strong>Timelines:</strong> The time it takes to process a VMC application can also vary. Generally, you should expect the process to take between a few days to several weeks. This timeline depends on multiple factors, including the efficiency of your chosen CA, the complexity of verifying your trademark, and the completeness of the information and documents you provide.</li> <li><strong>Renewal:</strong> VMCs are not perpetual and will need to be renewed periodically. The renewal process is similar to the initial application, although it may be quicker because your information and trademark are already on file with the CA. Be sure to keep track of your VMC's expiration date to avoid any interruption in your logo display.</li> </ul> Understanding these costs and timelines will help you plan and budget for your VMC application effectively. It's recommended to start this process well in advance of when you want your logo to start appearing in your outbound emails. <p> <img src="/images/cms/64d2d76f1c7443da13c0404a_649c8186cfc40c66070f4321_vmc-certificate.png" alt="" loading="lazy" decoding="async" /> <strong>Future of VMC: Including Non-Trademarked Logos</strong></p> <p>The Verified Mark Certificate (VMC) landscape is evolving, and one significant anticipated change is the inclusion of non-trademarked logos. Currently, a VMC requires a registered trademark for your logo, validating your organization as the legal owner. This approach strengthens email security and trust, as it makes logo <a href="https://palisade.email/learning/what-is-spoofing">spoofing</a> more difficult for malicious entities.</p> <p>However, this stipulation may change in the future. The BIMI Group, the entity responsible for developing and maintaining <a href="https://palisade.email/learning/what-is-bimi">BIMI (Brand Indicators for Message Identification)</a> standards, is considering expanding the eligibility criteria to include logos that are not trademarked. This change will make the VMC and its associated benefits accessible to a wider range of organizations, particularly smaller businesses or nonprofits that may not have registered trademarks.</p> <p>This potential change is an exciting development in the world of email security and branding. It underscores the ongoing commitment to making email communication more secure and visually engaging, all while maintaining a high level of trust between organizations and their email recipients.</p> <p></p> <h2 id="step-4-bimi-records">Step 4→ BIMI Records</h2> <img src="/images/cms/64d2d76f1c7443da13c04059_649c8196a8b30513ef1608d5_bimi-record.png" alt="" loading="lazy" decoding="async" /> <a href="https://bimigroup.org/" target="_blank" rel="noopener noreferrer">Official BIMI organization website</a> <h2 id="adding-your-brand-logo-to-your-outgoing-email">Adding your brand logo to your outgoing email</h2> <p>You've made it to the final step! This stage will guide you on how to create your Brand Indicators for Message Identification (BIMI) record, integrate it into your DNS records, and assist you in verifying its functionality. If necessary, we'll also help you troubleshoot any hiccups along the way.</p> <p>The finish line is in sight! By successfully adding your BIMI record, you'll be able to display your logo in your emails and secure that coveted verified blue Gmail checkmark.</p> <h2 id="what-will-be-covered-in-step-4">What will be covered in Step 4?</h2> <ul><li>Understanding BIMI Records</li> <li>Creating a BIMI Record</li> <li>Adding Your BIMI Record to Your DNS</li> <li>Validating Your BIMI Record</li> <li>Troubleshooting possible problems</li> </ul> <h3 id="understanding-bimi-records">Understanding BIMI Records</h3> <p>Brand Indicators for Message Identification (BIMI) records are a type of Domain-based Message Authentication, Reporting, and Conformance (DMARC) policy. They link a brand's verified logo with their domain. When set up properly, supported email clients will display this logo next to emails from the domain, providing visual authentication.</p> <p>BIMI records play a pivotal role in email security. They provide a visual check against phishing and email spoofing by displaying your verified logo in the recipient's inbox. This gives instant recognition and trust. BIMI records improve email security and deliverability by showing that your emails are legitimate.</p> <h2 id="creating-a-bimi-record">Creating a BIMI Record</h2> <p>Your BIMI record is a string of text that incorporates the URL where your company's Scalable Vector Graphics (SVG) logo is located. To craft your own record, refer to the examples provided in this section.</p> <h3 id="creating-a-bimi-record-using-an-official-bimi-record-generator"><strong>Creating a BIMI record using an official BIMI record generator:</strong></h3> <p>The BIMI record generator simplifies this process by taking the brand's logo and DNS details and automatically generating a BIMI record, which can then be added to the brand's DNS settings.</p> <p><a href="https://bimigroup.org/bimi-generator/" target="_blank" rel="noopener noreferrer">https://bimigroup.org/bimi-generator/</a></p> <h3 id="examples-and-types-of-bimi-records">Examples and types of BIMI records</h3> <p>In the syntax of BIMI records, it's crucial to distinguish between the number 1, the uppercase 'I', and the lowercase 'l'. They may look alike but are fundamentally different and can change the meaning of your BIMI record.</p> <p><strong>1. Example of a BIMI Record that includes a VMC:</strong></p> <p>This record comprises two example URLs which should be replaced with the URLs of your BIMI files:</p> <ul><li>The URL where your SVG logo is stored on your public web server.</li> <li>The URL for your VMC on your public web server. Note that Gmail requires a VMC to display BIMI logos in Gmail's inbox.</li> </ul> <strong>2. Example of a BIMI Record that does not include a VMC:</strong> <p>Remember to replace the example URLs with the precise locations of your files to successfully create and utilize your BIMI records.</p> <h2 id="add-your-bimi-record-to-your-dns-manager">Add your BIMI record to your DNS manager</h2> <p>To activate <a href="https://palisade.email/learning/what-is-bimi">BIMI</a> on your domain, you need to create a <a href="https://palisade.email/learning/what-is-a-dns">DNS</a> TXT record for BIMI through your DNS manager.</p> <p>If you need help publishing a DNS record, Palisade can provide the required record and manage supported hosted records. A DNS administrator may still need to approve the change when Palisade does not control the zone.</p> <h3 id="to-add-a-dns-txt-bimi-record-to-your-domain-follow-these-steps">To add a DNS TXT BIMI record to your domain, follow these steps</h3> <p>1 - First, log into your domain DNS management console. (example in CloudFlare)</p> <p>2- Input the required values into the form designated for your domain provider's DNS records:</p> <p>3- Save the record and verify it is correctly displaying in the DNS Manager: <img src="/images/cms/64d2d76eef8053e52583aeb7_649c7f5aff511fa3f3bfd99b_screenshot-2023-06-12-at-3.11.01-pm.png" alt="" loading="lazy" decoding="async" /> <h2 id="validating-your-bimi-record">Validating your BIMI Record</h2></p> <p>Using this tool, you can ensure that your BIMI record has been correctly added and is properly propagated. Don’t forget that it can take up to 48 hours to fully propagate.</p> <p><a href="https://bimigroup.org/bimi-generator/" target="_blank" rel="noopener noreferrer">https://bimigroup.org/bimi-generator/</a> <img src="/images/cms/64d2d76eef8053e52583aebc_649c7f69bfab66d1b23c8b77_screenshot-2023-06-12-at-3.21.38-pm.png" alt="" loading="lazy" decoding="async" /> <h2 id="troubleshooting-common-bimi-record-issues">Troubleshooting Common BIMI Record Issues</h2></p> <h3 id="logo-not-displaying-in-recipients-inbox">Logo Not Displaying in Recipient's Inbox</h3> <ul><li>Possible Causes: The most common causes are incorrect or invalid BIMI record syntax, a BIMI record that isn't correctly connected to your DNS, or SVG files that don't meet the standards or are unreachable.</li> <li>Remedial Steps: Review your BIMI record syntax to ensure it matches the format needed. Verify that your SVG file is reachable from the internet and meets BIMI standards. Also, check that your BIMI record is properly linked to your DNS.</li> </ul> <h3 id="messages-from-your-organization-are-sent-to-spam">Messages From Your Organization Are Sent to Spam</h3> <ul><li>Potential Reasons: This could occur due to weak or non-existent DMARC policies, an email system that's not properly authenticated, or content within your messages that email clients perceive as spam.</li> <li>Ways to Fix the Issue: Strengthen your DMARC policies and ensure SPF and DKIM records are properly set up to authenticate your email system. Also, review the content of your messages to ensure they don't contain elements often associated with spam, such as aggressive promotional language or an excessive number of links.</li> </ul> <h3 id="need-help">Need help?</h3> <p>Palisade can help validate the DNS and authentication work behind <a href="https://palisade.email/learning/what-is-bimi">BIMI</a>. Logo formatting, trademark eligibility, and certificate issuance still depend on external requirements and providers.</p> <p></p></div></div><section aria-label="Ask AI about this article" class="mt-12 rounded-[20px] bg-white p-6"><p class="text-xs font-bold uppercase tracking-wide text-palisade-gray-500">Keep going with AI</p><h2 class="mt-1 text-xl font-bold text-palisade-dark">Ask AI how this applies to you</h2><p class="mt-2 text-sm text-palisade-gray-600">Take this guide to your assistant — each question opens pre-filled, with a link back to this page so it can read the details.</p><ul class="mt-4"><li class="flex flex-wrap items-center justify-between gap-x-6 gap-y-2 border-t border-palisade-border py-3 first:border-t-0 first:pt-0 last:pb-0"><span class="min-w-0 flex-1 basis-60 text-sm font-medium text-palisade-dark">Why Set Up SPF, DKIM, and DMARC for Your Domain?</span><span class="flex shrink-0 items-center gap-2"><a href="https://chatgpt.com/?q=I%20just%20read%20Palisade's%20guide%20%22Master%20Guide%3A%20Obtaining%20your%20blue%20verified%20Gmail%20checkmark%22%20(https%3A%2F%2Fwww.palisade.email%2Fresources-post%2Fhow-to-get-gmail-blue-verified-checkmark).%20Why%20Set%20Up%20SPF%2C%20DKIM%2C%20and%20DMARC%20for%20Your%20Domain%3F%20Explain%20it%20in%20plain%20terms%2C%20using%20the%20guide%20as%20your%20starting%20point%2C%20and%20flag%20anything%20important%20it%20doesn't%20cover." class="flex h-9 w-9 items-center justify-center rounded-full border-card bg-white transition-colors hover:border-palisade-blue-light" target="_blank" rel="noopener noreferrer" title="Ask ChatGPT" aria-label="Ask ChatGPT: Why Set Up SPF, DKIM, and DMARC for Your Domain?"><img alt="" loading="lazy" width="18" height="18" decoding="async" data-nimg="1" class="h-[18px] w-[18px] shrink-0 rounded-[3px] object-contain" style="color:transparent" srcSet="/_next/image?url=%2Fimages%2Fai%2Fchatgpt.png&w=32&q=75&dpl=dpl_G6WMfMehfVJz6P5qTrAU7i6T7SYx 1x, /_next/image?url=%2Fimages%2Fai%2Fchatgpt.png&w=48&q=75&dpl=dpl_G6WMfMehfVJz6P5qTrAU7i6T7SYx 2x" src="/_next/image?url=%2Fimages%2Fai%2Fchatgpt.png&w=48&q=75&dpl=dpl_G6WMfMehfVJz6P5qTrAU7i6T7SYx"/></a><a href="https://claude.ai/new?q=I%20just%20read%20Palisade's%20guide%20%22Master%20Guide%3A%20Obtaining%20your%20blue%20verified%20Gmail%20checkmark%22%20(https%3A%2F%2Fwww.palisade.email%2Fresources-post%2Fhow-to-get-gmail-blue-verified-checkmark).%20Why%20Set%20Up%20SPF%2C%20DKIM%2C%20and%20DMARC%20for%20Your%20Domain%3F%20Explain%20it%20in%20plain%20terms%2C%20using%20the%20guide%20as%20your%20starting%20point%2C%20and%20flag%20anything%20important%20it%20doesn't%20cover." class="flex h-9 w-9 items-center justify-center rounded-full border-card bg-white transition-colors hover:border-palisade-blue-light" target="_blank" rel="noopener noreferrer" title="Ask Claude" aria-label="Ask Claude: Why Set Up SPF, DKIM, and DMARC for Your Domain?"><img alt="" loading="lazy" width="18" height="18" decoding="async" data-nimg="1" class="h-[18px] w-[18px] shrink-0 rounded-[3px] object-contain" style="color:transparent" srcSet="/_next/image?url=%2Fimages%2Fai%2Fclaude.png&w=32&q=75&dpl=dpl_G6WMfMehfVJz6P5qTrAU7i6T7SYx 1x, /_next/image?url=%2Fimages%2Fai%2Fclaude.png&w=48&q=75&dpl=dpl_G6WMfMehfVJz6P5qTrAU7i6T7SYx 2x" src="/_next/image?url=%2Fimages%2Fai%2Fclaude.png&w=48&q=75&dpl=dpl_G6WMfMehfVJz6P5qTrAU7i6T7SYx"/></a><a href="https://gemini.google.com/app?q=I%20just%20read%20Palisade's%20guide%20%22Master%20Guide%3A%20Obtaining%20your%20blue%20verified%20Gmail%20checkmark%22%20(https%3A%2F%2Fwww.palisade.email%2Fresources-post%2Fhow-to-get-gmail-blue-verified-checkmark).%20Why%20Set%20Up%20SPF%2C%20DKIM%2C%20and%20DMARC%20for%20Your%20Domain%3F%20Explain%20it%20in%20plain%20terms%2C%20using%20the%20guide%20as%20your%20starting%20point%2C%20and%20flag%20anything%20important%20it%20doesn't%20cover." class="flex h-9 w-9 items-center justify-center rounded-full border-card bg-white transition-colors hover:border-palisade-blue-light" target="_blank" rel="noopener noreferrer" title="Ask Gemini" aria-label="Ask Gemini: Why Set Up SPF, DKIM, and DMARC for Your Domain?"><img alt="" loading="lazy" width="18" height="18" decoding="async" data-nimg="1" class="h-[18px] w-[18px] shrink-0 rounded-[3px] object-contain" style="color:transparent" srcSet="/_next/image?url=%2Fimages%2Fai%2Fgemini.png&w=32&q=75&dpl=dpl_G6WMfMehfVJz6P5qTrAU7i6T7SYx 1x, /_next/image?url=%2Fimages%2Fai%2Fgemini.png&w=48&q=75&dpl=dpl_G6WMfMehfVJz6P5qTrAU7i6T7SYx 2x" src="/_next/image?url=%2Fimages%2Fai%2Fgemini.png&w=48&q=75&dpl=dpl_G6WMfMehfVJz6P5qTrAU7i6T7SYx"/></a><a href="https://www.perplexity.ai/search?q=I%20just%20read%20Palisade's%20guide%20%22Master%20Guide%3A%20Obtaining%20your%20blue%20verified%20Gmail%20checkmark%22%20(https%3A%2F%2Fwww.palisade.email%2Fresources-post%2Fhow-to-get-gmail-blue-verified-checkmark).%20Why%20Set%20Up%20SPF%2C%20DKIM%2C%20and%20DMARC%20for%20Your%20Domain%3F%20Explain%20it%20in%20plain%20terms%2C%20using%20the%20guide%20as%20your%20starting%20point%2C%20and%20flag%20anything%20important%20it%20doesn't%20cover." class="flex h-9 w-9 items-center justify-center rounded-full border-card bg-white transition-colors hover:border-palisade-blue-light" target="_blank" rel="noopener noreferrer" title="Ask Perplexity" aria-label="Ask Perplexity: Why Set Up SPF, DKIM, and DMARC for Your Domain?"><img alt="" loading="lazy" width="18" height="18" decoding="async" data-nimg="1" class="h-[18px] w-[18px] shrink-0 rounded-[3px] object-contain" style="color:transparent" srcSet="/_next/image?url=%2Fimages%2Fai%2Fperplexity.png&w=32&q=75&dpl=dpl_G6WMfMehfVJz6P5qTrAU7i6T7SYx 1x, /_next/image?url=%2Fimages%2Fai%2Fperplexity.png&w=48&q=75&dpl=dpl_G6WMfMehfVJz6P5qTrAU7i6T7SYx 2x" src="/_next/image?url=%2Fimages%2Fai%2Fperplexity.png&w=48&q=75&dpl=dpl_G6WMfMehfVJz6P5qTrAU7i6T7SYx"/></a><a href="https://grok.com/?q=I%20just%20read%20Palisade's%20guide%20%22Master%20Guide%3A%20Obtaining%20your%20blue%20verified%20Gmail%20checkmark%22%20(https%3A%2F%2Fwww.palisade.email%2Fresources-post%2Fhow-to-get-gmail-blue-verified-checkmark).%20Why%20Set%20Up%20SPF%2C%20DKIM%2C%20and%20DMARC%20for%20Your%20Domain%3F%20Explain%20it%20in%20plain%20terms%2C%20using%20the%20guide%20as%20your%20starting%20point%2C%20and%20flag%20anything%20important%20it%20doesn't%20cover." class="flex h-9 w-9 items-center justify-center rounded-full border-card bg-white transition-colors hover:border-palisade-blue-light" target="_blank" rel="noopener noreferrer" title="Ask Grok" aria-label="Ask Grok: Why Set Up SPF, DKIM, and DMARC for Your Domain?"><img alt="" loading="lazy" width="18" height="18" decoding="async" data-nimg="1" class="h-[18px] w-[18px] shrink-0 rounded-[3px] object-contain" style="color:transparent" srcSet="/_next/image?url=%2Fimages%2Fai%2Fgrok.png&w=32&q=75&dpl=dpl_G6WMfMehfVJz6P5qTrAU7i6T7SYx 1x, /_next/image?url=%2Fimages%2Fai%2Fgrok.png&w=48&q=75&dpl=dpl_G6WMfMehfVJz6P5qTrAU7i6T7SYx 2x" src="/_next/image?url=%2Fimages%2Fai%2Fgrok.png&w=48&q=75&dpl=dpl_G6WMfMehfVJz6P5qTrAU7i6T7SYx"/></a></span></li><li class="flex flex-wrap items-center justify-between gap-x-6 gap-y-2 border-t border-palisade-border py-3 first:border-t-0 first:pt-0 last:pb-0"><span class="min-w-0 flex-1 basis-60 text-sm font-medium text-palisade-dark">How does this apply to my domain?</span><span class="flex shrink-0 items-center gap-2"><a href="https://chatgpt.com/?q=I%20just%20read%20Palisade's%20guide%20%22Master%20Guide%3A%20Obtaining%20your%20blue%20verified%20Gmail%20checkmark%22%20(https%3A%2F%2Fwww.palisade.email%2Fresources-post%2Fhow-to-get-gmail-blue-verified-checkmark).%20How%20does%20this%20apply%20to%20my%20domain%20and%20email%20setup%20%E2%80%94%20or%20my%20clients'%20domains%2C%20if%20I%20manage%20several%3F%20Ask%20me%20what%20you%20need%20to%20know%2C%20then%20tell%20me%20what%20to%20check%20first." class="flex h-9 w-9 items-center justify-center rounded-full border-card bg-white transition-colors hover:border-palisade-blue-light" target="_blank" rel="noopener noreferrer" title="Ask ChatGPT" aria-label="Ask ChatGPT: How does this apply to my domain?"><img alt="" loading="lazy" width="18" height="18" decoding="async" data-nimg="1" class="h-[18px] w-[18px] shrink-0 rounded-[3px] object-contain" style="color:transparent" srcSet="/_next/image?url=%2Fimages%2Fai%2Fchatgpt.png&w=32&q=75&dpl=dpl_G6WMfMehfVJz6P5qTrAU7i6T7SYx 1x, /_next/image?url=%2Fimages%2Fai%2Fchatgpt.png&w=48&q=75&dpl=dpl_G6WMfMehfVJz6P5qTrAU7i6T7SYx 2x" src="/_next/image?url=%2Fimages%2Fai%2Fchatgpt.png&w=48&q=75&dpl=dpl_G6WMfMehfVJz6P5qTrAU7i6T7SYx"/></a><a href="https://claude.ai/new?q=I%20just%20read%20Palisade's%20guide%20%22Master%20Guide%3A%20Obtaining%20your%20blue%20verified%20Gmail%20checkmark%22%20(https%3A%2F%2Fwww.palisade.email%2Fresources-post%2Fhow-to-get-gmail-blue-verified-checkmark).%20How%20does%20this%20apply%20to%20my%20domain%20and%20email%20setup%20%E2%80%94%20or%20my%20clients'%20domains%2C%20if%20I%20manage%20several%3F%20Ask%20me%20what%20you%20need%20to%20know%2C%20then%20tell%20me%20what%20to%20check%20first." class="flex h-9 w-9 items-center justify-center rounded-full border-card bg-white transition-colors hover:border-palisade-blue-light" target="_blank" rel="noopener noreferrer" title="Ask Claude" aria-label="Ask Claude: How does this apply to my domain?"><img alt="" loading="lazy" width="18" height="18" decoding="async" data-nimg="1" class="h-[18px] w-[18px] shrink-0 rounded-[3px] object-contain" style="color:transparent" srcSet="/_next/image?url=%2Fimages%2Fai%2Fclaude.png&w=32&q=75&dpl=dpl_G6WMfMehfVJz6P5qTrAU7i6T7SYx 1x, /_next/image?url=%2Fimages%2Fai%2Fclaude.png&w=48&q=75&dpl=dpl_G6WMfMehfVJz6P5qTrAU7i6T7SYx 2x" src="/_next/image?url=%2Fimages%2Fai%2Fclaude.png&w=48&q=75&dpl=dpl_G6WMfMehfVJz6P5qTrAU7i6T7SYx"/></a><a href="https://gemini.google.com/app?q=I%20just%20read%20Palisade's%20guide%20%22Master%20Guide%3A%20Obtaining%20your%20blue%20verified%20Gmail%20checkmark%22%20(https%3A%2F%2Fwww.palisade.email%2Fresources-post%2Fhow-to-get-gmail-blue-verified-checkmark).%20How%20does%20this%20apply%20to%20my%20domain%20and%20email%20setup%20%E2%80%94%20or%20my%20clients'%20domains%2C%20if%20I%20manage%20several%3F%20Ask%20me%20what%20you%20need%20to%20know%2C%20then%20tell%20me%20what%20to%20check%20first." class="flex h-9 w-9 items-center justify-center rounded-full border-card bg-white transition-colors hover:border-palisade-blue-light" target="_blank" rel="noopener noreferrer" title="Ask Gemini" aria-label="Ask Gemini: How does this apply to my domain?"><img alt="" loading="lazy" width="18" height="18" decoding="async" data-nimg="1" class="h-[18px] w-[18px] shrink-0 rounded-[3px] object-contain" style="color:transparent" srcSet="/_next/image?url=%2Fimages%2Fai%2Fgemini.png&w=32&q=75&dpl=dpl_G6WMfMehfVJz6P5qTrAU7i6T7SYx 1x, /_next/image?url=%2Fimages%2Fai%2Fgemini.png&w=48&q=75&dpl=dpl_G6WMfMehfVJz6P5qTrAU7i6T7SYx 2x" src="/_next/image?url=%2Fimages%2Fai%2Fgemini.png&w=48&q=75&dpl=dpl_G6WMfMehfVJz6P5qTrAU7i6T7SYx"/></a><a href="https://www.perplexity.ai/search?q=I%20just%20read%20Palisade's%20guide%20%22Master%20Guide%3A%20Obtaining%20your%20blue%20verified%20Gmail%20checkmark%22%20(https%3A%2F%2Fwww.palisade.email%2Fresources-post%2Fhow-to-get-gmail-blue-verified-checkmark).%20How%20does%20this%20apply%20to%20my%20domain%20and%20email%20setup%20%E2%80%94%20or%20my%20clients'%20domains%2C%20if%20I%20manage%20several%3F%20Ask%20me%20what%20you%20need%20to%20know%2C%20then%20tell%20me%20what%20to%20check%20first." class="flex h-9 w-9 items-center justify-center rounded-full border-card bg-white transition-colors hover:border-palisade-blue-light" target="_blank" rel="noopener noreferrer" title="Ask Perplexity" aria-label="Ask Perplexity: How does this apply to my domain?"><img alt="" loading="lazy" width="18" height="18" decoding="async" data-nimg="1" class="h-[18px] w-[18px] shrink-0 rounded-[3px] object-contain" style="color:transparent" srcSet="/_next/image?url=%2Fimages%2Fai%2Fperplexity.png&w=32&q=75&dpl=dpl_G6WMfMehfVJz6P5qTrAU7i6T7SYx 1x, /_next/image?url=%2Fimages%2Fai%2Fperplexity.png&w=48&q=75&dpl=dpl_G6WMfMehfVJz6P5qTrAU7i6T7SYx 2x" src="/_next/image?url=%2Fimages%2Fai%2Fperplexity.png&w=48&q=75&dpl=dpl_G6WMfMehfVJz6P5qTrAU7i6T7SYx"/></a><a href="https://grok.com/?q=I%20just%20read%20Palisade's%20guide%20%22Master%20Guide%3A%20Obtaining%20your%20blue%20verified%20Gmail%20checkmark%22%20(https%3A%2F%2Fwww.palisade.email%2Fresources-post%2Fhow-to-get-gmail-blue-verified-checkmark).%20How%20does%20this%20apply%20to%20my%20domain%20and%20email%20setup%20%E2%80%94%20or%20my%20clients'%20domains%2C%20if%20I%20manage%20several%3F%20Ask%20me%20what%20you%20need%20to%20know%2C%20then%20tell%20me%20what%20to%20check%20first." class="flex h-9 w-9 items-center justify-center rounded-full border-card bg-white transition-colors hover:border-palisade-blue-light" target="_blank" rel="noopener noreferrer" title="Ask Grok" aria-label="Ask Grok: How does this apply to my domain?"><img alt="" loading="lazy" width="18" height="18" decoding="async" data-nimg="1" class="h-[18px] w-[18px] shrink-0 rounded-[3px] object-contain" style="color:transparent" srcSet="/_next/image?url=%2Fimages%2Fai%2Fgrok.png&w=32&q=75&dpl=dpl_G6WMfMehfVJz6P5qTrAU7i6T7SYx 1x, /_next/image?url=%2Fimages%2Fai%2Fgrok.png&w=48&q=75&dpl=dpl_G6WMfMehfVJz6P5qTrAU7i6T7SYx 2x" src="/_next/image?url=%2Fimages%2Fai%2Fgrok.png&w=48&q=75&dpl=dpl_G6WMfMehfVJz6P5qTrAU7i6T7SYx"/></a></span></li><li class="flex flex-wrap items-center justify-between gap-x-6 gap-y-2 border-t border-palisade-border py-3 first:border-t-0 first:pt-0 last:pb-0"><span class="min-w-0 flex-1 basis-60 text-sm font-medium text-palisade-dark">What should I do about it, step by step?</span><span class="flex shrink-0 items-center gap-2"><a href="https://chatgpt.com/?q=I%20just%20read%20Palisade's%20guide%20%22Master%20Guide%3A%20Obtaining%20your%20blue%20verified%20Gmail%20checkmark%22%20(https%3A%2F%2Fwww.palisade.email%2Fresources-post%2Fhow-to-get-gmail-blue-verified-checkmark).%20Turn%20it%20into%20a%20practical%20step-by-step%20action%20plan%20for%20my%20situation%2C%20and%20say%20where%20automation%20would%20save%20me%20time." class="flex h-9 w-9 items-center justify-center rounded-full border-card bg-white transition-colors hover:border-palisade-blue-light" target="_blank" rel="noopener noreferrer" title="Ask ChatGPT" aria-label="Ask ChatGPT: What should I do about it, step by step?"><img alt="" loading="lazy" width="18" height="18" decoding="async" data-nimg="1" class="h-[18px] w-[18px] shrink-0 rounded-[3px] object-contain" style="color:transparent" srcSet="/_next/image?url=%2Fimages%2Fai%2Fchatgpt.png&w=32&q=75&dpl=dpl_G6WMfMehfVJz6P5qTrAU7i6T7SYx 1x, /_next/image?url=%2Fimages%2Fai%2Fchatgpt.png&w=48&q=75&dpl=dpl_G6WMfMehfVJz6P5qTrAU7i6T7SYx 2x" src="/_next/image?url=%2Fimages%2Fai%2Fchatgpt.png&w=48&q=75&dpl=dpl_G6WMfMehfVJz6P5qTrAU7i6T7SYx"/></a><a href="https://claude.ai/new?q=I%20just%20read%20Palisade's%20guide%20%22Master%20Guide%3A%20Obtaining%20your%20blue%20verified%20Gmail%20checkmark%22%20(https%3A%2F%2Fwww.palisade.email%2Fresources-post%2Fhow-to-get-gmail-blue-verified-checkmark).%20Turn%20it%20into%20a%20practical%20step-by-step%20action%20plan%20for%20my%20situation%2C%20and%20say%20where%20automation%20would%20save%20me%20time." class="flex h-9 w-9 items-center justify-center rounded-full border-card bg-white transition-colors hover:border-palisade-blue-light" target="_blank" rel="noopener noreferrer" title="Ask Claude" aria-label="Ask Claude: What should I do about it, step by step?"><img alt="" loading="lazy" width="18" height="18" decoding="async" data-nimg="1" class="h-[18px] w-[18px] shrink-0 rounded-[3px] object-contain" style="color:transparent" srcSet="/_next/image?url=%2Fimages%2Fai%2Fclaude.png&w=32&q=75&dpl=dpl_G6WMfMehfVJz6P5qTrAU7i6T7SYx 1x, /_next/image?url=%2Fimages%2Fai%2Fclaude.png&w=48&q=75&dpl=dpl_G6WMfMehfVJz6P5qTrAU7i6T7SYx 2x" src="/_next/image?url=%2Fimages%2Fai%2Fclaude.png&w=48&q=75&dpl=dpl_G6WMfMehfVJz6P5qTrAU7i6T7SYx"/></a><a href="https://gemini.google.com/app?q=I%20just%20read%20Palisade's%20guide%20%22Master%20Guide%3A%20Obtaining%20your%20blue%20verified%20Gmail%20checkmark%22%20(https%3A%2F%2Fwww.palisade.email%2Fresources-post%2Fhow-to-get-gmail-blue-verified-checkmark).%20Turn%20it%20into%20a%20practical%20step-by-step%20action%20plan%20for%20my%20situation%2C%20and%20say%20where%20automation%20would%20save%20me%20time." class="flex h-9 w-9 items-center justify-center rounded-full border-card bg-white transition-colors hover:border-palisade-blue-light" target="_blank" rel="noopener noreferrer" title="Ask Gemini" aria-label="Ask Gemini: What should I do about it, step by step?"><img alt="" loading="lazy" width="18" height="18" decoding="async" data-nimg="1" class="h-[18px] w-[18px] shrink-0 rounded-[3px] object-contain" style="color:transparent" srcSet="/_next/image?url=%2Fimages%2Fai%2Fgemini.png&w=32&q=75&dpl=dpl_G6WMfMehfVJz6P5qTrAU7i6T7SYx 1x, /_next/image?url=%2Fimages%2Fai%2Fgemini.png&w=48&q=75&dpl=dpl_G6WMfMehfVJz6P5qTrAU7i6T7SYx 2x" src="/_next/image?url=%2Fimages%2Fai%2Fgemini.png&w=48&q=75&dpl=dpl_G6WMfMehfVJz6P5qTrAU7i6T7SYx"/></a><a href="https://www.perplexity.ai/search?q=I%20just%20read%20Palisade's%20guide%20%22Master%20Guide%3A%20Obtaining%20your%20blue%20verified%20Gmail%20checkmark%22%20(https%3A%2F%2Fwww.palisade.email%2Fresources-post%2Fhow-to-get-gmail-blue-verified-checkmark).%20Turn%20it%20into%20a%20practical%20step-by-step%20action%20plan%20for%20my%20situation%2C%20and%20say%20where%20automation%20would%20save%20me%20time." class="flex h-9 w-9 items-center justify-center rounded-full border-card bg-white transition-colors hover:border-palisade-blue-light" target="_blank" rel="noopener noreferrer" title="Ask Perplexity" aria-label="Ask Perplexity: What should I do about it, step by step?"><img alt="" loading="lazy" width="18" height="18" decoding="async" data-nimg="1" class="h-[18px] w-[18px] shrink-0 rounded-[3px] object-contain" style="color:transparent" srcSet="/_next/image?url=%2Fimages%2Fai%2Fperplexity.png&w=32&q=75&dpl=dpl_G6WMfMehfVJz6P5qTrAU7i6T7SYx 1x, /_next/image?url=%2Fimages%2Fai%2Fperplexity.png&w=48&q=75&dpl=dpl_G6WMfMehfVJz6P5qTrAU7i6T7SYx 2x" src="/_next/image?url=%2Fimages%2Fai%2Fperplexity.png&w=48&q=75&dpl=dpl_G6WMfMehfVJz6P5qTrAU7i6T7SYx"/></a><a href="https://grok.com/?q=I%20just%20read%20Palisade's%20guide%20%22Master%20Guide%3A%20Obtaining%20your%20blue%20verified%20Gmail%20checkmark%22%20(https%3A%2F%2Fwww.palisade.email%2Fresources-post%2Fhow-to-get-gmail-blue-verified-checkmark).%20Turn%20it%20into%20a%20practical%20step-by-step%20action%20plan%20for%20my%20situation%2C%20and%20say%20where%20automation%20would%20save%20me%20time." class="flex h-9 w-9 items-center justify-center rounded-full border-card bg-white transition-colors hover:border-palisade-blue-light" target="_blank" rel="noopener noreferrer" title="Ask Grok" aria-label="Ask Grok: What should I do about it, step by step?"><img alt="" loading="lazy" width="18" height="18" decoding="async" data-nimg="1" class="h-[18px] w-[18px] shrink-0 rounded-[3px] object-contain" style="color:transparent" srcSet="/_next/image?url=%2Fimages%2Fai%2Fgrok.png&w=32&q=75&dpl=dpl_G6WMfMehfVJz6P5qTrAU7i6T7SYx 1x, /_next/image?url=%2Fimages%2Fai%2Fgrok.png&w=48&q=75&dpl=dpl_G6WMfMehfVJz6P5qTrAU7i6T7SYx 2x" src="/_next/image?url=%2Fimages%2Fai%2Fgrok.png&w=48&q=75&dpl=dpl_G6WMfMehfVJz6P5qTrAU7i6T7SYx"/></a></span></li></ul></section><div class="mt-12 border-t border-palisade-border pt-6"><p class="mb-3 text-sm font-medium text-palisade-dark">Share this article</p><div class="flex items-center gap-3"><a href="https://twitter.com/intent/tweet?url=https%3A%2F%2Fwww.palisade.email%2Fresources-post%2Fhow-to-get-gmail-blue-verified-checkmark&text=Master%20Guide%3A%20Obtaining%20your%20blue%20verified%20Gmail%20checkmark" target="_blank" rel="noopener noreferrer" aria-label="Share on X" class="card-hover flex h-10 w-10 items-center justify-center rounded-full border border-palisade-border text-palisade-gray-600 hover:text-palisade-blue-light"><svg class="h-4 w-4" viewBox="0 0 20 20" fill="currentColor"><path d="M15.3 1.7h2.9l-6.4 7.3 7.5 9.9h-5.9l-4.6-6-5.3 6H0.6l6.8-7.8L0 1.7h6l4.2 5.5 4.6-5.5zm-1 14.7h1.6L5.3 3.3H3.6l10.7 13.1z"></path></svg></a><a href="https://www.linkedin.com/sharing/share-offsite/?url=https%3A%2F%2Fwww.palisade.email%2Fresources-post%2Fhow-to-get-gmail-blue-verified-checkmark" target="_blank" rel="noopener noreferrer" aria-label="Share on LinkedIn" class="card-hover flex h-10 w-10 items-center justify-center rounded-full border border-palisade-border text-palisade-gray-600 hover:text-palisade-blue-light"><svg class="h-4 w-4" viewBox="0 0 20 20" fill="currentColor"><path d="M18.52 0H1.48C0.66 0 0 0.66 0 1.48v17.04C0 19.34 0.66 20 1.48 20h17.04c0.82 0 1.48-0.66 1.48-1.48V1.48C20 0.66 19.34 0 18.52 0zM5.96 17.04H2.95V7.49h3.01v9.55zM4.46 6.16a1.75 1.75 0 110-3.5 1.75 1.75 0 010 3.5zm12.58 10.88h-3v-4.82c0-1.54-0.65-2.01-1.5-2.01-0.89 0-1.77 0.67-1.77 2.05v4.78h-3V7.49h2.89v1.32h0.04c0.29-0.59 1.31-1.59 2.86-1.59 1.68 0 3.49 1 3.49 3.91v5.91z"></path></svg></a></div></div><div class="mt-10"><div class="flex items-start gap-4"><a class="relative block h-16 w-16 shrink-0 overflow-hidden rounded-full" href="/author/samuel-chenard"><img alt="Samuel Chenard" loading="lazy" decoding="async" data-nimg="fill" class="object-cover" style="position:absolute;height:100%;width:100%;left:0;top:0;right:0;bottom:0;color:transparent" sizes="64px" srcSet="/_next/image?url=%2Fimages%2FPalisade-Profess-Sam.jpg&w=32&q=75&dpl=dpl_G6WMfMehfVJz6P5qTrAU7i6T7SYx 32w, /_next/image?url=%2Fimages%2FPalisade-Profess-Sam.jpg&w=48&q=75&dpl=dpl_G6WMfMehfVJz6P5qTrAU7i6T7SYx 48w, /_next/image?url=%2Fimages%2FPalisade-Profess-Sam.jpg&w=64&q=75&dpl=dpl_G6WMfMehfVJz6P5qTrAU7i6T7SYx 64w, /_next/image?url=%2Fimages%2FPalisade-Profess-Sam.jpg&w=96&q=75&dpl=dpl_G6WMfMehfVJz6P5qTrAU7i6T7SYx 96w, /_next/image?url=%2Fimages%2FPalisade-Profess-Sam.jpg&w=128&q=75&dpl=dpl_G6WMfMehfVJz6P5qTrAU7i6T7SYx 128w, /_next/image?url=%2Fimages%2FPalisade-Profess-Sam.jpg&w=256&q=75&dpl=dpl_G6WMfMehfVJz6P5qTrAU7i6T7SYx 256w, /_next/image?url=%2Fimages%2FPalisade-Profess-Sam.jpg&w=384&q=75&dpl=dpl_G6WMfMehfVJz6P5qTrAU7i6T7SYx 384w, /_next/image?url=%2Fimages%2FPalisade-Profess-Sam.jpg&w=640&q=75&dpl=dpl_G6WMfMehfVJz6P5qTrAU7i6T7SYx 640w, /_next/image?url=%2Fimages%2FPalisade-Profess-Sam.jpg&w=750&q=75&dpl=dpl_G6WMfMehfVJz6P5qTrAU7i6T7SYx 750w, /_next/image?url=%2Fimages%2FPalisade-Profess-Sam.jpg&w=828&q=75&dpl=dpl_G6WMfMehfVJz6P5qTrAU7i6T7SYx 828w, /_next/image?url=%2Fimages%2FPalisade-Profess-Sam.jpg&w=1080&q=75&dpl=dpl_G6WMfMehfVJz6P5qTrAU7i6T7SYx 1080w, /_next/image?url=%2Fimages%2FPalisade-Profess-Sam.jpg&w=1200&q=75&dpl=dpl_G6WMfMehfVJz6P5qTrAU7i6T7SYx 1200w, /_next/image?url=%2Fimages%2FPalisade-Profess-Sam.jpg&w=1920&q=75&dpl=dpl_G6WMfMehfVJz6P5qTrAU7i6T7SYx 1920w, /_next/image?url=%2Fimages%2FPalisade-Profess-Sam.jpg&w=2048&q=75&dpl=dpl_G6WMfMehfVJz6P5qTrAU7i6T7SYx 2048w, /_next/image?url=%2Fimages%2FPalisade-Profess-Sam.jpg&w=3840&q=75&dpl=dpl_G6WMfMehfVJz6P5qTrAU7i6T7SYx 3840w" src="/_next/image?url=%2Fimages%2FPalisade-Profess-Sam.jpg&w=3840&q=75&dpl=dpl_G6WMfMehfVJz6P5qTrAU7i6T7SYx"/></a><div class="min-w-0"><p class="text-xs font-bold uppercase tracking-wide text-palisade-gray-500">Written by</p><a class="mt-1 inline-block text-lg font-semibold text-palisade-dark hover:text-palisade-blue-light" href="/author/samuel-chenard">Samuel Chenard</a><p class="text-sm text-palisade-gray-500">CEO & Co-Founder, Palisade</p><p class="mt-2 text-sm leading-relaxed text-palisade-gray-600">Samuel Chenard is the CEO and co-founder of Palisade, AI-first DMARC software for IT teams and MSPs, from one domain to thousands.</p><a class="mt-2 inline-block text-sm font-medium text-palisade-blue-light hover:underline" href="/author/samuel-chenard">More from <!-- -->Samuel<!-- --> →</a><div class="mt-4 flex items-center gap-2"><a href="https://www.linkedin.com/in/samuelchenard/" target="_blank" rel="noopener noreferrer" aria-label="Samuel Chenard on LinkedIn" class="card-hover flex h-9 w-9 items-center justify-center rounded-full border border-palisade-border text-palisade-gray-600 hover:text-palisade-blue-light"><svg class="h-4 w-4" viewBox="0 0 20 20" fill="currentColor"><path d="M18.52 0H1.48C0.66 0 0 0.66 0 1.48v17.04C0 19.34 0.66 20 1.48 20h17.04c0.82 0 1.48-0.66 1.48-1.48V1.48C20 0.66 19.34 0 18.52 0zM5.96 17.04H2.95V7.49h3.01v9.55zM4.46 6.16a1.75 1.75 0 110-3.5 1.75 1.75 0 010 3.5zm12.58 10.88h-3v-4.82c0-1.54-0.65-2.01-1.5-2.01-0.89 0-1.77 0.67-1.77 2.05v4.78h-3V7.49h2.89v1.32h0.04c0.29-0.59 1.31-1.59 2.86-1.59 1.68 0 3.49 1 3.49 3.91v5.91z"></path></svg></a></div></div></div></div></article><aside><nav aria-label="Table of contents" class="mb-6 hidden lg:block"><p class="text-xs font-bold uppercase tracking-wide text-palisade-gray-500">On this page</p><ul class="mt-3 flex flex-col gap-2"><li class=""><a href="#step-1-configuring-your-dns-and-preparing-to-set-up-your-bimi-record-laying-the-" class="text-sm leading-snug text-palisade-gray-600 hover:text-palisade-blue-light">Step 1→ Configuring your DNS and Preparing to set up your BIMI record – laying the necessary groundwork.</a></li><li class=""><a href="#dns-records-what-they-are-why-they-matter-and-how-to-set-them-up" class="text-sm leading-snug text-palisade-gray-600 hover:text-palisade-blue-light">DNS Records: What They Are, Why They Matter, and How to Set Them Up</a></li><li class=""><a href="#why-set-up-spf-dkim-and-dmarc-for-your-domain" class="text-sm leading-snug text-palisade-gray-600 hover:text-palisade-blue-light">Why Set Up SPF, DKIM, and DMARC for Your Domain?</a></li><li class="pl-3"><a href="#understanding-propagation" class="text-sm leading-snug text-palisade-gray-600 hover:text-palisade-blue-light">Understanding Propagation</a></li><li class=""><a href="#gathering-your-dns-manager-credentials" class="text-sm leading-snug text-palisade-gray-600 hover:text-palisade-blue-light">Gathering Your DNS Manager Credentials</a></li><li class="pl-3"><a href="#setting-up-your-spf-record" class="text-sm leading-snug text-palisade-gray-600 hover:text-palisade-blue-light">Setting up your SPF Record</a></li><li class=""><a href="#setting-up-your-spf-record" class="text-sm leading-snug text-palisade-gray-600 hover:text-palisade-blue-light">Setting Up Your SPF Record</a></li><li class="pl-3"><a href="#setting-up-your-dkim-dns-record" class="text-sm leading-snug text-palisade-gray-600 hover:text-palisade-blue-light">Setting up your DKIM DNS record</a></li><li class="pl-3"><a href="#setup-dmarc-for-your-domain" class="text-sm leading-snug text-palisade-gray-600 hover:text-palisade-blue-light">Setup DMARC for your Domain</a></li><li class=""><a href="#checking-for-an-existing-bimi-record" class="text-sm leading-snug text-palisade-gray-600 hover:text-palisade-blue-light">Checking for an existing BIMI record</a></li><li class=""><a href="#step-2-logo---svg-trademark" class="text-sm leading-snug text-palisade-gray-600 hover:text-palisade-blue-light">Step 2 → Logo - SVG & Trademark</a></li><li class=""><a href="#step-1---obtaining-configuring-your-companys-logo-svg" class="text-sm leading-snug text-palisade-gray-600 hover:text-palisade-blue-light">Step 1 - Obtaining & Configuring Your Company's Logo SVG</a></li><li class=""><a href="#step-2---trademarking-your-logo" class="text-sm leading-snug text-palisade-gray-600 hover:text-palisade-blue-light">Step 2 - Trademarking Your Logo</a></li><li class=""><a href="#obtaining-configuring-your-companys-logo-svg" class="text-sm leading-snug text-palisade-gray-600 hover:text-palisade-blue-light">Obtaining & Configuring Your Company's Logo SVG</a></li><li class="pl-3"><a href="#understanding-what-an-svg-is" class="text-sm leading-snug text-palisade-gray-600 hover:text-palisade-blue-light">Understanding what an SVG is</a></li><li class="pl-3"><a href="#determining-if-your-company-logo-is-already-in-svg-format" class="text-sm leading-snug text-palisade-gray-600 hover:text-palisade-blue-light">Determining if your company logo is already in SVG format</a></li><li class="pl-3"><a href="#bimi-svg-file-requirements-and-recommendations" class="text-sm leading-snug text-palisade-gray-600 hover:text-palisade-blue-light">BIMI SVG file requirements and recommendations</a></li><li class=""><a href="#creating-your-brand-logo-svg-file" class="text-sm leading-snug text-palisade-gray-600 hover:text-palisade-blue-light">Creating your Brand Logo SVG file</a></li><li class="pl-3"><a href="#converting-your-logo-to-an-svg-format" class="text-sm leading-snug text-palisade-gray-600 hover:text-palisade-blue-light">Converting your logo to an SVG format</a></li><li class="pl-3"><a href="#heres-a-step-by-step-guide-on-how-to-create-your-svg-file-using-adobe-illustrato" class="text-sm leading-snug text-palisade-gray-600 hover:text-palisade-blue-light">Here’s a step-by-step guide on how to create your SVG file using Adobe Illustrator</a></li><li class="pl-3"><a href="#somewhat-challenging" class="text-sm leading-snug text-palisade-gray-600 hover:text-palisade-blue-light">Somewhat challenging?</a></li><li class=""><a href="#step-2---trademarking-your-logo" class="text-sm leading-snug text-palisade-gray-600 hover:text-palisade-blue-light">Step 2 - Trademarking Your Logo</a></li><li class="pl-3"><a href="#understanding-what-a-logo-trademark-is" class="text-sm leading-snug text-palisade-gray-600 hover:text-palisade-blue-light">Understanding what a Logo Trademark is</a></li><li class="pl-3"><a href="#before-applying-for-your-logo-trademark" class="text-sm leading-snug text-palisade-gray-600 hover:text-palisade-blue-light">Before applying for your Logo Trademark</a></li><li class="pl-3"><a href="#how-to-apply-for-your-logo-trademark-for-your-vmc-certificate" class="text-sm leading-snug text-palisade-gray-600 hover:text-palisade-blue-light">How to Apply for your Logo Trademark for your VMC Certificate</a></li><li class="pl-3"><a href="#timeline-for-a-logo-trademark-application" class="text-sm leading-snug text-palisade-gray-600 hover:text-palisade-blue-light">Timeline for a Logo Trademark Application</a></li><li class="pl-3"><a href="#cost-of-obtaining-your-logo-trademark" class="text-sm leading-snug text-palisade-gray-600 hover:text-palisade-blue-light">Cost of Obtaining Your Logo Trademark</a></li><li class="pl-3"><a href="#seems-like-a-lot-to-do-on-your-own" class="text-sm leading-snug text-palisade-gray-600 hover:text-palisade-blue-light">Seems like a lot to do on your own?</a></li><li class=""><a href="#step-3-obtaining-your-verified-mark-certificate-vmc" class="text-sm leading-snug text-palisade-gray-600 hover:text-palisade-blue-light">Step 3→ Obtaining your Verified Mark Certificate (VMC)</a></li><li class=""><a href="#what-will-be-covered-in-step-3" class="text-sm leading-snug text-palisade-gray-600 hover:text-palisade-blue-light">What will be covered in Step 3?</a></li><li class=""><a href="#what-is-a-verified-mark-certificate-vmc" class="text-sm leading-snug text-palisade-gray-600 hover:text-palisade-blue-light">What is a Verified Mark Certificate (VMC)?</a></li><li class=""><a href="#applying-for-a-vmc" class="text-sm leading-snug text-palisade-gray-600 hover:text-palisade-blue-light">Applying for a VMC</a></li><li class=""><a href="#understanding-the-costs-and-timelines-for-vmc" class="text-sm leading-snug text-palisade-gray-600 hover:text-palisade-blue-light">Understanding the Costs and Timelines for VMC</a></li><li class=""><a href="#step-4-bimi-records" class="text-sm leading-snug text-palisade-gray-600 hover:text-palisade-blue-light">Step 4→ BIMI Records</a></li><li class=""><a href="#adding-your-brand-logo-to-your-outgoing-email" class="text-sm leading-snug text-palisade-gray-600 hover:text-palisade-blue-light">Adding your brand logo to your outgoing email</a></li><li class=""><a href="#what-will-be-covered-in-step-4" class="text-sm leading-snug text-palisade-gray-600 hover:text-palisade-blue-light">What will be covered in Step 4?</a></li><li class="pl-3"><a href="#understanding-bimi-records" class="text-sm leading-snug text-palisade-gray-600 hover:text-palisade-blue-light">Understanding BIMI Records</a></li><li class=""><a href="#creating-a-bimi-record" class="text-sm leading-snug text-palisade-gray-600 hover:text-palisade-blue-light">Creating a BIMI Record</a></li><li class="pl-3"><a href="#creating-a-bimi-record-using-an-official-bimi-record-generator" class="text-sm leading-snug text-palisade-gray-600 hover:text-palisade-blue-light">Creating a BIMI record using an official BIMI record generator:</a></li><li class="pl-3"><a href="#examples-and-types-of-bimi-records" class="text-sm leading-snug text-palisade-gray-600 hover:text-palisade-blue-light">Examples and types of BIMI records</a></li><li class=""><a href="#add-your-bimi-record-to-your-dns-manager" class="text-sm leading-snug text-palisade-gray-600 hover:text-palisade-blue-light">Add your BIMI record to your DNS manager</a></li><li class="pl-3"><a href="#to-add-a-dns-txt-bimi-record-to-your-domain-follow-these-steps" class="text-sm leading-snug text-palisade-gray-600 hover:text-palisade-blue-light">To add a DNS TXT BIMI record to your domain, follow these steps</a></li><li class=""><a href="#validating-your-bimi-record" class="text-sm leading-snug text-palisade-gray-600 hover:text-palisade-blue-light">Validating your BIMI Record</a></li><li class=""><a href="#troubleshooting-common-bimi-record-issues" class="text-sm leading-snug text-palisade-gray-600 hover:text-palisade-blue-light">Troubleshooting Common BIMI Record Issues</a></li><li class="pl-3"><a href="#logo-not-displaying-in-recipients-inbox" class="text-sm leading-snug text-palisade-gray-600 hover:text-palisade-blue-light">Logo Not Displaying in Recipient's Inbox</a></li><li class="pl-3"><a href="#messages-from-your-organization-are-sent-to-spam" class="text-sm leading-snug text-palisade-gray-600 hover:text-palisade-blue-light">Messages From Your Organization Are Sent to Spam</a></li><li class="pl-3"><a href="#need-help" class="text-sm leading-snug text-palisade-gray-600 hover:text-palisade-blue-light">Need help?</a></li></ul></nav><div class="lg:sticky lg:top-24"><div class="rounded-[20px] border border-palisade-border bg-white p-6 shadow-card"><div class="flex items-center gap-2.5"><svg xmlns="http://www.w3.org/2000/svg" width="24" height="24" fill="currentColor" viewBox="0 0 256 256" class="shrink-0 text-palisade-blue-light"><path d="M114.34,154.34l96-96a8,8,0,0,1,11.32,11.32l-96,96a8,8,0,0,1-11.32-11.32ZM128,88a63.9,63.9,0,0,1,20.44,3.33,8,8,0,1,0,5.11-15.16A80,80,0,0,0,48.49,160.88,8,8,0,0,0,56.43,168c.29,0,.59,0,.89-.05a8,8,0,0,0,7.07-8.83A64.92,64.92,0,0,1,64,152,64.07,64.07,0,0,1,128,88Zm99.74,13a8,8,0,0,0-14.24,7.3,96.27,96.27,0,0,1,5,75.71l-181.1-.07A96.24,96.24,0,0,1,128,56h.88a95,95,0,0,1,42.82,10.5A8,8,0,1,0,179,52.27a112,112,0,0,0-156.66,137A16.07,16.07,0,0,0,37.46,200H218.53a16,16,0,0,0,15.11-10.71,112.35,112.35,0,0,0-5.9-88.3Z"></path></svg><h2 class="text-base font-bold text-palisade-dark">Email Security Score</h2></div><p class="mt-2 text-sm text-palisade-gray-600">Score your domain's DMARC, SPF, DKIM, and BIMI in one free check.</p><div class="mt-1"><form class="mt-4 flex flex-col gap-3"><input type="text" placeholder="yourdomain.com" autoComplete="off" spellCheck="false" aria-label="yourdomain.com" class="w-full rounded-[12px] border-card bg-white px-4 py-2.5 text-sm text-palisade-dark placeholder:text-palisade-gray-400 focus:border-palisade-blue-light focus:outline-none" value=""/><button type="submit" class="btn-primary inline-flex w-full items-center justify-center">Get your score</button></form></div></div></div></aside></div><section class="mt-16"><h2 class="text-2xl font-bold text-palisade-dark">Related articles</h2><div class="mt-6 grid gap-6 sm:grid-cols-2 lg:grid-cols-4"><a class="group flex flex-col rounded-[20px] border border-palisade-border bg-white p-5 shadow-card transition hover:border-palisade-blue-light hover:-translate-y-0.5" href="/resources-post/mxtoolbox-alternatives"><div class="relative mb-4 aspect-video w-full overflow-hidden rounded-lg"><img alt="MXToolbox alternatives: choose by diagnostic job" loading="lazy" decoding="async" data-nimg="fill" class="object-cover transition-transform group-hover:scale-[1.02]" style="position:absolute;height:100%;width:100%;left:0;top:0;right:0;bottom:0;color:transparent" sizes="(max-width: 640px) 100vw, (max-width: 1024px) 50vw, 25vw" srcSet="/_next/image?url=%2Fimages%2Feditorial%2Fmxtoolbox-alternatives%2Fmxtoolbox-alternatives-hero.png%3Fv%3D20260728&w=256&q=75&dpl=dpl_G6WMfMehfVJz6P5qTrAU7i6T7SYx 256w, /_next/image?url=%2Fimages%2Feditorial%2Fmxtoolbox-alternatives%2Fmxtoolbox-alternatives-hero.png%3Fv%3D20260728&w=384&q=75&dpl=dpl_G6WMfMehfVJz6P5qTrAU7i6T7SYx 384w, /_next/image?url=%2Fimages%2Feditorial%2Fmxtoolbox-alternatives%2Fmxtoolbox-alternatives-hero.png%3Fv%3D20260728&w=640&q=75&dpl=dpl_G6WMfMehfVJz6P5qTrAU7i6T7SYx 640w, /_next/image?url=%2Fimages%2Feditorial%2Fmxtoolbox-alternatives%2Fmxtoolbox-alternatives-hero.png%3Fv%3D20260728&w=750&q=75&dpl=dpl_G6WMfMehfVJz6P5qTrAU7i6T7SYx 750w, /_next/image?url=%2Fimages%2Feditorial%2Fmxtoolbox-alternatives%2Fmxtoolbox-alternatives-hero.png%3Fv%3D20260728&w=828&q=75&dpl=dpl_G6WMfMehfVJz6P5qTrAU7i6T7SYx 828w, /_next/image?url=%2Fimages%2Feditorial%2Fmxtoolbox-alternatives%2Fmxtoolbox-alternatives-hero.png%3Fv%3D20260728&w=1080&q=75&dpl=dpl_G6WMfMehfVJz6P5qTrAU7i6T7SYx 1080w, /_next/image?url=%2Fimages%2Feditorial%2Fmxtoolbox-alternatives%2Fmxtoolbox-alternatives-hero.png%3Fv%3D20260728&w=1200&q=75&dpl=dpl_G6WMfMehfVJz6P5qTrAU7i6T7SYx 1200w, /_next/image?url=%2Fimages%2Feditorial%2Fmxtoolbox-alternatives%2Fmxtoolbox-alternatives-hero.png%3Fv%3D20260728&w=1920&q=75&dpl=dpl_G6WMfMehfVJz6P5qTrAU7i6T7SYx 1920w, /_next/image?url=%2Fimages%2Feditorial%2Fmxtoolbox-alternatives%2Fmxtoolbox-alternatives-hero.png%3Fv%3D20260728&w=2048&q=75&dpl=dpl_G6WMfMehfVJz6P5qTrAU7i6T7SYx 2048w, /_next/image?url=%2Fimages%2Feditorial%2Fmxtoolbox-alternatives%2Fmxtoolbox-alternatives-hero.png%3Fv%3D20260728&w=3840&q=75&dpl=dpl_G6WMfMehfVJz6P5qTrAU7i6T7SYx 3840w" src="/_next/image?url=%2Fimages%2Feditorial%2Fmxtoolbox-alternatives%2Fmxtoolbox-alternatives-hero.png%3Fv%3D20260728&w=3840&q=75&dpl=dpl_G6WMfMehfVJz6P5qTrAU7i6T7SYx"/></div><span class="text-base font-semibold leading-snug text-palisade-dark group-hover:text-palisade-blue-light">MXToolbox alternatives: choose by diagnostic job</span><span class="mt-2 text-sm text-palisade-gray-500">July 27, 2026</span></a><a class="group flex flex-col rounded-[20px] border border-palisade-border bg-white p-5 shadow-card transition hover:border-palisade-blue-light hover:-translate-y-0.5" href="/resources-post/feature-spotlight-dmarc-agent-ai-assisted"><div class="relative mb-4 aspect-video w-full overflow-hidden rounded-lg"><img alt="Feature spotlight: DMARC Agent" loading="lazy" decoding="async" data-nimg="fill" class="object-cover transition-transform group-hover:scale-[1.02]" style="position:absolute;height:100%;width:100%;left:0;top:0;right:0;bottom:0;color:transparent" sizes="(max-width: 640px) 100vw, (max-width: 1024px) 50vw, 25vw" srcSet="/_next/image?url=%2Fimages%2Feditorial%2Ffeature-spotlight-dmarc-agent-ai-assisted%2Ffeature-spotlight-dmarc-agent-ai-assisted-hero.png&w=256&q=75&dpl=dpl_G6WMfMehfVJz6P5qTrAU7i6T7SYx 256w, /_next/image?url=%2Fimages%2Feditorial%2Ffeature-spotlight-dmarc-agent-ai-assisted%2Ffeature-spotlight-dmarc-agent-ai-assisted-hero.png&w=384&q=75&dpl=dpl_G6WMfMehfVJz6P5qTrAU7i6T7SYx 384w, /_next/image?url=%2Fimages%2Feditorial%2Ffeature-spotlight-dmarc-agent-ai-assisted%2Ffeature-spotlight-dmarc-agent-ai-assisted-hero.png&w=640&q=75&dpl=dpl_G6WMfMehfVJz6P5qTrAU7i6T7SYx 640w, /_next/image?url=%2Fimages%2Feditorial%2Ffeature-spotlight-dmarc-agent-ai-assisted%2Ffeature-spotlight-dmarc-agent-ai-assisted-hero.png&w=750&q=75&dpl=dpl_G6WMfMehfVJz6P5qTrAU7i6T7SYx 750w, /_next/image?url=%2Fimages%2Feditorial%2Ffeature-spotlight-dmarc-agent-ai-assisted%2Ffeature-spotlight-dmarc-agent-ai-assisted-hero.png&w=828&q=75&dpl=dpl_G6WMfMehfVJz6P5qTrAU7i6T7SYx 828w, /_next/image?url=%2Fimages%2Feditorial%2Ffeature-spotlight-dmarc-agent-ai-assisted%2Ffeature-spotlight-dmarc-agent-ai-assisted-hero.png&w=1080&q=75&dpl=dpl_G6WMfMehfVJz6P5qTrAU7i6T7SYx 1080w, /_next/image?url=%2Fimages%2Feditorial%2Ffeature-spotlight-dmarc-agent-ai-assisted%2Ffeature-spotlight-dmarc-agent-ai-assisted-hero.png&w=1200&q=75&dpl=dpl_G6WMfMehfVJz6P5qTrAU7i6T7SYx 1200w, /_next/image?url=%2Fimages%2Feditorial%2Ffeature-spotlight-dmarc-agent-ai-assisted%2Ffeature-spotlight-dmarc-agent-ai-assisted-hero.png&w=1920&q=75&dpl=dpl_G6WMfMehfVJz6P5qTrAU7i6T7SYx 1920w, /_next/image?url=%2Fimages%2Feditorial%2Ffeature-spotlight-dmarc-agent-ai-assisted%2Ffeature-spotlight-dmarc-agent-ai-assisted-hero.png&w=2048&q=75&dpl=dpl_G6WMfMehfVJz6P5qTrAU7i6T7SYx 2048w, /_next/image?url=%2Fimages%2Feditorial%2Ffeature-spotlight-dmarc-agent-ai-assisted%2Ffeature-spotlight-dmarc-agent-ai-assisted-hero.png&w=3840&q=75&dpl=dpl_G6WMfMehfVJz6P5qTrAU7i6T7SYx 3840w" src="/_next/image?url=%2Fimages%2Feditorial%2Ffeature-spotlight-dmarc-agent-ai-assisted%2Ffeature-spotlight-dmarc-agent-ai-assisted-hero.png&w=3840&q=75&dpl=dpl_G6WMfMehfVJz6P5qTrAU7i6T7SYx"/></div><span class="text-base font-semibold leading-snug text-palisade-dark group-hover:text-palisade-blue-light">Feature spotlight: DMARC Agent</span><span class="mt-2 text-sm text-palisade-gray-500">November 25, 2025</span></a><a class="group flex flex-col rounded-[20px] border border-palisade-border bg-white p-5 shadow-card transition hover:border-palisade-blue-light hover:-translate-y-0.5" href="/resources-post/feature-spotlight-whitelabel-prospecting-reports"><div class="relative mb-4 aspect-video w-full overflow-hidden rounded-lg"><img alt="Feature spotlight: Whitelabel prospecting reports" loading="lazy" decoding="async" data-nimg="fill" class="object-cover transition-transform group-hover:scale-[1.02]" style="position:absolute;height:100%;width:100%;left:0;top:0;right:0;bottom:0;color:transparent" sizes="(max-width: 640px) 100vw, (max-width: 1024px) 50vw, 25vw" srcSet="/_next/image?url=%2Fimages%2Feditorial%2Ffeature-spotlight-whitelabel-prospecting-reports%2Ffeature-spotlight-whitelabel-prospecting-reports-hero.png&w=256&q=75&dpl=dpl_G6WMfMehfVJz6P5qTrAU7i6T7SYx 256w, /_next/image?url=%2Fimages%2Feditorial%2Ffeature-spotlight-whitelabel-prospecting-reports%2Ffeature-spotlight-whitelabel-prospecting-reports-hero.png&w=384&q=75&dpl=dpl_G6WMfMehfVJz6P5qTrAU7i6T7SYx 384w, /_next/image?url=%2Fimages%2Feditorial%2Ffeature-spotlight-whitelabel-prospecting-reports%2Ffeature-spotlight-whitelabel-prospecting-reports-hero.png&w=640&q=75&dpl=dpl_G6WMfMehfVJz6P5qTrAU7i6T7SYx 640w, /_next/image?url=%2Fimages%2Feditorial%2Ffeature-spotlight-whitelabel-prospecting-reports%2Ffeature-spotlight-whitelabel-prospecting-reports-hero.png&w=750&q=75&dpl=dpl_G6WMfMehfVJz6P5qTrAU7i6T7SYx 750w, /_next/image?url=%2Fimages%2Feditorial%2Ffeature-spotlight-whitelabel-prospecting-reports%2Ffeature-spotlight-whitelabel-prospecting-reports-hero.png&w=828&q=75&dpl=dpl_G6WMfMehfVJz6P5qTrAU7i6T7SYx 828w, /_next/image?url=%2Fimages%2Feditorial%2Ffeature-spotlight-whitelabel-prospecting-reports%2Ffeature-spotlight-whitelabel-prospecting-reports-hero.png&w=1080&q=75&dpl=dpl_G6WMfMehfVJz6P5qTrAU7i6T7SYx 1080w, /_next/image?url=%2Fimages%2Feditorial%2Ffeature-spotlight-whitelabel-prospecting-reports%2Ffeature-spotlight-whitelabel-prospecting-reports-hero.png&w=1200&q=75&dpl=dpl_G6WMfMehfVJz6P5qTrAU7i6T7SYx 1200w, /_next/image?url=%2Fimages%2Feditorial%2Ffeature-spotlight-whitelabel-prospecting-reports%2Ffeature-spotlight-whitelabel-prospecting-reports-hero.png&w=1920&q=75&dpl=dpl_G6WMfMehfVJz6P5qTrAU7i6T7SYx 1920w, /_next/image?url=%2Fimages%2Feditorial%2Ffeature-spotlight-whitelabel-prospecting-reports%2Ffeature-spotlight-whitelabel-prospecting-reports-hero.png&w=2048&q=75&dpl=dpl_G6WMfMehfVJz6P5qTrAU7i6T7SYx 2048w, /_next/image?url=%2Fimages%2Feditorial%2Ffeature-spotlight-whitelabel-prospecting-reports%2Ffeature-spotlight-whitelabel-prospecting-reports-hero.png&w=3840&q=75&dpl=dpl_G6WMfMehfVJz6P5qTrAU7i6T7SYx 3840w" src="/_next/image?url=%2Fimages%2Feditorial%2Ffeature-spotlight-whitelabel-prospecting-reports%2Ffeature-spotlight-whitelabel-prospecting-reports-hero.png&w=3840&q=75&dpl=dpl_G6WMfMehfVJz6P5qTrAU7i6T7SYx"/></div><span class="text-base font-semibold leading-snug text-palisade-dark group-hover:text-palisade-blue-light">Feature spotlight: Whitelabel prospecting reports</span><span class="mt-2 text-sm text-palisade-gray-500">October 16, 2025</span></a><a class="group flex flex-col rounded-[20px] border border-palisade-border bg-white p-5 shadow-card transition hover:border-palisade-blue-light hover:-translate-y-0.5" href="/resources-post/8-best-dmarc-tools-for-msps-expert-tested-picks-for-2025"><div class="relative mb-4 aspect-video w-full overflow-hidden rounded-lg"><img alt="8 DMARC tools for MSPs compared in 2026" loading="lazy" decoding="async" data-nimg="fill" class="object-cover transition-transform group-hover:scale-[1.02]" style="position:absolute;height:100%;width:100%;left:0;top:0;right:0;bottom:0;color:transparent" sizes="(max-width: 640px) 100vw, (max-width: 1024px) 50vw, 25vw" srcSet="/_next/image?url=%2Fimages%2Feditorial%2F8-best-dmarc-tools-for-msps-expert-tested-picks-for-2025%2F8-best-dmarc-tools-for-msps-expert-tested-picks-for-2025-hero.png&w=256&q=75&dpl=dpl_G6WMfMehfVJz6P5qTrAU7i6T7SYx 256w, /_next/image?url=%2Fimages%2Feditorial%2F8-best-dmarc-tools-for-msps-expert-tested-picks-for-2025%2F8-best-dmarc-tools-for-msps-expert-tested-picks-for-2025-hero.png&w=384&q=75&dpl=dpl_G6WMfMehfVJz6P5qTrAU7i6T7SYx 384w, /_next/image?url=%2Fimages%2Feditorial%2F8-best-dmarc-tools-for-msps-expert-tested-picks-for-2025%2F8-best-dmarc-tools-for-msps-expert-tested-picks-for-2025-hero.png&w=640&q=75&dpl=dpl_G6WMfMehfVJz6P5qTrAU7i6T7SYx 640w, /_next/image?url=%2Fimages%2Feditorial%2F8-best-dmarc-tools-for-msps-expert-tested-picks-for-2025%2F8-best-dmarc-tools-for-msps-expert-tested-picks-for-2025-hero.png&w=750&q=75&dpl=dpl_G6WMfMehfVJz6P5qTrAU7i6T7SYx 750w, /_next/image?url=%2Fimages%2Feditorial%2F8-best-dmarc-tools-for-msps-expert-tested-picks-for-2025%2F8-best-dmarc-tools-for-msps-expert-tested-picks-for-2025-hero.png&w=828&q=75&dpl=dpl_G6WMfMehfVJz6P5qTrAU7i6T7SYx 828w, /_next/image?url=%2Fimages%2Feditorial%2F8-best-dmarc-tools-for-msps-expert-tested-picks-for-2025%2F8-best-dmarc-tools-for-msps-expert-tested-picks-for-2025-hero.png&w=1080&q=75&dpl=dpl_G6WMfMehfVJz6P5qTrAU7i6T7SYx 1080w, /_next/image?url=%2Fimages%2Feditorial%2F8-best-dmarc-tools-for-msps-expert-tested-picks-for-2025%2F8-best-dmarc-tools-for-msps-expert-tested-picks-for-2025-hero.png&w=1200&q=75&dpl=dpl_G6WMfMehfVJz6P5qTrAU7i6T7SYx 1200w, /_next/image?url=%2Fimages%2Feditorial%2F8-best-dmarc-tools-for-msps-expert-tested-picks-for-2025%2F8-best-dmarc-tools-for-msps-expert-tested-picks-for-2025-hero.png&w=1920&q=75&dpl=dpl_G6WMfMehfVJz6P5qTrAU7i6T7SYx 1920w, /_next/image?url=%2Fimages%2Feditorial%2F8-best-dmarc-tools-for-msps-expert-tested-picks-for-2025%2F8-best-dmarc-tools-for-msps-expert-tested-picks-for-2025-hero.png&w=2048&q=75&dpl=dpl_G6WMfMehfVJz6P5qTrAU7i6T7SYx 2048w, /_next/image?url=%2Fimages%2Feditorial%2F8-best-dmarc-tools-for-msps-expert-tested-picks-for-2025%2F8-best-dmarc-tools-for-msps-expert-tested-picks-for-2025-hero.png&w=3840&q=75&dpl=dpl_G6WMfMehfVJz6P5qTrAU7i6T7SYx 3840w" src="/_next/image?url=%2Fimages%2Feditorial%2F8-best-dmarc-tools-for-msps-expert-tested-picks-for-2025%2F8-best-dmarc-tools-for-msps-expert-tested-picks-for-2025-hero.png&w=3840&q=75&dpl=dpl_G6WMfMehfVJz6P5qTrAU7i6T7SYx"/></div><span class="text-base font-semibold leading-snug text-palisade-dark group-hover:text-palisade-blue-light">8 DMARC tools for MSPs compared in 2026</span><span class="mt-2 text-sm text-palisade-gray-500">October 2, 2025</span></a></div></section></div><!--$--><!--/$--></main><footer class="mb-[74px] border-t border-palisade-border bg-white max-[768px]:mb-0 max-[768px]:pt-0 max-[768px]:pb-0 max-[480px]:px-[25px]"><div class="mx-auto max-w-[1300px] px-[25px] pt-12 pb-[90px]"><div class="grid grid-cols-2 gap-x-8 gap-y-8 md:grid-cols-3 lg:grid-cols-[180px_1fr_1fr_1fr_1fr_1fr]"><div class="col-span-2 md:col-span-3 lg:col-span-1"><a href="/"><img alt="Palisade" loading="lazy" width="135" height="16" decoding="async" data-nimg="1" style="color:transparent" srcSet="/_next/image?url=%2Fimages%2FPalisade%20Logo.png&w=256&q=75&dpl=dpl_G6WMfMehfVJz6P5qTrAU7i6T7SYx 1x, /_next/image?url=%2Fimages%2FPalisade%20Logo.png&w=384&q=75&dpl=dpl_G6WMfMehfVJz6P5qTrAU7i6T7SYx 2x" src="/_next/image?url=%2Fimages%2FPalisade%20Logo.png&w=384&q=75&dpl=dpl_G6WMfMehfVJz6P5qTrAU7i6T7SYx"/></a><a href="mailto:hello@palisade.email" class="mt-4 block text-sm text-palisade-dark hover:text-palisade-blue-light">hello@palisade.email</a><div class="mt-4 flex gap-3"><a href="https://twitter.com/Palisade_email" target="_blank" rel="noopener noreferrer" class="text-palisade-gray-400 hover:text-palisade-dark" aria-label="Twitter"><svg class="h-5 w-5" fill="currentColor" viewBox="0 0 24 24"><path d="M18.244 2.25h3.308l-7.227 8.26 8.502 11.24H16.17l-5.214-6.817L4.99 21.75H1.68l7.73-8.835L1.254 2.25H8.08l4.713 6.231zm-1.161 17.52h1.833L7.084 4.126H5.117z"></path></svg></a><a href="https://www.linkedin.com/company/palisadetech" target="_blank" rel="noopener noreferrer" class="text-palisade-gray-400 hover:text-palisade-dark" aria-label="LinkedIn"><svg class="h-5 w-5" fill="currentColor" viewBox="0 0 24 24"><path d="M20.447 20.452h-3.554v-5.569c0-1.328-.027-3.037-1.852-3.037-1.853 0-2.136 1.445-2.136 2.939v5.667H9.351V9h3.414v1.561h.046c.477-.9 1.637-1.85 3.37-1.85 3.601 0 4.267 2.37 4.267 5.455v6.286zM5.337 7.433a2.062 2.062 0 01-2.063-2.065 2.064 2.064 0 112.063 2.065zm1.782 13.019H3.555V9h3.564v11.452zM22.225 0H1.771C.792 0 0 .774 0 1.729v20.542C0 23.227.792 24 1.771 24h20.451C23.2 24 24 23.227 24 22.271V1.729C24 .774 23.2 0 22.222 0h.003z"></path></svg></a></div></div><div><h3 class="mb-4 text-base font-semibold text-palisade-dark">Products</h3><ul class="flex flex-col gap-[14px]"><li><a href="https://app.palisade.email/signup" target="_blank" rel="noopener noreferrer" class="text-sm text-palisade-dark hover:text-palisade-blue-light">Palisade AI-first DMARC</a></li><li><a class="text-sm text-palisade-dark hover:text-palisade-blue-light" href="/pricing">Pricing</a></li><li><a class="text-sm text-palisade-dark hover:text-palisade-blue-light" href="/tools/email-security-score">Email Deliverability</a></li><li><a href="https://developer.palisade.email/guide/guide" target="_blank" rel="noopener noreferrer" class="text-sm text-palisade-dark hover:text-palisade-blue-light">Palisade API</a></li></ul></div><div><h3 class="mb-4 text-base font-semibold text-palisade-dark">Tools</h3><ul class="flex flex-col gap-[14px]"><li><a class="text-sm text-palisade-dark hover:text-palisade-blue-light" href="/tools/email-security-score">Email Security Score</a></li><li><a class="text-sm text-palisade-dark hover:text-palisade-blue-light" href="/tools/bimi">BIMI Checker</a></li><li><a class="text-sm text-palisade-dark hover:text-palisade-blue-light" href="/tools/spf">SPF Checker</a></li><li><a class="text-sm text-palisade-dark hover:text-palisade-blue-light" href="/tools/dkim">DKIM Checker</a></li><li><a class="text-sm text-palisade-dark hover:text-palisade-blue-light" href="/tools/dmarc">DMARC Checker</a></li><li><a class="text-sm text-palisade-dark hover:text-palisade-blue-light" href="/tools/mx">MX Checker</a></li><li><a class="text-sm text-palisade-dark hover:text-palisade-blue-light" href="/tools/mta-sts">MTA-STS Checker</a></li><li><a class="text-sm text-palisade-dark hover:text-palisade-blue-light" href="/tools/dmarc-generator">DMARC Generator</a></li><li><a class="text-sm text-palisade-dark hover:text-palisade-blue-light" href="/tools/spf-generator">SPF Generator</a></li><li><a class="text-sm text-palisade-dark hover:text-palisade-blue-light" href="/tools/bimi-generator">BIMI Generator</a></li><li><a class="text-sm text-palisade-dark hover:text-palisade-blue-light" href="/tools/bimi-svg-converter">BIMI SVG Converter</a></li><li><a class="text-sm text-palisade-dark hover:text-palisade-blue-light" href="/tools/blocklist-checker">Blocklist Checker</a></li></ul></div><div><h3 class="mb-4 text-base font-semibold text-palisade-dark">Resources</h3><ul class="flex flex-col gap-[14px]"><li><a class="text-sm text-palisade-dark hover:text-palisade-blue-light" href="/resources">All Resources</a></li><li><a class="text-sm text-palisade-dark hover:text-palisade-blue-light" href="/learning/glossary">Email Auth Glossary</a></li><li><a class="text-sm text-palisade-dark hover:text-palisade-blue-light" href="/email-deliverability">Email Deliverability</a></li><li><a class="text-sm text-palisade-dark hover:text-palisade-blue-light" href="/learning/smtp-error-codes">SMTP Error Codes</a></li><li><a class="text-sm text-palisade-dark hover:text-palisade-blue-light" href="/category/master-guide">Master Guides</a></li><li><a class="text-sm text-palisade-dark hover:text-palisade-blue-light" href="/category/dmarc-guides">DMARC Guides</a></li><li><a class="text-sm text-palisade-dark hover:text-palisade-blue-light" href="/category/email-authentication">Email Authentication</a></li><li><a class="text-sm text-palisade-dark hover:text-palisade-blue-light" href="/category/security">Security</a></li><li><a class="text-sm text-palisade-dark hover:text-palisade-blue-light" href="/category/email">Email News</a></li><li><a class="text-sm text-palisade-dark hover:text-palisade-blue-light" href="/category/company">Company Blog</a></li></ul></div><div><h3 class="mb-4 text-base font-semibold text-palisade-dark">Tool comparisons</h3><ul class="flex flex-col gap-[14px]"><li><a class="text-sm text-palisade-dark hover:text-palisade-blue-light" href="/compare">All comparisons</a></li><li><a class="text-sm text-palisade-dark hover:text-palisade-blue-light" href="/powerdmarc-alternative">PowerDMARC</a></li><li><a class="text-sm text-palisade-dark hover:text-palisade-blue-light" href="/easydmarc-dmarc-alternative">EasyDMARC</a></li><li><a class="text-sm text-palisade-dark hover:text-palisade-blue-light" href="/dmarcian-dmarc-alternative">DMARCIAN</a></li><li><a class="text-sm text-palisade-dark hover:text-palisade-blue-light" href="/sendmarc-dmarc-alternative">SendMARC</a></li><li><a class="text-sm text-palisade-dark hover:text-palisade-blue-light" href="/valimail-alternative">Valimail</a></li><li><a class="text-sm text-palisade-dark hover:text-palisade-blue-light" href="/suped-alternative">Suped</a></li><li><a class="text-sm text-palisade-dark hover:text-palisade-blue-light" href="/dmarcly-alternative">DMARCLY</a></li><li><a class="text-sm text-palisade-dark hover:text-palisade-blue-light" href="/postmark-dmarc-alternative">Postmark DMARC</a></li><li><a class="text-sm text-palisade-dark hover:text-palisade-blue-light" href="/cloudflare-dmarc-alternative">Cloudflare DMARC</a></li><li><a class="text-sm text-palisade-dark hover:text-palisade-blue-light" href="/uriports-alternative">URIports</a></li></ul></div><div><h3 class="mb-4 text-base font-semibold text-palisade-dark">Company</h3><ul class="flex flex-col gap-[14px]"><li><a class="text-sm text-palisade-dark hover:text-palisade-blue-light" href="/contact-us">Contact us</a></li><li><a class="text-sm text-palisade-dark hover:text-palisade-blue-light" href="/terms-conditions">Terms & Conditions</a></li><li><a class="text-sm text-palisade-dark hover:text-palisade-blue-light" href="/privacy-policy">Privacy Policy</a></li></ul><div class="mt-6"><img src="/images/Vector-5.svg" alt="DigiCert" class="h-auto w-[120px]"/><span class="mt-1 block text-xs font-medium text-palisade-gray-500">Official Partner</span></div></div></div><div class="mt-12 flex flex-wrap items-center justify-between gap-3 border-t border-palisade-border pt-6"><p class="text-sm text-palisade-gray-400">© <!-- -->2026<!-- --> Palisade</p><a href="https://logo.dev" class="text-sm text-palisade-gray-400 underline decoration-palisade-gray-300 underline-offset-4 hover:text-palisade-blue-light">Logos provided by Logo.dev</a></div></div></footer><!--$!--><template data-dgst="BAILOUT_TO_CLIENT_SIDE_RENDERING"></template><!--/$--><!--$!--><template data-dgst="BAILOUT_TO_CLIENT_SIDE_RENDERING"></template><!--/$--><script src="/_next/static/chunks/cbf6bff9a409086e.js?dpl=dpl_G6WMfMehfVJz6P5qTrAU7i6T7SYx" id="_R_" async=""></script><script>(self.__next_f=self.__next_f||[]).push([0])</script><script>self.__next_f.push([1,"1:\"$Sreact.fragment\"\n2:I[79520,[\"/_next/static/chunks/3c22aeb80bdabc4f.js?dpl=dpl_G6WMfMehfVJz6P5qTrAU7i6T7SYx\",\"/_next/static/chunks/874f0e9db4f593ca.js?dpl=dpl_G6WMfMehfVJz6P5qTrAU7i6T7SYx\",\"/_next/static/chunks/b2d09427a4dc1cc9.js?dpl=dpl_G6WMfMehfVJz6P5qTrAU7i6T7SYx\",\"/_next/static/chunks/49eb543f4b7c43a6.js?dpl=dpl_G6WMfMehfVJz6P5qTrAU7i6T7SYx\"],\"\"]\ne:I[68027,[],\"default\"]\n:HL[\"/_next/static/chunks/ffa3736465956609.css?dpl=dpl_G6WMfMehfVJz6P5qTrAU7i6T7SYx\",\"style\"]\n:HL[\"/_next/static/chunks/8fb699a2a51fcf65.css?dpl=dpl_G6WMfMehfVJz6P5qTrAU7i6T7SYx\",\"style\"]\n:HL[\"/_next/static/media/ad9c66e761fed85a-s.p.bd81a64b.woff2\",\"font\",{\"crossOrigin\":\"\",\"type\":\"font/woff2\"}]\n3:T641,"])</script><script>self.__next_f.push([1,"!function(t,e){var o,n,p,r;e.__SV||(window.posthog\u0026\u0026window.posthog.__loaded)||(window.posthog=e,e._i=[],e.init=function(i,s,a){function g(t,e){var o=e.split(\".\");2==o.length\u0026\u0026(t=t[o[0]],e=o[1]),t[e]=function(){t.push([e].concat(Array.prototype.slice.call(arguments,0)))}}(p=t.createElement(\"script\")).type=\"text/javascript\",p.crossOrigin=\"anonymous\",p.async=!0,p.src=s.api_host.replace(\".i.posthog.com\",\"-assets.i.posthog.com\")+\"/static/array.js\",(r=t.getElementsByTagName(\"script\")[0]).parentNode.insertBefore(p,r);var u=e;for(void 0!==a?u=e[a]=[]:a=\"posthog\",u.people=u.people||[],u.toString=function(t){var e=\"posthog\";return\"posthog\"!==a\u0026\u0026(e+=\".\"+a),t||(e+=\" (stub)\"),e},u.people.toString=function(){return u.toString(1)+\".people (stub)\"},o=\"init capture identify alias people set_config register register_once unregister opt_out_capturing has_opted_out_capturing opt_in_capturing reset isFeatureEnabled onFeatureFlags getFeatureFlag getFeatureFlagPayload reloadFeatureFlags group updateEarlyAccessFeatureEnrollment getEarlyAccessFeatures getActiveMatchingSurveys getSurveys onSessionId\".split(\" \"),n=0;n\u003co.length;n++)g(u,o[n]);e._i.push([i,s,a])},e.__SV=1)}(document,window.posthog||[]);posthog.init('phc_McCRlmeXhWNpfpD6IoTBpKCRbNmWJkfefEJgH1dLkA1',{api_host:'https://us.i.posthog.com',defaults:'2025-11-30',person_profiles:'identified_only',disable_session_recording:true,disable_surveys:true,capture_dead_clicks:false,capture_performance:{web_vitals:false}});posthog.register(function(){var e=window.__palExperiments,p={};if(e){for(var k in e){p[\"exp_\"+k.replace(/-/g,\"_\")]=e[k]}}return p}());"])</script><script>self.__next_f.push([1,"0:{\"P\":null,\"b\":\"rjSzAnTuZw6JSifCs3dD4\",\"c\":[\"\",\"resources-post\",\"how-to-get-gmail-blue-verified-checkmark\"],\"q\":\"\",\"i\":false,\"f\":[[[\"\",{\"children\":[\"resources-post\",{\"children\":[[\"slug\",\"how-to-get-gmail-blue-verified-checkmark\",\"d\"],{\"children\":[\"__PAGE__\",{}]}]}]},\"$undefined\",\"$undefined\",true],[[\"$\",\"$1\",\"c\",{\"children\":[[[\"$\",\"link\",\"0\",{\"rel\":\"stylesheet\",\"href\":\"/_next/static/chunks/ffa3736465956609.css?dpl=dpl_G6WMfMehfVJz6P5qTrAU7i6T7SYx\",\"precedence\":\"next\",\"crossOrigin\":\"$undefined\",\"nonce\":\"$undefined\"}],[\"$\",\"link\",\"1\",{\"rel\":\"stylesheet\",\"href\":\"/_next/static/chunks/8fb699a2a51fcf65.css?dpl=dpl_G6WMfMehfVJz6P5qTrAU7i6T7SYx\",\"precedence\":\"next\",\"crossOrigin\":\"$undefined\",\"nonce\":\"$undefined\"}],[\"$\",\"script\",\"script-0\",{\"src\":\"/_next/static/chunks/3c22aeb80bdabc4f.js?dpl=dpl_G6WMfMehfVJz6P5qTrAU7i6T7SYx\",\"async\":true,\"nonce\":\"$undefined\"}],[\"$\",\"script\",\"script-1\",{\"src\":\"/_next/static/chunks/874f0e9db4f593ca.js?dpl=dpl_G6WMfMehfVJz6P5qTrAU7i6T7SYx\",\"async\":true,\"nonce\":\"$undefined\"}],[\"$\",\"script\",\"script-2\",{\"src\":\"/_next/static/chunks/b2d09427a4dc1cc9.js?dpl=dpl_G6WMfMehfVJz6P5qTrAU7i6T7SYx\",\"async\":true,\"nonce\":\"$undefined\"}],[\"$\",\"script\",\"script-3\",{\"src\":\"/_next/static/chunks/49eb543f4b7c43a6.js?dpl=dpl_G6WMfMehfVJz6P5qTrAU7i6T7SYx\",\"async\":true,\"nonce\":\"$undefined\"}]],[\"$\",\"html\",null,{\"lang\":\"en\",\"children\":[[\"$\",\"head\",null,{\"children\":[[\"$\",\"link\",null,{\"rel\":\"alternate\",\"type\":\"application/rss+xml\",\"title\":\"Palisade — DMARC \u0026 Email Security\",\"href\":\"/feed.xml\"}],[\"$\",\"script\",null,{\"type\":\"application/ld+json\",\"dangerouslySetInnerHTML\":{\"__html\":\"{\\\"@context\\\":\\\"https://schema.org\\\",\\\"@type\\\":\\\"Organization\\\",\\\"@id\\\":\\\"https://www.palisade.email#organization\\\",\\\"name\\\":\\\"Palisade\\\",\\\"url\\\":\\\"https://www.palisade.email\\\",\\\"logo\\\":{\\\"@type\\\":\\\"ImageObject\\\",\\\"url\\\":\\\"https://www.palisade.email/images/Palisade-Logo-1.png\\\"},\\\"email\\\":\\\"hello@palisade.email\\\",\\\"description\\\":\\\"AI-first DMARC software for IT teams and MSPs, from one domain to thousands.\\\"}\"}}],[\"$\",\"script\",null,{\"type\":\"application/ld+json\",\"dangerouslySetInnerHTML\":{\"__html\":\"{\\\"@context\\\":\\\"https://schema.org\\\",\\\"@type\\\":\\\"WebSite\\\",\\\"@id\\\":\\\"https://www.palisade.email#website\\\",\\\"name\\\":\\\"Palisade\\\",\\\"url\\\":\\\"https://www.palisade.email\\\",\\\"publisher\\\":{\\\"@id\\\":\\\"https://www.palisade.email#organization\\\"}}\"}}]]}],[\"$\",\"body\",null,{\"className\":\"noto_sans_jp_5f468dff-module__g3fLYW__variable font-sans antialiased\",\"children\":[[\"$\",\"script\",null,{\"dangerouslySetInnerHTML\":{\"__html\":\"(function(){try{var E=[],A={};for(var i=0;i\u003cE.length;i++){var k=E[i][0],vs=E[i][1],ws=E[i][2],sk=\\\"pal_exp_\\\"+k,v=null;try{v=localStorage.getItem(sk)}catch(e){}if(!v||vs.indexOf(v)\u003c0){var r=Math.random(),c=0;for(var j=0;j\u003cvs.length;j++){c+=ws[j];if(r\u003cc||j===vs.length-1){v=vs[j];break}}try{localStorage.setItem(sk,v)}catch(e){}}A[k]=v;document.documentElement.setAttribute(\\\"data-exp-\\\"+k,v)}window.__palExperiments=A}catch(e){}})();\"}}],[[\"$\",\"$L2\",null,{\"src\":\"https://www.googletagmanager.com/gtag/js?id=G-57N9JZ1N9K\",\"strategy\":\"lazyOnload\"}],[\"$\",\"$L2\",null,{\"id\":\"gtag-init\",\"strategy\":\"lazyOnload\",\"children\":\"window.dataLayer=window.dataLayer||[];function gtag(){dataLayer.push(arguments);}gtag('js',new Date());gtag('config','G-57N9JZ1N9K');gtag('config','AW-17577916135');\"}],[\"$\",\"$L2\",null,{\"id\":\"posthog-init\",\"strategy\":\"lazyOnload\",\"children\":\"$3\"}],\"$L4\"],\"$L5\",\"$L6\",\"$L7\",\"$L8\",\"$L9\"]}]]}]]}],{\"children\":[\"$La\",{\"children\":[\"$Lb\",{\"children\":[\"$Lc\",{},null,false,false]},null,false,false]},null,false,false]},null,false,false],\"$Ld\",false]],\"m\":\"$undefined\",\"G\":[\"$e\",[]],\"S\":true}\n"])</script><script>self.__next_f.push([1,"f:\"$Sreact.suspense\"\n10:I[64288,[\"/_next/static/chunks/3c22aeb80bdabc4f.js?dpl=dpl_G6WMfMehfVJz6P5qTrAU7i6T7SYx\",\"/_next/static/chunks/874f0e9db4f593ca.js?dpl=dpl_G6WMfMehfVJz6P5qTrAU7i6T7SYx\",\"/_next/static/chunks/b2d09427a4dc1cc9.js?dpl=dpl_G6WMfMehfVJz6P5qTrAU7i6T7SYx\",\"/_next/static/chunks/49eb543f4b7c43a6.js?dpl=dpl_G6WMfMehfVJz6P5qTrAU7i6T7SYx\"],\"default\"]\n11:I[2971,[\"/_next/static/chunks/3c22aeb80bdabc4f.js?dpl=dpl_G6WMfMehfVJz6P5qTrAU7i6T7SYx\",\"/_next/static/chunks/874f0e9db4f593ca.js?dpl=dpl_G6WMfMehfVJz6P5qTrAU7i6T7SYx\",\"/_next/static/chunks/b2d09427a4dc1cc9.js?dpl=dpl_G6WMfMehfVJz6P5qTrAU7i6T7SYx\",\"/_next/static/chunks/49eb543f4b7c43a6.js?dpl=dpl_G6WMfMehfVJz6P5qTrAU7i6T7SYx\"],\"default\"]\n12:I[39756,[\"/_next/static/chunks/ff1a16fafef87110.js?dpl=dpl_G6WMfMehfVJz6P5qTrAU7i6T7SYx\",\"/_next/static/chunks/5d2013ea39502e59.js?dpl=dpl_G6WMfMehfVJz6P5qTrAU7i6T7SYx\"],\"default\"]\n13:I[37457,[\"/_next/static/chunks/ff1a16fafef87110.js?dpl=dpl_G6WMfMehfVJz6P5qTrAU7i6T7SYx\",\"/_next/static/chunks/5d2013ea39502e59.js?dpl=dpl_G6WMfMehfVJz6P5qTrAU7i6T7SYx\"],\"default\"]\n14:I[22016,[\"/_next/static/chunks/3c22aeb80bdabc4f.js?dpl=dpl_G6WMfMehfVJz6P5qTrAU7i6T7SYx\",\"/_next/static/chunks/874f0e9db4f593ca.js?dpl=dpl_G6WMfMehfVJz6P5qTrAU7i6T7SYx\",\"/_next/static/chunks/b2d09427a4dc1cc9.js?dpl=dpl_G6WMfMehfVJz6P5qTrAU7i6T7SYx\",\"/_next/static/chunks/49eb543f4b7c43a6.js?dpl=dpl_G6WMfMehfVJz6P5qTrAU7i6T7SYx\",\"/_next/static/chunks/6103dac3ac1256f1.js?dpl=dpl_G6WMfMehfVJz6P5qTrAU7i6T7SYx\"],\"\"]\n15:I[5500,[\"/_next/static/chunks/3c22aeb80bdabc4f.js?dpl=dpl_G6WMfMehfVJz6P5qTrAU7i6T7SYx\",\"/_next/static/chunks/874f0e9db4f593ca.js?dpl=dpl_G6WMfMehfVJz6P5qTrAU7i6T7SYx\",\"/_next/static/chunks/b2d09427a4dc1cc9.js?dpl=dpl_G6WMfMehfVJz6P5qTrAU7i6T7SYx\",\"/_next/static/chunks/49eb543f4b7c43a6.js?dpl=dpl_G6WMfMehfVJz6P5qTrAU7i6T7SYx\",\"/_next/static/chunks/6103dac3ac1256f1.js?dpl=dpl_G6WMfMehfVJz6P5qTrAU7i6T7SYx\"],\"Image\"]\n23:I[57215,[\"/_next/static/chunks/3c22aeb80bdabc4f.js?dpl=dpl_G6WMfMehfVJz6P5qTrAU7i6T7SYx\",\"/_next/static/chunks/874f0e9db4f593ca.js?dpl=dpl_G6WMfMehfVJz6P5qTrAU7i6T7SYx\",\"/_next/static/chunks/b2d09427a4dc1cc9.js?dpl=dpl_G6WMfMehfVJz6P5qTrAU7i6T7SYx\",\"/_next/static/chunks/49eb543f4b7c43a6.js?dpl=dpl_G6WMfMehfVJz6P5qTrAU7i6T7SYx\"],\"SpeedInsights\"]\n24:I[2355,[\"/_next/static/chunks/3c22aeb80bdabc4f.js?dpl=dpl_G6WMfMehfVJz6P5qTrAU7i6T7SYx\",\"/_next/static/chunks/874f0e9db4f593ca.js?dpl=dpl_G6WMfMehfVJz6P5qTrAU7i6T7SYx\",\"/_next/static/chunks/b2d09427a4dc1cc9.js?dpl=dpl_G6WMfMehfVJz6P5qTrAU7i6T7SYx\",\"/_next/static/chunks/49eb543f4b7c43a6.js?dpl=dpl_G6WMfMehfVJz6P5qTrAU7i6T7SYx\"],\"Analytics\"]\n26:I[97367,[\"/_next/static/chunks/ff1a16fafef87110.js?dpl=dpl_G6WMfMehfVJz6P5qTrAU7i6T7SYx\",\"/_next/static/chunks/5d2013ea39502e59.js?dpl=dpl_G6WMfMehfVJz6P5qTrAU7i6T7SYx\"],\"OutletBoundary\"]\n28:I[97367,[\"/_next/static/chunks/ff1a16fafef87110.js?dpl=dpl_G6WMfMehfVJz6P5qTrAU7i6T7SYx\",\"/_next/static/chunks/5d2013ea39502e59.js?dpl=dpl_G6WMfMehfVJz6P5qTrAU7i6T7SYx\"],\"ViewportBoundary\"]\n2a:I[97367,[\"/_next/static/chunks/ff1a16fafef87110.js?dpl=dpl_G6WMfMehfVJz6P5qTrAU7i6T7SYx\",\"/_next/static/chunks/5d2013ea39502e59.js?dpl=dpl_G6WMfMehfVJz6P5qTrAU7i6T7SYx\"],\"MetadataBoundary\"]\n4:[\"$\",\"$f\",null,{\"fallback\":null,\"children\":[\"$\",\"$L10\",null,{}]}]\n5:[\"$\",\"$L11\",null,{}]\n6:[\"$\",\"main\",null,{\"children\":[\"$\",\"$L12\",null,{\"parallelRouterKey\":\"children\",\"error\":\"$undefined\",\"errorStyles\":\"$undefined\",\"errorScripts\":\"$undefined\",\"template\":[\"$\",\"$L13\",null,{}],\"templateStyles\":\"$undefined\",\"templateScripts\":\"$undefined\",\"notFound\":[[\"$\",\"div\",null,{\"className\":\"mx-auto flex min-h-[60vh] max-w-[600px] flex-col items-center justify-center px-[25px] text-center\",\"children\":[[\"$\",\"h1\",null,{\"className\":\"gradient-text text-6xl font-bold\",\"children\":\"404\"}],[\"$\",\"p\",null,{\"className\":\"mt-4 text-lg text-palisade-gray-600\",\"children\":\"This page could not be found.\"}],[\"$\",\"$L14\",null,{\"href\":\"/\",\"className\":\"btn-primary mt-8\",\"children\":\"Back to home\"}]]}],[]],\"forbidden\":\"$undefined\",\"unauthorized\":\"$undefined\"}]}]\n"])</script><script>self.__next_f.push([1,"7:[\"$\",\"footer\",null,{\"className\":\"mb-[74px] border-t border-palisade-border bg-white max-[768px]:mb-0 max-[768px]:pt-0 max-[768px]:pb-0 max-[480px]:px-[25px]\",\"children\":[\"$\",\"div\",null,{\"className\":\"mx-auto max-w-[1300px] px-[25px] pt-12 pb-[90px]\",\"children\":[[\"$\",\"div\",null,{\"className\":\"grid grid-cols-2 gap-x-8 gap-y-8 md:grid-cols-3 lg:grid-cols-[180px_1fr_1fr_1fr_1fr_1fr]\",\"children\":[[\"$\",\"div\",null,{\"className\":\"col-span-2 md:col-span-3 lg:col-span-1\",\"children\":[[\"$\",\"$L14\",null,{\"href\":\"/\",\"children\":[\"$\",\"$L15\",null,{\"src\":\"/images/Palisade Logo.png\",\"alt\":\"Palisade\",\"width\":135,\"height\":16}]}],[\"$\",\"a\",null,{\"href\":\"mailto:hello@palisade.email\",\"className\":\"mt-4 block text-sm text-palisade-dark hover:text-palisade-blue-light\",\"children\":\"hello@palisade.email\"}],[\"$\",\"div\",null,{\"className\":\"mt-4 flex gap-3\",\"children\":[[\"$\",\"a\",null,{\"href\":\"https://twitter.com/Palisade_email\",\"target\":\"_blank\",\"rel\":\"noopener noreferrer\",\"className\":\"text-palisade-gray-400 hover:text-palisade-dark\",\"aria-label\":\"Twitter\",\"children\":[\"$\",\"svg\",null,{\"className\":\"h-5 w-5\",\"fill\":\"currentColor\",\"viewBox\":\"0 0 24 24\",\"children\":[\"$\",\"path\",null,{\"d\":\"M18.244 2.25h3.308l-7.227 8.26 8.502 11.24H16.17l-5.214-6.817L4.99 21.75H1.68l7.73-8.835L1.254 2.25H8.08l4.713 6.231zm-1.161 17.52h1.833L7.084 4.126H5.117z\"}]}]}],[\"$\",\"a\",null,{\"href\":\"https://www.linkedin.com/company/palisadetech\",\"target\":\"_blank\",\"rel\":\"noopener noreferrer\",\"className\":\"text-palisade-gray-400 hover:text-palisade-dark\",\"aria-label\":\"LinkedIn\",\"children\":[\"$\",\"svg\",null,{\"className\":\"h-5 w-5\",\"fill\":\"currentColor\",\"viewBox\":\"0 0 24 24\",\"children\":[\"$\",\"path\",null,{\"d\":\"M20.447 20.452h-3.554v-5.569c0-1.328-.027-3.037-1.852-3.037-1.853 0-2.136 1.445-2.136 2.939v5.667H9.351V9h3.414v1.561h.046c.477-.9 1.637-1.85 3.37-1.85 3.601 0 4.267 2.37 4.267 5.455v6.286zM5.337 7.433a2.062 2.062 0 01-2.063-2.065 2.064 2.064 0 112.063 2.065zm1.782 13.019H3.555V9h3.564v11.452zM22.225 0H1.771C.792 0 0 .774 0 1.729v20.542C0 23.227.792 24 1.771 24h20.451C23.2 24 24 23.227 24 22.271V1.729C24 .774 23.2 0 22.222 0h.003z\"}]}]}]]}]]}],[[\"$\",\"div\",\"Products\",{\"children\":[[\"$\",\"h3\",null,{\"className\":\"mb-4 text-base font-semibold text-palisade-dark\",\"children\":\"Products\"}],[\"$\",\"ul\",null,{\"className\":\"flex flex-col gap-[14px]\",\"children\":[[\"$\",\"li\",\"https://app.palisade.email/signup\",{\"children\":[\"$\",\"a\",null,{\"href\":\"https://app.palisade.email/signup\",\"target\":\"_blank\",\"rel\":\"noopener noreferrer\",\"className\":\"text-sm text-palisade-dark hover:text-palisade-blue-light\",\"children\":\"Palisade AI-first DMARC\"}]}],[\"$\",\"li\",\"/pricing\",{\"children\":[\"$\",\"$L14\",null,{\"href\":\"/pricing\",\"className\":\"text-sm text-palisade-dark hover:text-palisade-blue-light\",\"children\":\"Pricing\"}]}],[\"$\",\"li\",\"/tools/email-security-score\",{\"children\":[\"$\",\"$L14\",null,{\"href\":\"/tools/email-security-score\",\"className\":\"text-sm text-palisade-dark hover:text-palisade-blue-light\",\"children\":\"Email Deliverability\"}]}],[\"$\",\"li\",\"https://developer.palisade.email/guide/guide\",{\"children\":[\"$\",\"a\",null,{\"href\":\"https://developer.palisade.email/guide/guide\",\"target\":\"_blank\",\"rel\":\"noopener noreferrer\",\"className\":\"text-sm text-palisade-dark hover:text-palisade-blue-light\",\"children\":\"Palisade API\"}]}]]}],\"$undefined\"]}],[\"$\",\"div\",\"Tools\",{\"children\":[[\"$\",\"h3\",null,{\"className\":\"mb-4 text-base font-semibold text-palisade-dark\",\"children\":\"Tools\"}],[\"$\",\"ul\",null,{\"className\":\"flex flex-col gap-[14px]\",\"children\":[[\"$\",\"li\",\"/tools/email-security-score\",{\"children\":[\"$\",\"$L14\",null,{\"href\":\"/tools/email-security-score\",\"className\":\"text-sm text-palisade-dark hover:text-palisade-blue-light\",\"children\":\"Email Security Score\"}]}],[\"$\",\"li\",\"/tools/bimi\",{\"children\":[\"$\",\"$L14\",null,{\"href\":\"/tools/bimi\",\"className\":\"text-sm text-palisade-dark hover:text-palisade-blue-light\",\"children\":\"BIMI Checker\"}]}],[\"$\",\"li\",\"/tools/spf\",{\"children\":[\"$\",\"$L14\",null,{\"href\":\"/tools/spf\",\"className\":\"text-sm text-palisade-dark hover:text-palisade-blue-light\",\"children\":\"SPF Checker\"}]}],[\"$\",\"li\",\"/tools/dkim\",{\"children\":\"$L16\"}],\"$L17\",\"$L18\",\"$L19\",\"$L1a\",\"$L1b\",\"$L1c\",\"$L1d\",\"$L1e\"]}],\"$undefined\"]}],\"$L1f\",\"$L20\",\"$L21\"]]}],\"$L22\"]}]}]\n"])</script><script>self.__next_f.push([1,"8:[\"$\",\"$L23\",null,{}]\n9:[\"$\",\"$L24\",null,{}]\na:[\"$\",\"$1\",\"c\",{\"children\":[null,[\"$\",\"$L12\",null,{\"parallelRouterKey\":\"children\",\"error\":\"$undefined\",\"errorStyles\":\"$undefined\",\"errorScripts\":\"$undefined\",\"template\":[\"$\",\"$L13\",null,{}],\"templateStyles\":\"$undefined\",\"templateScripts\":\"$undefined\",\"notFound\":\"$undefined\",\"forbidden\":\"$undefined\",\"unauthorized\":\"$undefined\"}]]}]\nb:[\"$\",\"$1\",\"c\",{\"children\":[null,[\"$\",\"$L12\",null,{\"parallelRouterKey\":\"children\",\"error\":\"$undefined\",\"errorStyles\":\"$undefined\",\"errorScripts\":\"$undefined\",\"template\":[\"$\",\"$L13\",null,{}],\"templateStyles\":\"$undefined\",\"templateScripts\":\"$undefined\",\"notFound\":\"$undefined\",\"forbidden\":\"$undefined\",\"unauthorized\":\"$undefined\"}]]}]\nc:[\"$\",\"$1\",\"c\",{\"children\":[\"$L25\",[[\"$\",\"script\",\"script-0\",{\"src\":\"/_next/static/chunks/6103dac3ac1256f1.js?dpl=dpl_G6WMfMehfVJz6P5qTrAU7i6T7SYx\",\"async\":true,\"nonce\":\"$undefined\"}]],[\"$\",\"$L26\",null,{\"children\":[\"$\",\"$f\",null,{\"name\":\"Next.MetadataOutlet\",\"children\":\"$@27\"}]}]]}]\nd:[\"$\",\"$1\",\"h\",{\"children\":[null,[\"$\",\"$L28\",null,{\"children\":\"$L29\"}],[\"$\",\"div\",null,{\"hidden\":true,\"children\":[\"$\",\"$L2a\",null,{\"children\":[\"$\",\"$f\",null,{\"name\":\"Next.Metadata\",\"children\":\"$L2b\"}]}]}],[\"$\",\"meta\",null,{\"name\":\"next-size-adjust\",\"content\":\"\"}]]}]\n"])</script><script>self.__next_f.push([1,":HL[\"/images/Vector-5.svg\",\"image\"]\n16:[\"$\",\"$L14\",null,{\"href\":\"/tools/dkim\",\"className\":\"text-sm text-palisade-dark hover:text-palisade-blue-light\",\"children\":\"DKIM Checker\"}]\n17:[\"$\",\"li\",\"/tools/dmarc\",{\"children\":[\"$\",\"$L14\",null,{\"href\":\"/tools/dmarc\",\"className\":\"text-sm text-palisade-dark hover:text-palisade-blue-light\",\"children\":\"DMARC Checker\"}]}]\n18:[\"$\",\"li\",\"/tools/mx\",{\"children\":[\"$\",\"$L14\",null,{\"href\":\"/tools/mx\",\"className\":\"text-sm text-palisade-dark hover:text-palisade-blue-light\",\"children\":\"MX Checker\"}]}]\n19:[\"$\",\"li\",\"/tools/mta-sts\",{\"children\":[\"$\",\"$L14\",null,{\"href\":\"/tools/mta-sts\",\"className\":\"text-sm text-palisade-dark hover:text-palisade-blue-light\",\"children\":\"MTA-STS Checker\"}]}]\n1a:[\"$\",\"li\",\"/tools/dmarc-generator\",{\"children\":[\"$\",\"$L14\",null,{\"href\":\"/tools/dmarc-generator\",\"className\":\"text-sm text-palisade-dark hover:text-palisade-blue-light\",\"children\":\"DMARC Generator\"}]}]\n1b:[\"$\",\"li\",\"/tools/spf-generator\",{\"children\":[\"$\",\"$L14\",null,{\"href\":\"/tools/spf-generator\",\"className\":\"text-sm text-palisade-dark hover:text-palisade-blue-light\",\"children\":\"SPF Generator\"}]}]\n1c:[\"$\",\"li\",\"/tools/bimi-generator\",{\"children\":[\"$\",\"$L14\",null,{\"href\":\"/tools/bimi-generator\",\"className\":\"text-sm text-palisade-dark hover:text-palisade-blue-light\",\"children\":\"BIMI Generator\"}]}]\n1d:[\"$\",\"li\",\"/tools/bimi-svg-converter\",{\"children\":[\"$\",\"$L14\",null,{\"href\":\"/tools/bimi-svg-converter\",\"className\":\"text-sm text-palisade-dark hover:text-palisade-blue-light\",\"children\":\"BIMI SVG Converter\"}]}]\n1e:[\"$\",\"li\",\"/tools/blocklist-checker\",{\"children\":[\"$\",\"$L14\",null,{\"href\":\"/tools/blocklist-checker\",\"className\":\"text-sm text-palisade-dark hover:text-palisade-blue-light\",\"children\":\"Blocklist Checker\"}]}]\n"])</script><script>self.__next_f.push([1,"1f:[\"$\",\"div\",\"Resources\",{\"children\":[[\"$\",\"h3\",null,{\"className\":\"mb-4 text-base font-semibold text-palisade-dark\",\"children\":\"Resources\"}],[\"$\",\"ul\",null,{\"className\":\"flex flex-col gap-[14px]\",\"children\":[[\"$\",\"li\",\"/resources\",{\"children\":[\"$\",\"$L14\",null,{\"href\":\"/resources\",\"className\":\"text-sm text-palisade-dark hover:text-palisade-blue-light\",\"children\":\"All Resources\"}]}],[\"$\",\"li\",\"/learning/glossary\",{\"children\":[\"$\",\"$L14\",null,{\"href\":\"/learning/glossary\",\"className\":\"text-sm text-palisade-dark hover:text-palisade-blue-light\",\"children\":\"Email Auth Glossary\"}]}],[\"$\",\"li\",\"/email-deliverability\",{\"children\":[\"$\",\"$L14\",null,{\"href\":\"/email-deliverability\",\"className\":\"text-sm text-palisade-dark hover:text-palisade-blue-light\",\"children\":\"Email Deliverability\"}]}],[\"$\",\"li\",\"/learning/smtp-error-codes\",{\"children\":[\"$\",\"$L14\",null,{\"href\":\"/learning/smtp-error-codes\",\"className\":\"text-sm text-palisade-dark hover:text-palisade-blue-light\",\"children\":\"SMTP Error Codes\"}]}],[\"$\",\"li\",\"/category/master-guide\",{\"children\":[\"$\",\"$L14\",null,{\"href\":\"/category/master-guide\",\"className\":\"text-sm text-palisade-dark hover:text-palisade-blue-light\",\"children\":\"Master Guides\"}]}],[\"$\",\"li\",\"/category/dmarc-guides\",{\"children\":[\"$\",\"$L14\",null,{\"href\":\"/category/dmarc-guides\",\"className\":\"text-sm text-palisade-dark hover:text-palisade-blue-light\",\"children\":\"DMARC Guides\"}]}],[\"$\",\"li\",\"/category/email-authentication\",{\"children\":[\"$\",\"$L14\",null,{\"href\":\"/category/email-authentication\",\"className\":\"text-sm text-palisade-dark hover:text-palisade-blue-light\",\"children\":\"Email Authentication\"}]}],[\"$\",\"li\",\"/category/security\",{\"children\":[\"$\",\"$L14\",null,{\"href\":\"/category/security\",\"className\":\"text-sm text-palisade-dark hover:text-palisade-blue-light\",\"children\":\"Security\"}]}],[\"$\",\"li\",\"/category/email\",{\"children\":[\"$\",\"$L14\",null,{\"href\":\"/category/email\",\"className\":\"text-sm text-palisade-dark hover:text-palisade-blue-light\",\"children\":\"Email News\"}]}],[\"$\",\"li\",\"/category/company\",{\"children\":[\"$\",\"$L14\",null,{\"href\":\"/category/company\",\"className\":\"text-sm text-palisade-dark hover:text-palisade-blue-light\",\"children\":\"Company Blog\"}]}]]}],\"$undefined\"]}]\n"])</script><script>self.__next_f.push([1,"20:[\"$\",\"div\",\"Tool comparisons\",{\"children\":[[\"$\",\"h3\",null,{\"className\":\"mb-4 text-base font-semibold text-palisade-dark\",\"children\":\"Tool comparisons\"}],[\"$\",\"ul\",null,{\"className\":\"flex flex-col gap-[14px]\",\"children\":[[\"$\",\"li\",\"/compare\",{\"children\":[\"$\",\"$L14\",null,{\"href\":\"/compare\",\"className\":\"text-sm text-palisade-dark hover:text-palisade-blue-light\",\"children\":\"All comparisons\"}]}],[\"$\",\"li\",\"/powerdmarc-alternative\",{\"children\":[\"$\",\"$L14\",null,{\"href\":\"/powerdmarc-alternative\",\"className\":\"text-sm text-palisade-dark hover:text-palisade-blue-light\",\"children\":\"PowerDMARC\"}]}],[\"$\",\"li\",\"/easydmarc-dmarc-alternative\",{\"children\":[\"$\",\"$L14\",null,{\"href\":\"/easydmarc-dmarc-alternative\",\"className\":\"text-sm text-palisade-dark hover:text-palisade-blue-light\",\"children\":\"EasyDMARC\"}]}],[\"$\",\"li\",\"/dmarcian-dmarc-alternative\",{\"children\":[\"$\",\"$L14\",null,{\"href\":\"/dmarcian-dmarc-alternative\",\"className\":\"text-sm text-palisade-dark hover:text-palisade-blue-light\",\"children\":\"DMARCIAN\"}]}],[\"$\",\"li\",\"/sendmarc-dmarc-alternative\",{\"children\":[\"$\",\"$L14\",null,{\"href\":\"/sendmarc-dmarc-alternative\",\"className\":\"text-sm text-palisade-dark hover:text-palisade-blue-light\",\"children\":\"SendMARC\"}]}],[\"$\",\"li\",\"/valimail-alternative\",{\"children\":[\"$\",\"$L14\",null,{\"href\":\"/valimail-alternative\",\"className\":\"text-sm text-palisade-dark hover:text-palisade-blue-light\",\"children\":\"Valimail\"}]}],[\"$\",\"li\",\"/suped-alternative\",{\"children\":[\"$\",\"$L14\",null,{\"href\":\"/suped-alternative\",\"className\":\"text-sm text-palisade-dark hover:text-palisade-blue-light\",\"children\":\"Suped\"}]}],[\"$\",\"li\",\"/dmarcly-alternative\",{\"children\":[\"$\",\"$L14\",null,{\"href\":\"/dmarcly-alternative\",\"className\":\"text-sm text-palisade-dark hover:text-palisade-blue-light\",\"children\":\"DMARCLY\"}]}],[\"$\",\"li\",\"/postmark-dmarc-alternative\",{\"children\":[\"$\",\"$L14\",null,{\"href\":\"/postmark-dmarc-alternative\",\"className\":\"text-sm text-palisade-dark hover:text-palisade-blue-light\",\"children\":\"Postmark DMARC\"}]}],[\"$\",\"li\",\"/cloudflare-dmarc-alternative\",{\"children\":[\"$\",\"$L14\",null,{\"href\":\"/cloudflare-dmarc-alternative\",\"className\":\"text-sm text-palisade-dark hover:text-palisade-blue-light\",\"children\":\"Cloudflare DMARC\"}]}],[\"$\",\"li\",\"/uriports-alternative\",{\"children\":[\"$\",\"$L14\",null,{\"href\":\"/uriports-alternative\",\"className\":\"text-sm text-palisade-dark hover:text-palisade-blue-light\",\"children\":\"URIports\"}]}]]}],\"$undefined\"]}]\n"])</script><script>self.__next_f.push([1,"21:[\"$\",\"div\",\"Company\",{\"children\":[[\"$\",\"h3\",null,{\"className\":\"mb-4 text-base font-semibold text-palisade-dark\",\"children\":\"Company\"}],[\"$\",\"ul\",null,{\"className\":\"flex flex-col gap-[14px]\",\"children\":[[\"$\",\"li\",\"/contact-us\",{\"children\":[\"$\",\"$L14\",null,{\"href\":\"/contact-us\",\"className\":\"text-sm text-palisade-dark hover:text-palisade-blue-light\",\"children\":\"Contact us\"}]}],[\"$\",\"li\",\"/terms-conditions\",{\"children\":[\"$\",\"$L14\",null,{\"href\":\"/terms-conditions\",\"className\":\"text-sm text-palisade-dark hover:text-palisade-blue-light\",\"children\":\"Terms \u0026 Conditions\"}]}],[\"$\",\"li\",\"/privacy-policy\",{\"children\":[\"$\",\"$L14\",null,{\"href\":\"/privacy-policy\",\"className\":\"text-sm text-palisade-dark hover:text-palisade-blue-light\",\"children\":\"Privacy Policy\"}]}]]}],[\"$\",\"div\",null,{\"className\":\"mt-6\",\"children\":[[\"$\",\"img\",null,{\"src\":\"/images/Vector-5.svg\",\"alt\":\"DigiCert\",\"className\":\"h-auto w-[120px]\"}],[\"$\",\"span\",null,{\"className\":\"mt-1 block text-xs font-medium text-palisade-gray-500\",\"children\":\"Official Partner\"}]]}]]}]\n22:[\"$\",\"div\",null,{\"className\":\"mt-12 flex flex-wrap items-center justify-between gap-3 border-t border-palisade-border pt-6\",\"children\":[[\"$\",\"p\",null,{\"className\":\"text-sm text-palisade-gray-400\",\"children\":[\"© \",2026,\" Palisade\"]}],[\"$\",\"a\",null,{\"href\":\"https://logo.dev\",\"className\":\"text-sm text-palisade-gray-400 underline decoration-palisade-gray-300 underline-offset-4 hover:text-palisade-blue-light\",\"children\":\"Logos provided by Logo.dev\"}]]}]\n"])</script><script>self.__next_f.push([1,"2c:Tcc9,"])</script><script>self.__next_f.push([1,"{\"@context\":\"https://schema.org\",\"@type\":\"FAQPage\",\"mainEntity\":[{\"@type\":\"Question\",\"name\":\"Why Set Up SPF, DKIM, and DMARC for Your Domain?\",\"acceptedAnswer\":{\"@type\":\"Answer\",\"text\":\"Setting up SPF, DKIM, and DMARC records for your domain is crucial for improving email deliverability and trustworthiness. These protocols authenticate your email messages, ensuring they come from a legitimate source. This authentication helps prevent your emails from being flagged as spam or rejected by email servers. By implementing SPF, DKIM, and DMARC, you increase the likelihood of your emails reaching the intended recipients’ inboxes. \"}},{\"@type\":\"Question\",\"name\":\"Somewhat challenging?\",\"acceptedAnswer\":{\"@type\":\"Answer\",\"text\":\"Setting up DMARC and managing email authentication protocols like SPF and DKIM can be technically complex. If you find yourself in need of assistance with these steps, we're here to help. Our experienced team can provide you with the guidance and support you need to properly configure DMARC, SPF, and DKIM for your domain. Whether you have questions, need clarification, or require hands-on assistance, don't hesitate to reach out to us. Get in touch with our team, and we'll ensure you receive the right pointers to help you establish a robust email authentication setup and get your SVG logo done right.\"}},{\"@type\":\"Question\",\"name\":\"Seems like a lot to do on your own?\",\"acceptedAnswer\":{\"@type\":\"Answer\",\"text\":\"Palisade does not register trademarks. Use qualified legal counsel for trademark work. After that, Palisade can help verify the email-authentication and DNS requirements that support BIMI.\"}},{\"@type\":\"Question\",\"name\":\"What will be covered in Step 3?\",\"acceptedAnswer\":{\"@type\":\"Answer\",\"text\":\"- What is a Verified Mark Certificate (VMC)? - Applying for a VMC - Understanding the Costs and Timelines for VMC - Future of VMC: Including Non-Trademarked Logos - Frequently Asked Questions about the VMC\"}},{\"@type\":\"Question\",\"name\":\"What is a Verified Mark Certificate (VMC)?\",\"acceptedAnswer\":{\"@type\":\"Answer\",\"text\":\"In the digital era, establishing brand identity and ensuring the legitimacy of communication channels have become pivotal for businesses. One tool that assists in these goals is the Verified Mark Certificate (VMC). This comprehensive guide provides an overview of VMC, its importance in email marketing, the steps to obtain one, and future updates on VMC eligibility. Obtaining your VMC is the holy grail to get finally getting your BIMI record. A Verified Mark Certificate (VMC) is a digital certificate that verifies the ownership of a logo. Issued by a Certificate Authority, it validates that the organization is the legal owner of the brand logo.\"}},{\"@type\":\"Question\",\"name\":\"What will be covered in Step 4?\",\"acceptedAnswer\":{\"@type\":\"Answer\",\"text\":\"- Understanding BIMI Records - Creating a BIMI Record - Adding Your BIMI Record to Your DNS - Validating Your BIMI Record - Troubleshooting possible problems\"}},{\"@type\":\"Question\",\"name\":\"Need help?\",\"acceptedAnswer\":{\"@type\":\"Answer\",\"text\":\"Palisade can help validate the DNS and authentication work behind BIMI. Logo formatting, trademark eligibility, and certificate issuance still depend on external requirements and providers. \"}}]}"])</script><script>self.__next_f.push([1,"25:[\"$\",\"div\",null,{\"className\":\"mx-auto w-full min-w-0 max-w-[1180px] px-[25px] py-12\",\"children\":[[\"$\",\"script\",null,{\"type\":\"application/ld+json\",\"dangerouslySetInnerHTML\":{\"__html\":\"{\\\"@context\\\":\\\"https://schema.org\\\",\\\"@type\\\":\\\"Article\\\",\\\"headline\\\":\\\"Master Guide: Obtaining your blue verified Gmail checkmark\\\",\\\"description\\\":\\\"Guide to Gmail’s blue checkmark, mastering BIMI, SPF, DKIM, DMARC with Palisade’s AI Workflow.\\\",\\\"image\\\":\\\"https://www.palisade.email/images/editorial/how-to-get-gmail-blue-verified-checkmark/how-to-get-gmail-blue-verified-checkmark-hero.png\\\",\\\"datePublished\\\":\\\"2023-08-09T00:01:51.518Z\\\",\\\"dateModified\\\":\\\"2025-06-10T16:03:29.148Z\\\",\\\"author\\\":{\\\"@type\\\":\\\"Person\\\",\\\"name\\\":\\\"Samuel Chenard\\\",\\\"url\\\":\\\"https://www.palisade.email/author/samuel-chenard\\\"},\\\"publisher\\\":{\\\"@type\\\":\\\"Organization\\\",\\\"name\\\":\\\"Palisade\\\",\\\"logo\\\":{\\\"@type\\\":\\\"ImageObject\\\",\\\"url\\\":\\\"https://www.palisade.email/images/Palisade-Logo-1.png\\\"}},\\\"mainEntityOfPage\\\":{\\\"@type\\\":\\\"WebPage\\\",\\\"@id\\\":\\\"https://www.palisade.email/resources-post/how-to-get-gmail-blue-verified-checkmark\\\"}}\"}}],[\"$\",\"script\",null,{\"type\":\"application/ld+json\",\"dangerouslySetInnerHTML\":{\"__html\":\"{\\\"@context\\\":\\\"https://schema.org\\\",\\\"@type\\\":\\\"BreadcrumbList\\\",\\\"itemListElement\\\":[{\\\"@type\\\":\\\"ListItem\\\",\\\"position\\\":1,\\\"name\\\":\\\"Home\\\",\\\"item\\\":\\\"https://www.palisade.email\\\"},{\\\"@type\\\":\\\"ListItem\\\",\\\"position\\\":2,\\\"name\\\":\\\"Back to Resources\\\",\\\"item\\\":\\\"https://www.palisade.email/resources\\\"},{\\\"@type\\\":\\\"ListItem\\\",\\\"position\\\":3,\\\"name\\\":\\\"Master Guide: Obtaining your blue verified Gmail checkmark\\\",\\\"item\\\":\\\"https://www.palisade.email/resources-post/how-to-get-gmail-blue-verified-checkmark\\\"}]}\"}}],null,[\"$\",\"script\",null,{\"type\":\"application/ld+json\",\"dangerouslySetInnerHTML\":{\"__html\":\"$2c\"}}],\"$L2d\",\"$L2e\"]}]\n"])</script><script>self.__next_f.push([1,"2f:I[48648,[\"/_next/static/chunks/3c22aeb80bdabc4f.js?dpl=dpl_G6WMfMehfVJz6P5qTrAU7i6T7SYx\",\"/_next/static/chunks/874f0e9db4f593ca.js?dpl=dpl_G6WMfMehfVJz6P5qTrAU7i6T7SYx\",\"/_next/static/chunks/b2d09427a4dc1cc9.js?dpl=dpl_G6WMfMehfVJz6P5qTrAU7i6T7SYx\",\"/_next/static/chunks/49eb543f4b7c43a6.js?dpl=dpl_G6WMfMehfVJz6P5qTrAU7i6T7SYx\",\"/_next/static/chunks/6103dac3ac1256f1.js?dpl=dpl_G6WMfMehfVJz6P5qTrAU7i6T7SYx\"],\"default\"]\n"])</script><script>self.__next_f.push([1,"2d:[\"$\",\"div\",null,{\"className\":\"grid min-w-0 grid-cols-1 gap-12 lg:grid-cols-[minmax(0,1fr)_300px]\",\"children\":[[\"$\",\"article\",null,{\"className\":\"mx-auto w-full min-w-0 max-w-[760px]\",\"children\":[[\"$\",\"$L14\",null,{\"href\":\"/resources\",\"className\":\"mb-8 inline-flex items-center gap-1 text-sm text-palisade-gray-500 hover:text-palisade-blue-light\",\"children\":[[\"$\",\"svg\",null,{\"className\":\"h-4 w-4\",\"fill\":\"none\",\"viewBox\":\"0 0 24 24\",\"stroke\":\"currentColor\",\"children\":[\"$\",\"path\",null,{\"strokeLinecap\":\"round\",\"strokeLinejoin\":\"round\",\"strokeWidth\":2,\"d\":\"M15 19l-7-7 7-7\"}]}],\"Back to Resources\"]}],[\"$\",\"$L14\",null,{\"href\":\"/category/master-guide\",\"className\":\"mb-3 flex w-fit rounded-full border border-palisade-border px-3 py-1 text-xs font-semibold uppercase tracking-wide text-palisade-blue hover:border-palisade-blue-light hover:text-palisade-blue-light\",\"children\":\"Master Guides\"}],[\"$\",\"h1\",null,{\"className\":\"gradient-text h1-page font-bold text-balance\",\"children\":\"Master Guide: Obtaining your blue verified Gmail checkmark\"}],[\"$\",\"div\",null,{\"className\":\"mt-4 flex flex-wrap items-center gap-x-2 gap-y-1 text-sm text-palisade-gray-500\",\"children\":[[\"$\",\"$L14\",null,{\"href\":\"/author/samuel-chenard\",\"className\":\"font-medium text-palisade-dark underline-offset-2 hover:text-palisade-blue-light hover:underline\",\"children\":[\"By \",\"Samuel Chenard\"]}],[\"$\",\"span\",null,{\"aria-hidden\":\"true\",\"children\":\"·\"}],[\"$\",\"span\",null,{\"children\":\"August 9, 2023\"}],[[\"$\",\"span\",null,{\"aria-hidden\":\"true\",\"children\":\"·\"}],[\"$\",\"span\",null,{\"className\":\"font-medium text-palisade-dark\",\"children\":[\"Updated \",\"June 10, 2025\"]}]],[\"$\",\"span\",null,{\"aria-hidden\":\"true\",\"children\":\"·\"}],[\"$\",\"span\",null,{\"children\":[32,\" min read\"]}]]}],[\"$\",\"div\",null,{\"className\":\"mt-5\",\"children\":[\"$\",\"div\",null,{\"className\":\"flex max-w-full flex-wrap items-center gap-2\",\"children\":[[\"$\",\"span\",null,{\"className\":\"text-sm text-palisade-gray-500\",\"children\":\"Ask AI to explain\"}],[[\"$\",\"$L2f\",\"chatgpt\",{\"href\":\"https://chatgpt.com/?q=Read%20and%20summarize%20this%20page%20(%22Master%20Guide%3A%20Obtaining%20your%20blue%20verified%20Gmail%20checkmark%22)%2C%20then%20flag%20anything%20unclear%2C%20missing%2C%20or%20out%20of%20date%3A%20https%3A%2F%2Fwww.palisade.email%2Fresources-post%2Fhow-to-get-gmail-blue-verified-checkmark\",\"event\":\"ask_ai_clicked\",\"eventProps\":{\"platform\":\"chatgpt\",\"question\":\"summarize\",\"placement\":\"article_top\"},\"target\":\"_blank\",\"rel\":\"noopener noreferrer\",\"className\":\"inline-flex max-w-full items-center rounded-full border-card bg-white font-medium text-palisade-dark transition-colors hover:border-palisade-blue-light hover:text-palisade-blue-light gap-1.5 px-3 py-1.5 text-sm\",\"children\":[[\"$\",\"$L15\",null,{\"src\":\"/images/ai/chatgpt.png\",\"alt\":\"\",\"width\":16,\"height\":16,\"className\":\"h-4 w-4 shrink-0 rounded-[3px] object-contain\"}],\"ChatGPT\"]}],[\"$\",\"$L2f\",\"claude\",{\"href\":\"https://claude.ai/new?q=Read%20and%20summarize%20this%20page%20(%22Master%20Guide%3A%20Obtaining%20your%20blue%20verified%20Gmail%20checkmark%22)%2C%20then%20flag%20anything%20unclear%2C%20missing%2C%20or%20out%20of%20date%3A%20https%3A%2F%2Fwww.palisade.email%2Fresources-post%2Fhow-to-get-gmail-blue-verified-checkmark\",\"event\":\"ask_ai_clicked\",\"eventProps\":{\"platform\":\"claude\",\"question\":\"summarize\",\"placement\":\"article_top\"},\"target\":\"_blank\",\"rel\":\"noopener noreferrer\",\"className\":\"inline-flex max-w-full items-center rounded-full border-card bg-white font-medium text-palisade-dark transition-colors hover:border-palisade-blue-light hover:text-palisade-blue-light gap-1.5 px-3 py-1.5 text-sm\",\"children\":[[\"$\",\"$L15\",null,{\"src\":\"/images/ai/claude.png\",\"alt\":\"\",\"width\":16,\"height\":16,\"className\":\"h-4 w-4 shrink-0 rounded-[3px] object-contain\"}],\"Claude\"]}],[\"$\",\"$L2f\",\"gemini\",{\"href\":\"https://gemini.google.com/app?q=Read%20and%20summarize%20this%20page%20(%22Master%20Guide%3A%20Obtaining%20your%20blue%20verified%20Gmail%20checkmark%22)%2C%20then%20flag%20anything%20unclear%2C%20missing%2C%20or%20out%20of%20date%3A%20https%3A%2F%2Fwww.palisade.email%2Fresources-post%2Fhow-to-get-gmail-blue-verified-checkmark\",\"event\":\"ask_ai_clicked\",\"eventProps\":{\"platform\":\"gemini\",\"question\":\"summarize\",\"placement\":\"article_top\"},\"target\":\"_blank\",\"rel\":\"noopener noreferrer\",\"className\":\"inline-flex max-w-full items-center rounded-full border-card bg-white font-medium text-palisade-dark transition-colors hover:border-palisade-blue-light hover:text-palisade-blue-light gap-1.5 px-3 py-1.5 text-sm\",\"children\":[\"$L30\",\"Gemini\"]}],\"$L31\",\"$L32\"]]}]}],\"$L33\",\"$L34\",false,\"$L35\",\"$L36\",\"$L37\"]}],\"$L38\"]}]\n"])</script><script>self.__next_f.push([1,"2e:[\"$\",\"section\",null,{\"className\":\"mt-16\",\"children\":[[\"$\",\"h2\",null,{\"className\":\"text-2xl font-bold text-palisade-dark\",\"children\":\"Related articles\"}],[\"$\",\"div\",null,{\"className\":\"mt-6 grid gap-6 sm:grid-cols-2 lg:grid-cols-4\",\"children\":[[\"$\",\"$L14\",\"mxtoolbox-alternatives\",{\"href\":\"/resources-post/mxtoolbox-alternatives\",\"className\":\"group flex flex-col rounded-[20px] border border-palisade-border bg-white p-5 shadow-card transition hover:border-palisade-blue-light hover:-translate-y-0.5\",\"children\":[[\"$\",\"div\",null,{\"className\":\"relative mb-4 aspect-video w-full overflow-hidden rounded-lg\",\"children\":[\"$\",\"$L15\",null,{\"src\":\"/images/editorial/mxtoolbox-alternatives/mxtoolbox-alternatives-hero.png?v=20260728\",\"alt\":\"MXToolbox alternatives: choose by diagnostic job\",\"fill\":true,\"className\":\"object-cover transition-transform group-hover:scale-[1.02]\",\"sizes\":\"(max-width: 640px) 100vw, (max-width: 1024px) 50vw, 25vw\"}]}],[\"$\",\"span\",null,{\"className\":\"text-base font-semibold leading-snug text-palisade-dark group-hover:text-palisade-blue-light\",\"children\":\"MXToolbox alternatives: choose by diagnostic job\"}],[\"$\",\"span\",null,{\"className\":\"mt-2 text-sm text-palisade-gray-500\",\"children\":\"July 27, 2026\"}]]}],[\"$\",\"$L14\",\"feature-spotlight-dmarc-agent-ai-assisted\",{\"href\":\"/resources-post/feature-spotlight-dmarc-agent-ai-assisted\",\"className\":\"group flex flex-col rounded-[20px] border border-palisade-border bg-white p-5 shadow-card transition hover:border-palisade-blue-light hover:-translate-y-0.5\",\"children\":[[\"$\",\"div\",null,{\"className\":\"relative mb-4 aspect-video w-full overflow-hidden rounded-lg\",\"children\":[\"$\",\"$L15\",null,{\"src\":\"/images/editorial/feature-spotlight-dmarc-agent-ai-assisted/feature-spotlight-dmarc-agent-ai-assisted-hero.png\",\"alt\":\"Feature spotlight: DMARC Agent\",\"fill\":true,\"className\":\"object-cover transition-transform group-hover:scale-[1.02]\",\"sizes\":\"(max-width: 640px) 100vw, (max-width: 1024px) 50vw, 25vw\"}]}],[\"$\",\"span\",null,{\"className\":\"text-base font-semibold leading-snug text-palisade-dark group-hover:text-palisade-blue-light\",\"children\":\"Feature spotlight: DMARC Agent\"}],[\"$\",\"span\",null,{\"className\":\"mt-2 text-sm text-palisade-gray-500\",\"children\":\"November 25, 2025\"}]]}],[\"$\",\"$L14\",\"feature-spotlight-whitelabel-prospecting-reports\",{\"href\":\"/resources-post/feature-spotlight-whitelabel-prospecting-reports\",\"className\":\"group flex flex-col rounded-[20px] border border-palisade-border bg-white p-5 shadow-card transition hover:border-palisade-blue-light hover:-translate-y-0.5\",\"children\":[[\"$\",\"div\",null,{\"className\":\"relative mb-4 aspect-video w-full overflow-hidden rounded-lg\",\"children\":[\"$\",\"$L15\",null,{\"src\":\"/images/editorial/feature-spotlight-whitelabel-prospecting-reports/feature-spotlight-whitelabel-prospecting-reports-hero.png\",\"alt\":\"Feature spotlight: Whitelabel prospecting reports\",\"fill\":true,\"className\":\"object-cover transition-transform group-hover:scale-[1.02]\",\"sizes\":\"(max-width: 640px) 100vw, (max-width: 1024px) 50vw, 25vw\"}]}],[\"$\",\"span\",null,{\"className\":\"text-base font-semibold leading-snug text-palisade-dark group-hover:text-palisade-blue-light\",\"children\":\"Feature spotlight: Whitelabel prospecting reports\"}],[\"$\",\"span\",null,{\"className\":\"mt-2 text-sm text-palisade-gray-500\",\"children\":\"October 16, 2025\"}]]}],[\"$\",\"$L14\",\"8-best-dmarc-tools-for-msps-expert-tested-picks-for-2025\",{\"href\":\"/resources-post/8-best-dmarc-tools-for-msps-expert-tested-picks-for-2025\",\"className\":\"group flex flex-col rounded-[20px] border border-palisade-border bg-white p-5 shadow-card transition hover:border-palisade-blue-light hover:-translate-y-0.5\",\"children\":[[\"$\",\"div\",null,{\"className\":\"relative mb-4 aspect-video w-full overflow-hidden rounded-lg\",\"children\":\"$L39\"}],\"$L3a\",\"$L3b\"]}]]}]]}]\n"])</script><script>self.__next_f.push([1,"30:[\"$\",\"$L15\",null,{\"src\":\"/images/ai/gemini.png\",\"alt\":\"\",\"width\":16,\"height\":16,\"className\":\"h-4 w-4 shrink-0 rounded-[3px] object-contain\"}]\n31:[\"$\",\"$L2f\",\"perplexity\",{\"href\":\"https://www.perplexity.ai/search?q=Read%20and%20summarize%20this%20page%20(%22Master%20Guide%3A%20Obtaining%20your%20blue%20verified%20Gmail%20checkmark%22)%2C%20then%20flag%20anything%20unclear%2C%20missing%2C%20or%20out%20of%20date%3A%20https%3A%2F%2Fwww.palisade.email%2Fresources-post%2Fhow-to-get-gmail-blue-verified-checkmark\",\"event\":\"ask_ai_clicked\",\"eventProps\":{\"platform\":\"perplexity\",\"question\":\"summarize\",\"placement\":\"article_top\"},\"target\":\"_blank\",\"rel\":\"noopener noreferrer\",\"className\":\"inline-flex max-w-full items-center rounded-full border-card bg-white font-medium text-palisade-dark transition-colors hover:border-palisade-blue-light hover:text-palisade-blue-light gap-1.5 px-3 py-1.5 text-sm\",\"children\":[[\"$\",\"$L15\",null,{\"src\":\"/images/ai/perplexity.png\",\"alt\":\"\",\"width\":16,\"height\":16,\"className\":\"h-4 w-4 shrink-0 rounded-[3px] object-contain\"}],\"Perplexity\"]}]\n32:[\"$\",\"$L2f\",\"grok\",{\"href\":\"https://grok.com/?q=Read%20and%20summarize%20this%20page%20(%22Master%20Guide%3A%20Obtaining%20your%20blue%20verified%20Gmail%20checkmark%22)%2C%20then%20flag%20anything%20unclear%2C%20missing%2C%20or%20out%20of%20date%3A%20https%3A%2F%2Fwww.palisade.email%2Fresources-post%2Fhow-to-get-gmail-blue-verified-checkmark\",\"event\":\"ask_ai_clicked\",\"eventProps\":{\"platform\":\"grok\",\"question\":\"summarize\",\"placement\":\"article_top\"},\"target\":\"_blank\",\"rel\":\"noopener noreferrer\",\"className\":\"inline-flex max-w-full items-center rounded-full border-card bg-white font-medium text-palisade-dark transition-colors hover:border-palisade-blue-light hover:text-palisade-blue-light gap-1.5 px-3 py-1.5 text-sm\",\"children\":[[\"$\",\"$L15\",null,{\"src\":\"/images/ai/grok.png\",\"alt\":\"\",\"width\":16,\"height\":16,\"className\":\"h-4 w-4 shrink-0 rounded-[3px] object-contain\"}],\"Grok\"]}]\n33:[\"$\",\"div\",null,{\"className\":\"relative mt-8 aspect-video w-full overflow-hidden rounded-[20px]\",\"children\":[[\"$\",\"$L15\",null,{\"src\":\"/images/editorial/how-to-get-gmail-blue-verified-checkmark/how-to-get-gmail-blue-verified-checkmark-hero.png\",\"alt\":\"Master Guide: Obtaining your blue verified Gmail checkmark\",\"fill\":true,\"className\":\"object-cover\",\"priority\":true,\"sizes\":\"(max-width: 760px) 100vw, 760px\"}],false]}]\n3c:Tcd56,"])</script><script>self.__next_f.push([1,"\u003cimg src=\"/images/cms/67e43fd92e5486310d20cb68_verified-gmail-checkmark-palisade.png\" alt=\"__wf_reserved_inherit\" loading=\"lazy\" decoding=\"async\" /\u003e\n\n\u003cp\u003eIn today's fast-paced digital world, authenticity and credibility are paramount. It's no surprise, then, that since its introduction by Gmail in May 2023, the blue verified checkmark has become a critical asset for brands seeking to build trust. This symbol, tied to \u003ca href=\"https://palisade.email/learning/what-is-bimi\"\u003eBIMI (Brand Indicators for Message Identification)\u003c/a\u003e, showcases your brand’s legitimacy in email inboxes. Acquiring it, however, involves a detailed process requiring patience and precision.\u003c/p\u003e\n\u003cp\u003eAs business owners ourselves, we know how vital securing and optimizing \u003ca href=\"https://palisade.email/learning/what-is-email-deliverability\"\u003eemail deliverability\u003c/a\u003e is for success. We've crafted this comprehensive guide to help companies of all technical skill levels navigate the pathway to the checkmark. We'll lead you through these crucial steps:\u003c/p\u003e\n\u003cp\u003eThe process spans email authentication, a compatible brand logo, and the certificate requirements that apply to your logo type. Palisade's \u003ca href=\"https://app.palisade.email/signup\" target=\"_blank\" rel=\"noopener noreferrer\"\u003eAI-first DMARC agent\u003c/a\u003e can help with the authentication work. Trademark and certificate work remains with the relevant legal and certificate providers.\u003c/p\u003e\n\u003cp\u003e\u003c/p\u003e\n\u003ch2 id=\"step-1-configuring-your-dns-and-preparing-to-set-up-your-bimi-record-laying-the-\"\u003eStep 1→ Configuring your DNS and Preparing to set up your BIMI record – laying the necessary groundwork.\u003c/h2\u003e\n\u003cimg src=\"/images/cms/64d2d76f1c7443da13c04056_649c7f91ce2580b826749acc_dns-record-explanation-to-get-gmail-verified-blue-checkmark-1.png\" alt=\"\" loading=\"lazy\" decoding=\"async\" /\u003e\n\u003cp\u003eIn this initial stage, we'll lay the groundwork for your verified checkmark by preparing your \u003ca href=\"https://palisade.email/learning/what-is-bimi\"\u003eBIMI (Brand Indicators for Message Identification)\u003c/a\u003e records—a technically intensive but essential step. BIMI is an ever-evolving email standard and may change over time. To prepare, you’ll need:\u003c/p\u003e\n\u003cp\u003e\u003ca href=\"https://palisade.email/learning/what-is-spf\"\u003eSPF\u003c/a\u003e, \u003ca href=\"https://palisade.email/learning/what-is-dkim\"\u003eDKIM\u003c/a\u003e, \u003ca href=\"https://palisade.email/learning/what-is-dmarc\"\u003eDMARC\u003c/a\u003e, and BIMI are interlinked protocols enhancing email communication security and authenticity. SPF and DKIM verify email origins, DMARC builds on these checks, dictating actions when checks fail, while BIMI, relying on DMARC, visually validates your emails with your logo. These protocols not only secure but also visually enhance your emails, building trust with recipients.\u003c/p\u003e\n\u003ch2 id=\"dns-records-what-they-are-why-they-matter-and-how-to-set-them-up\"\u003eDNS Records: What They Are, Why They Matter, and How to Set Them Up\u003c/h2\u003e\n\u003cp\u003eSimply put, \u003ca href=\"https://palisade.email/learning/what-is-a-dns\"\u003eDNS (Domain Name System)\u003c/a\u003e records are a crucial part of how the internet functions; they serve as the internet’s address book. They help connect your website’s domain name to the appropriate server IP address, making your website accessible to users. For protocols like BIMI, you need to add these DNS records to your domain provider’s management console. These records, particularly \u003ca href=\"https://palisade.email/learning/what-is-a-txt-record\"\u003eTXT records\u003c/a\u003e, carry vital information about your domain for external servers. Understanding DNS records and their roles, such as connecting your domain name to its IP address for accurate email routing, is a key part of setting up email authentication protocols like BIMI.\u003c/p\u003e\n\u003ch2 id=\"why-set-up-spf-dkim-and-dmarc-for-your-domain\"\u003eWhy Set Up SPF, DKIM, and DMARC for Your Domain?\u003c/h2\u003e\n\u003cp\u003eSetting up \u003ca href=\"https://palisade.email/learning/what-is-spf\"\u003eSPF\u003c/a\u003e, \u003ca href=\"https://palisade.email/learning/what-is-dkim\"\u003eDKIM\u003c/a\u003e, and \u003ca href=\"https://palisade.email/learning/what-is-dmarc\"\u003eDMARC\u003c/a\u003e records for your domain is crucial for improving \u003ca href=\"https://palisade.email/learning/what-is-email-deliverability\"\u003eemail deliverability\u003c/a\u003e and trustworthiness. These protocols authenticate your email messages, ensuring they come from a legitimate source. This authentication helps prevent your emails from being flagged as \u003ca href=\"https://palisade.email/learning/understanding-spam-emails\"\u003espam\u003c/a\u003e or rejected by email servers. By implementing SPF, DKIM, and DMARC, you increase the likelihood of your emails reaching the intended recipients’ inboxes.\n\u003c/p\u003e\n\u003ch3 id=\"understanding-propagation\"\u003eUnderstanding Propagation\u003c/h3\u003e\n\u003cimg src=\"/images/cms/64d2d76e4b408566a40c3a97_648c4df1afe9f6a54e02dec6_whatsmydns.png\" alt=\"\" loading=\"lazy\" decoding=\"async\" /\u003e\nWhen adding a new DNS record, bear in mind that it can take up to 48 hours for it to fully propagate across all DNS servers globally. If you're encountering verification hiccups during this period, it's likely due to this propagation period. However, remember, propagation isn't the sole source of potential issues.\n\u003cp\u003eIf you're curious about your DNS propagation status, use a tool like the one linked below. Keep in mind, though, that propagation times can vary, and delays don't necessarily signal a problem with your record itself.\u003c/p\u003e\n\u003cp\u003e\u003ca href=\"https://www.whatsmydns.net/\" target=\"_blank\" rel=\"noopener noreferrer\"\u003ehttps://www.whatsmydns.net/\u003c/a\u003e\u003c/p\u003e\n\u003cp\u003e\u003cem\u003e*Don’t forget to select “DNS” in the drop-down next to domain name\u003c/em\u003e\u003c/p\u003e\n\u003ch2 id=\"gathering-your-dns-manager-credentials\"\u003eGathering Your DNS Manager Credentials\u003c/h2\u003e\n\u003cp\u003eTo set up your DNS records, you will need to access your DNS Manager. There are two common methods depending on your domain host: signing in directly to the domain host's sign-in portal or logging in via your third-party DNS Manager. These steps ensure smooth access to the necessary settings for managing your domain's DNS configuration.\u003c/p\u003e\n\u003cp\u003eIf you have a website developer or an IT person on your team, they might be the ones managing your domain. Don't hesitate to ask them for this information.\u003c/p\u003e\n\u003cp\u003eHere are some of the most popular domain hosts:\u003c/p\u003e\n\u003cul\u003e\u003cli\u003eGoDaddy\u003c/li\u003e\n\u003cli\u003eGoogle Domain\u003c/li\u003e\n\u003cli\u003eBluehost\u003c/li\u003e\n\u003cli\u003eNameCheap\u003c/li\u003e\n\u003cli\u003eDreamHost\u003c/li\u003e\n\u003c/ul\u003e\nMost popular DNS Managers:\n\u003cul\u003e\u003cli\u003eCloudflare\u003c/li\u003e\n\u003cli\u003eGoogle Cloud DNS\u003c/li\u003e\n\u003cli\u003eAmazon Route 53\u003c/li\u003e\n\u003c/ul\u003e\n\u003cstrong\u003eDomain Host DNS Manager\u003c/strong\u003e\n\u003cp\u003eOnce you’ve signed in, your domain host provider's dashboard look should similar to this:\n\u003cimg src=\"/images/cms/64d2d76f4b408566a40c3aa1_648314c49897d3e6019ebbde_domain-host-provider-example-1.png\" alt=\"\" loading=\"lazy\" decoding=\"async\" /\u003e\nYou can also use your domain hosting provider’s internal Domain Manager to check out your DNS. Many of them have an interface that looks similar to this:\n\u003cimg src=\"/images/cms/64d2d76f4b408566a40c3aa5_648314bb7cd70869b725f30c_dns-manager---domain-hosting-1.png\" alt=\"\" loading=\"lazy\" decoding=\"async\" /\u003e\n\u003cstrong\u003eThird-Party DNS Manager\u003c/strong\u003e\u003c/p\u003e\n\u003cp\u003eIf you are using a free third-party DNS Manager like \u003ca href=\"https://www.cloudflare.com/\" target=\"_blank\" rel=\"noopener noreferrer\"\u003eCloudflare\u003c/a\u003e, which we highly recommend, your DNS interface would look like this.\n\u003cimg src=\"/images/cms/64d2d76f4b408566a40c3aa9_648314b10244efd7c81b5a2b_cloudflare-dns-manager---domain-hosting.png\" alt=\"\" loading=\"lazy\" decoding=\"async\" /\u003e\n\u003ch3 id=\"setting-up-your-spf-record\"\u003eSetting up your SPF Record\u003c/h3\u003e\u003c/p\u003e\n\u003cp\u003eAn SPF record is a line of text that specifies which domains or IP addresses are allowed to send emails on behalf of your domain.\u003c/p\u003e\n\u003cp\u003e\u003ca href=\"/resources-post/introduction-to-spf-records-what-is-an-spf-record-and-why-does-it-matter\"\u003eSetting up an SPF\u003c/a\u003e (Sender Policy Framework) record for your company's domain is like putting a seal of authenticity on your outgoing emails. It helps prevent others from sending emails pretending to be from your domain. Here are the steps it will take to set it up:\u003c/p\u003e\n\u003cp\u003e\u003cstrong\u003e1. Identify the Third Party Services your Company is Using\u003c/strong\u003e\u003c/p\u003e\n\u003cp\u003eMake a list of all the mail servers that send emails on behalf of your domain. These could include your company's internal mail servers and any external email marketing services.\u003c/p\u003e\n\u003cp\u003eYou may include either the domain name or the IP address of the third party service in the SPF record. Depending on the specific circumstances. Here's how:\u003c/p\u003e\n\u003cp\u003e\u003cstrong\u003e2. Domain name:\u003c/strong\u003e If a third-party provider is sending mail on your behalf and they have an SPF record published for their own domain, you could use the \u003cstrong\u003einclude\u003c/strong\u003e mechanism followed by their domain name. This will include their SPF record in your own.\u003c/p\u003e\n\u003cp\u003eAn example of this would be \u003cstrong\u003ev=spf1 include:thirdpartydomain.com -all\u003c/strong\u003e, where \u003cstrong\u003ethirdpartydomain.com\u003c/strong\u003e is the domain of the third-party mail service.\u003cstrong\u003e\u003c/strong\u003e\u003c/p\u003e\n\u003cp\u003e\u003cstrong\u003e3. IP Address:\u003c/strong\u003e If you know the specific IP address or range of IP addresses that the third-party provider uses to send mail, you can specify these directly in your SPF record using the \u003cstrong\u003eip4\u003c/strong\u003e or \u003cstrong\u003eip6\u003c/strong\u003e mechanisms.\u003c/p\u003e\n\u003cp\u003eAn example of this would be \u003cstrong\u003ev=spf1 ip4:192.0.2.0/24 -all\u003c/strong\u003e, where \u003cstrong\u003e192.0.2.0/24\u003c/strong\u003e is the IP range used by the third-party provider.\u003c/p\u003e\n\u003cp\u003e\u003cstrong\u003e4. Create Your SPF Record\u003c/strong\u003e\u003c/p\u003e\n\u003cp\u003eReplace the sample IP addresses in the example with your actual ones. Here's an example SPF record for a domain using\u003c/p\u003e\n\u003cp\u003e\u003cstrong\u003eGoogle Workspace for email (Gmail) example:\u003c/strong\u003e\u003c/p\u003e\n\u003cp\u003e\u003cstrong\u003ev=spf1 include:_spf.google.com ~all\u003c/strong\u003e\u003c/p\u003e\n\u003ch2 id=\"setting-up-your-spf-record\"\u003eSetting Up Your SPF Record\u003c/h2\u003e\n\u003cp\u003eAn \u003ca href=\"https://palisade.email/learning/what-is-spf\"\u003eSPF record\u003c/a\u003e is a line of text that specifies which domains or IP addresses are allowed to send emails on behalf of your domain. Setting up an SPF (Sender Policy Framework) record for your company’s domain is like putting a seal of authenticity on your outgoing emails. It helps prevent others from sending emails pretending to be from your domain, protecting against \u003ca href=\"https://palisade.email/learning/what-is-spoofing\"\u003espoofing\u003c/a\u003e. Here are the steps it will take to set it up:\u003c/p\u003e\n\u003cp\u003e\u003cstrong\u003e1. Identify the Third-Party Services Your Company is Using\u003c/strong\u003e\nMake a list of all the mail servers that send emails on behalf of your domain. These could include your company’s internal mail servers and any external email marketing services.\n\u003c/p\u003e\n\u003cp\u003e\u003cstrong\u003e2. Domain Name\u003c/strong\u003e\nIf a third-party provider is sending mail on your behalf and they have an SPF record published for their own domain, you could use the include mechanism followed by their domain name. This will include their SPF record in your own. An example of this would be v=spf1 include:thirdpartydomain.com -all, where \u003ca href=\"http://thirdpartydomain.com\" target=\"_blank\" rel=\"noopener noreferrer\"\u003ethirdpartydomain.com\u003c/a\u003e is the domain of the third-party mail service.\n\u003c/p\u003e\n\u003cp\u003e\u003cstrong\u003e3. IP Address\u003c/strong\u003e\nIf you know the specific IP address or range of IP addresses that the third-party provider uses to send mail, you can specify these directly in your SPF record using the ip4 or ip6 mechanisms. An example of this would be \u003cstrong\u003ev=spf1 ip4:192.0.2.0/24 -all\u003c/strong\u003e, where \u003cstrong\u003e192.0.2.0/24\u003c/strong\u003e is the IP range used by the third-party provider.\n\u003c/p\u003e\n\u003cp\u003e\u003cstrong\u003e4. Create Your SPF Record\u003c/strong\u003e\nReplace the sample IP addresses in the example with your actual ones.\u003c/p\u003e\n\u003cp\u003eHere’s an example SPF record for a domain using Google Workspace for email (Gmail): \u003cstrong\u003ev=spf1 include:_spf.google.com ~all\u003c/strong\u003e\u003c/p\u003e\n\u003cp\u003eAdd \u003cstrong\u003einclude:_spf.domain.com\u003c/strong\u003e for every third-party tool using your domain for sending emails.\n\u003c/p\u003e\n\u003cp\u003e\u003cstrong\u003e5. Add the SPF Record to Your DNS\u003c/strong\u003e\n\u003cimg src=\"/images/cms/64d2d76f1c7443da13c0404e_649c7fdf4edce7ee591e2580_screenshot-2023-06-20-at-10.10.04-am.png\" alt=\"\" loading=\"lazy\" decoding=\"async\" /\u003e\nLog in to your \u003ca href=\"https://palisade.email/learning/what-is-a-dns\"\u003eDNS\u003c/a\u003e management interface and add \u003ca href=\"https://palisade.email/learning/what-is-a-txt-record\"\u003eTXT records\u003c/a\u003e for your domain like discussed previously. Don’t forget to add @ for the root domain and set the TTL to Auto or, alternatively, use 8 hours if you don’t intend on updating your SPF record often.\u003c/p\u003e\n\u003cp\u003e**6. Test Your SPF Record\n**After the new record propagates (which may take up to 48 hours), use an online SPF record checker to verify if it’s set up correctly. You can use \u003ca href=\"/tools/spf\"\u003ePalisade's SPF Checker\u003c/a\u003e. \n\u003c/p\u003e\n\u003ch3 id=\"setting-up-your-dkim-dns-record\"\u003eSetting up your DKIM DNS record\u003c/h3\u003e\n\u003cp\u003eDKIM (DomainKeys Identified Mail) is a method to verify that the emails you send are genuine and haven't been changed along the way. It works by adding a special digital signature to your email.\u003c/p\u003e\n\u003cp\u003eHere’s how to set it up:\u003c/p\u003e\n\u003cp\u003e\u003cstrong\u003e1. Generate a DKIM Key\u003c/strong\u003e\u003c/p\u003e\n\u003cp\u003eYou need to create a special key pair. If you use services like Google Workspace for using Gmail with your work email for example, they will provide you with a part of the key called the public key. They will keep the other part, called the private key, secure to sign your outgoing emails.\u003c/p\u003e\n\u003cp\u003eExample using the \u003ca href=\"https://admin.google.com/ac/apps/gmail/authenticateemail\" target=\"_blank\" rel=\"noopener noreferrer\"\u003eGoogle Workspace Authentication Generator:\u003c/a\u003e\n\u003cimg src=\"/images/cms/64d2d76f4b408566a40c3a9d_648c4fdbe99a3460f152dff3_google-dkim-generator.png\" alt=\"\" loading=\"lazy\" decoding=\"async\" /\u003e\n\u003cstrong\u003e2. Add the DKIM record to your DNS\u003c/strong\u003e\u003c/p\u003e\n\u003cp\u003eThe host for the DKIM record will usually look something like \u003cstrong\u003eselector._domainkey\u003c/strong\u003e, where \u003cstrong\u003eselector\u003c/strong\u003e is a name you choose (it could be anything like \"mail\", \"google\", etc.). The value will be the DKIM value provided by the third party.\u003c/p\u003e\n\u003cp\u003eAdding a new TXT record to your DNS settings. Use the following example for each value:\u003c/p\u003e\n\u003cp\u003eThe DNS Record creator should look similar to this Cloudflare example:\n\u003cimg src=\"/images/cms/64d2d76e4b408566a40c3a84_648c4fe366bde728c6f66f80_google-dkim-generator-1.png\" alt=\"\" loading=\"lazy\" decoding=\"async\" /\u003e\n\u003cstrong\u003eTest your DKIM\u003c/strong\u003e\u003c/p\u003e\n\u003cp\u003eAfter the DKIM record propagates, you can use an \u003ca href=\"/tools/dkim\"\u003ePalisade' DKIM record checker\u003c/a\u003e to verify that it's set up correctly. Just enter your domain and the selector you used, and it should return your DKIM record.\n\nYour DKIM setup depends on the sending provider. Palisade's \u003ca href=\"https://app.palisade.email/signup\" target=\"_blank\" rel=\"noopener noreferrer\"\u003eAI-first DMARC agent\u003c/a\u003e can identify failing sources and help work through alignment, but you must use the selector and DNS value generated for your own provider account.\u003c/p\u003e\n\u003ch3 id=\"setup-dmarc-for-your-domain\"\u003eSetup DMARC for your Domain\u003c/h3\u003e\n\u003cp\u003e\u003ca href=\"https://palisade.email/learning/what-is-dmarc\"\u003eDMARC (Domain-based Message Authentication, Reporting, and Conformance)\u003c/a\u003e is an email protocol that uses \u003ca href=\"https://palisade.email/learning/what-is-spf\"\u003eSPF\u003c/a\u003e and \u003ca href=\"https://palisade.email/learning/what-is-dkim\"\u003eDKIM\u003c/a\u003e to check if an email is legitimately from the domain it says it’s from.\u003c/p\u003e\n\u003cp\u003e\u003cstrong\u003eSpecifically: \u003c/strong\u003eIt tells the receiving email server what to do if the checks fail (like sending a report, quarantining the email, or rejecting the email), and can stop fraudulent emails before they even get to the recipient, protecting against \u003ca href=\"https://palisade.email/learning/what-is-spoofing\"\u003espoofing\u003c/a\u003e.\u003c/p\u003e\n\u003cp\u003eTypically, each service will provide you with a single DMARC record to input into your \u003ca href=\"https://palisade.email/learning/what-is-a-dns\"\u003eDNS\u003c/a\u003e Manager. Let’s say you use Mailjet for marketing emails, Google Apps (Gmail) for user emails, and Hubspot CRM for transactional emails. In this case, each of these services requires its own DMARC \u003ca href=\"https://palisade.email/learning/what-is-a-txt-record\"\u003eTXT record\u003c/a\u003e in your DNS manager. This ensures that the DMARC policies are correctly applied and enforced for each specific email service you utilize.\u003c/p\u003e\n\u003cp\u003eNote that you’ll first need SPF and/or DKIM deployed for a minimum of 48 hours (Propagation!) before you can set up DMARC.\u003c/p\u003e\n\u003cp\u003e\u003c/p\u003e\n\u003cp\u003e\u003cstrong\u003eSpecial Requirements for your DMARC policy settings for BIMI\u003c/strong\u003e\u003c/p\u003e\n\u003cp\u003eTo enable BIMI, your DMARC policy must meet certain requirements.\u003c/p\u003e\n\u003cul\u003e\u003cli\u003eThe policy option (\u003cstrong\u003ep\u003c/strong\u003e) must be set to either \u003cstrong\u003equarantine\u003c/strong\u003e or \u003cstrong\u003ereject\u003c/strong\u003e. BIMI does not support DMARC policies with the \u003cstrong\u003ep\u003c/strong\u003e option set to \u003cstrong\u003enone\u003c/strong\u003e.\u003c/li\u003e\n\u003cli\u003eAdditionally, the percent option (\u003cstrong\u003epct\u003c/strong\u003e) must be set to \u003cstrong\u003e100\u003c/strong\u003e to apply the DMARC policy to all outgoing mail from your domain.\u003c/li\u003e\n\u003c/ul\u003e\nFinally, Here are the steps to set up DMARC for a single service:\n\u003cp\u003e\u003cstrong\u003e1. Create a DMARC policy\u003c/strong\u003e\u003c/p\u003e\n\u003cp\u003eYour DMARC policy is a DNS record that tells receiving mail servers how to handle emails from your domain if they fail SPF or DKIM checks. Here's a simple example of a DMARC policy:\u003c/p\u003e\n\u003cp\u003eIn this case, \u003cstrong\u003ev=DMARC1\u003c/strong\u003e specifies the version of DMARC. The \u003cstrong\u003ep=quarantine\u003c/strong\u003e tells the mail server to moves suspicious emails into a different folder, like your recipient’s spam folder, instead of the inbox.\u003c/p\u003e\n\u003cp\u003e\u003cstrong\u003erua=mailto:postmaster@example.com\u003c/strong\u003e specifies that aggregate reports should be emailed to \u003cstrong\u003epostmaster@example.com\u003c/strong\u003e.\u003c/p\u003e\n\u003cp\u003eIf you would like to reject suspicious emails outright, you would change \u003cstrong\u003ep=quarantine\u003c/strong\u003e to \u003cstrong\u003ep=reject\u003c/strong\u003e. However, we recommend using caution when using \u003cstrong\u003ep=reject\u003c/strong\u003e as you would need to be absolutely sure to whitelist all of your email sending services.\u003c/p\u003e\n\u003cp\u003eTo be compliant for BIMI, your DMARC record cannot use the p=none policy.\u003c/p\u003e\n\u003cp\u003e\u003cstrong\u003e2. Add the DMARC record to your DNS\u003c/strong\u003e\u003c/p\u003e\n\u003cp\u003eAdd a new TXT record to your DNS settings. The host for the DMARC record will be \u003cstrong\u003e_dmarc\u003c/strong\u003e. The value will be the DMARC policy you just created. So, your DNS entry might look like this:\u003c/p\u003e\n\u003cp\u003e\u003cstrong\u003eType:\u003c/strong\u003e TXT\u003cstrong\u003eHost:\u003c/strong\u003e _dmarc\u003cstrong\u003eValue:\u003c/strong\u003e v=DMARC1; p=quarantine; \u003ca href=\"\u003cmailto:rua=mailto:postmaster@example.com\u003e\"\u003erua=mailto:postmaster@\u003c/a\u003egetverified.emai\u003cstrong\u003eTTL:\u003c/strong\u003e 3600 (or your provider's default)\u003c/p\u003e\n\u003cp\u003eHit save, then your DMARC record should show up in your DNS record. This can take up to 24 hours to update.\u003c/p\u003e\n\u003cp\u003e\u003cstrong\u003e3. Test your DMARC record\u003c/strong\u003e\u003c/p\u003e\n\u003cp\u003eAfter the DMARC record propagates, you can use \u003ca href=\"/tools/dmarc\"\u003ePalisade's DMARC checker\u003c/a\u003e to verify that it's set up correctly. Just enter your domain and it should return your DMARC record.\u003c/p\u003e\n\u003cp\u003eRemember to monitor your DMARC reports regularly, as they will provide valuable insight into whether any malicious entities are attempting to send emails on behalf of your domain.\u003c/p\u003e\n\u003ch2 id=\"checking-for-an-existing-bimi-record\"\u003eChecking for an existing BIMI record\u003c/h2\u003e\n\u003cp\u003eYou can check if your domain has an existing BIMI record by using \u003ca href=\"/tools/bimi\"\u003ePalisade's BIMI checker\u003c/a\u003e. This tool checks for the BIMI record and the BIMI image SVG file associated with your domain and will generate a report with the results of the checks.\n\u003cimg src=\"/images/cms/64d2d76e4b408566a40c3a8d_6483149f5b8abf4f20a3f3fc_bimi-record-cheker.png\" alt=\"\" loading=\"lazy\" decoding=\"async\" /\u003e\nIf authentication is the blocker, Palisade's \u003ca href=\"https://app.palisade.email/signup\" target=\"_blank\" rel=\"noopener noreferrer\"\u003eAI-first DMARC agent\u003c/a\u003e can help you work through SPF, DKIM, and DMARC before you return to the \u003ca href=\"https://palisade.email/learning/what-is-bimi\"\u003eBIMI\u003c/a\u003e requirements.\u003c/p\u003e\n\u003ch2 id=\"step-2-logo---svg-trademark\"\u003eStep 2 → Logo - SVG \u0026 Trademark\u003c/h2\u003e\n\u003cp\u003eThe second step for obtaining your verified blue Gmail checkmark will consist of you uploading your company logo in a specific SVG format on your public server and securing a trademark for your logo.\u003c/p\u003e\n\u003cp\u003eThe process of creating a BIMI-compliant SVG logo includes multiple technical and design steps that might require the assistance of a specialist.\u003c/p\u003e\n\u003cp\u003eObtaining a trademark includes researching existing trademarks to ensure that your logo is unique, filing a trademark application with the appropriate government agency, and waiting for the trademark to be approved.\u003c/p\u003e\n\u003cp\u003e\u003cstrong\u003eLatest news:\u003c/strong\u003e The BIMI standard currently requires a registered trademark for your logo to be eligible for a Verified Mark Certificate (VMC). However, the standard is being expanded to include logos that are not trademarked.\u003c/p\u003e\n\u003cp\u003eHere’s a breakdown of the different steps:\u003c/p\u003e\n\u003ch2 id=\"step-1---obtaining-configuring-your-companys-logo-svg\"\u003eStep 1 - Obtaining \u0026 Configuring Your Company's Logo SVG\u003c/h2\u003e\n\u003cul\u003e\u003cli\u003eUnderstand what an SVG is\u003c/li\u003e\n\u003cli\u003eDetermining if your company logo is already in SVG format\u003c/li\u003e\n\u003cli\u003eConverting your logo to an SVG format\u003c/li\u003e\n\u003cli\u003eCreating a BIMI-compliant SVG logo\u003c/li\u003e\n\u003c/ul\u003e\n\u003ch2 id=\"step-2---trademarking-your-logo\"\u003eStep 2 - Trademarking Your Logo\u003c/h2\u003e\n\u003cul\u003e\u003cli\u003eUnderstanding what a logo trademark is\u003c/li\u003e\n\u003cli\u003eApplying for a logo trademark\u003c/li\u003e\n\u003cli\u003eUnderstanding the timeline for trademark registration\u003c/li\u003e\n\u003cli\u003eWork with a reputable company to get your logo trademarked\u003c/li\u003e\n\u003c/ul\u003e\n\u003ch2 id=\"obtaining-configuring-your-companys-logo-svg\"\u003eObtaining \u0026 Configuring Your Company's Logo SVG\u003c/h2\u003e\n\u003ch3 id=\"understanding-what-an-svg-is\"\u003e\u003cstrong\u003eUnderstanding what an SVG is\u003c/strong\u003e\u003c/h3\u003e\n\u003cp\u003eSVG stands for Scalable Vector Graphics. Imagine a picture you can zoom in on indefinitely without it ever getting blurry, and that's essentially what an SVG is.\u003c/p\u003e\n\u003cp\u003eThis means no matter how much you increase the size of an SVG, it will always look sharp and clear because it stores the image via mathematical formulas and does not stretch pixels.\u003c/p\u003e\n\u003cp\u003e\u003c/p\u003e\n\u003cp\u003eHere are some of the most popular software programs for creating SVG graphics:\u003c/p\u003e\n\u003cul\u003e\u003cli\u003eAdobe Illustrator\u003c/li\u003e\n\u003cli\u003eFigma\u003c/li\u003e\n\u003cli\u003eSketch\u003c/li\u003e\n\u003cli\u003eInkscape\u003c/li\u003e\n\u003c/ul\u003e\nExample of increasing the size of an SVG logo that scales perfectly:\n\u003cimg src=\"/images/cms/64d2d76e3918948ea8bc7657_649c827fcfc40c6607102ef8_ezgif.com-optimize-2.gif\" alt=\"\" loading=\"lazy\" decoding=\"async\" /\u003e\n\u003ch3 id=\"determining-if-your-company-logo-is-already-in-svg-format\"\u003e\u003cstrong\u003eDetermining if your company logo is already in SVG format\u003c/strong\u003e\u003c/h3\u003e\n\u003cp\u003eTo find out if your company logo is already in SVG format, start by checking where your digital assets are stored. This could be on your company server, a cloud storage platform, or even an email thread from when the logo was first created. The SVG file will end with the extension \".svg\" in the filename.\u003c/p\u003e\n\u003cp\u003eIf you're unsure, you can also ask your design team, the design agency or freelancer who originally created your logo, or the person responsible for your company's branding. Any of these sources may still have the original design files and can provide you with the SVG if it was created. It's important to maintain an SVG version of your logo, as it provides flexibility and scalability for different digital applications.\u003c/p\u003e\n\u003ch3 id=\"bimi-svg-file-requirements-and-recommendations\"\u003eBIMI SVG file requirements and recommendations\u003c/h3\u003e\n\u003cp\u003eTo ensure that your logo is verified and can be displayed properly at various resolutions, it must meet BIMI's brand logo requirements. This ensures that your logo passes security checks and can be displayed accurately.\u003c/p\u003e\n\u003cp\u003eIn order to be properly displayed in the recipient's inbox, your SVG file must adhere to certain specifications.\u003c/p\u003e\n\u003cul\u003e\u003cli\u003eIt must be in SVG Tiny Portable/Secure (SVG Tiny PS) format- baseProfile attribute of tiny-ps- version attribute of 1.2\u003c/li\u003e\n\u003cli\u003eThe \u003ctitle\u003e element should reflect your organization's name\u003c/li\u003e\n\u003cli\u003eThe logo should not include external links or references, scripts, animations, or interactive elements.\u003c/li\u003e\n\u003cli\u003eThe \u003csvg\u003e root element should not include x= or y= attributes.\u003c/li\u003e\n\u003cli\u003eTo ensure compatibility with email clients that support BIMI, the logo should be centered in a square on a solid color background, have a small file size of no larger than 32 KB, and include a \u003cdesc\u003e element for accessibility.\u003c/li\u003e\n\u003c/ul\u003e\n\u003ch2 id=\"creating-your-brand-logo-svg-file\"\u003eCreating your Brand Logo SVG file\u003c/h2\u003e\n\u003cimg src=\"/images/cms/64d2d76e1c7443da13c0402a_649c7eb0cb6b77009f88ceee_getting-your-logo-in-svg-format.png\" alt=\"\" loading=\"lazy\" decoding=\"async\" /\u003e\n\u003ch3 id=\"converting-your-logo-to-an-svg-format\"\u003eConverting your logo to an SVG format\u003c/h3\u003e\n\u003cp\u003eIf your company logo isn't already in SVG format, you'll need to convert it. This process should ideally be carried out by a professional graphic designer to ensure the quality and accuracy of your logo are maintained.\u003c/p\u003e\n\u003cp\u003eIf you're unsure how to proceed, \u003ca href=\"https://www.palisade.email/contact-us\"\u003eget in touch with our team\u003c/a\u003e so we can help!\u003c/p\u003e\n\u003cp\u003eIt is possible to find online tools that claim to automatically convert JPG files to SVG format. However, we strongly advise against using these tools, as the results are usually poor and inaccurate. Here’s an example of a logo that has been automatically converted:\n\u003cimg src=\"/images/cms/64d2d76e3918948ea8bc764f_649c7ec6925a6e93249a9c07_jpg-to-svg-converter-example.png\" alt=\"\" loading=\"lazy\" decoding=\"async\" /\u003e\n\u003cstrong\u003eTips for better results:\u003c/strong\u003e\u003c/p\u003e\n\u003cul\u003e\u003cli\u003eOptimal image presentation is achieved with a square aspect ratio (1:1).\u003c/li\u003e\n\u003cli\u003eIt's recommended that the image be positioned in the center to ensure ideal visibility in various shapes such as a square, a rounded square, or a circle.\u003c/li\u003e\n\u003cli\u003eUsing non-transparent backgrounds is advisable due to the inconsistent and unpredictable display outcomes with transparent backgrounds.\u003c/li\u003e\n\u003c/ul\u003e\nYour logo will display in different sizes and formats, so it’s important to consider that when designing your logo:\n\u003cimg src=\"/images/cms/64d2d76e3918948ea8bc7648_649c7ed13230615831ec31c1_different-ways-your-logo-can-display-2.png\" alt=\"\" loading=\"lazy\" decoding=\"async\" /\u003e\nMake sure your logo is 80px by 80px and that it has padding around it. This ensures that any cropping in different shapes doesn’t affect the design:\n\u003cimg src=\"/images/cms/64d2d76e3918948ea8bc763d_649c7edc050a996013aa7b99_size-and-padding-on-your-logo-svg-1.png\" alt=\"\" loading=\"lazy\" decoding=\"async\" /\u003e\nCurrently, there are no tools available that can create an SVG format file suitable for BIMI that meets all the requirements. Typically, SVG files for BIMI need to be modified manually using a text editor or a special-purpose script.\n\u003cp\u003eHere is a useful tool provided by the BIMI organization to help you convert your SVG 1.2 to the SVG P/S format:\u003c/p\u003e\n\u003cp\u003e\u003ca href=\"https://bimigroup.org/svg-conversion-tools-released/\" target=\"_blank\" rel=\"noopener noreferrer\"\u003ehttps://bimigroup.org/svg-conversion-tools-released/\u003c/a\u003e\u003c/p\u003e\n\u003cp\u003eTo obtain a Verified Checkmark, you must have a company logo in a BIMI-compliant SVG format and a trademark for your logo. The logo must be based on the Scalable Vector Graphic (SVG) Tiny 1.2 format specified by the W3C, with fewer allowed elements, and in \"SVG Tiny Portable/Secure\" (SVG P/S) format supported by BIMI.\u003c/p\u003e\n\u003ch3 id=\"heres-a-step-by-step-guide-on-how-to-create-your-svg-file-using-adobe-illustrato\"\u003eHere’s a step-by-step guide on how to create your SVG file using Adobe Illustrator\u003c/h3\u003e\n\u003cimg src=\"/images/cms/64d2d76e3918948ea8bc7639_649c7ee6a8baca4c35000c3d_using-adobe-illustrator-to-vectorize-your-logo.png\" alt=\"\" loading=\"lazy\" decoding=\"async\" /\u003e\n\u003cstrong\u003e1.\u003c/strong\u003e Launch Adobe Illustrator and open your original vector image.\n\u003cp\u003e\u003cstrong\u003e2.\u003c/strong\u003e Ensure that your vector image doesn't contain bitmaps, external file links, text, or grouped objects. If you have text to preserve as a shape, use the 'Create outlines' option in Illustrator.\u003c/p\u003e\n\u003cp\u003e\u003cstrong\u003e3.\u003c/strong\u003e Click on 'File' and choose 'Save As…'.\u003c/p\u003e\n\u003cp\u003e\u003cstrong\u003e4.\u003c/strong\u003e In the 'Save As' dialog:\u003c/p\u003e\n\u003cul\u003e\u003cli\u003eType the desired filename in the 'Save As' field. Stick to lowercase letters and hyphens, for instance: mybusiness-bimi.svg. Avoid using special characters.\u003c/li\u003e\n\u003cli\u003eIn the 'Format' drop down menu, choose 'SVG (svg)'. Do not select 'SVG Compressed (svgz)'.\u003c/li\u003e\n\u003cli\u003eHit the 'Save' button\u003c/li\u003e\n\u003c/ul\u003e\u003cimg src=\"/images/cms/64d2d76e1c7443da13c04032_649c7ef7b1e737f991f9ae28_saving-to-svg-in-adobe-illustrator.png\" alt=\"\" loading=\"lazy\" decoding=\"async\" /\u003e\n\u003cstrong\u003e5.\u003c/strong\u003e In the resulting 'SVG Options' dialog:\n\u003cul\u003e\u003cli\u003eIn the 'SVG Profiles' dropdown, choose 'SVG Tiny 1.2'.\u003c/li\u003e\n\u003cli\u003eIn 'Image Location', opt for 'Preserve'.\u003c/li\u003e\n\u003c/ul\u003e\u003cimg src=\"/images/cms/64d2d76e3918948ea8bc7641_649c7f005012cbccffe2c210_choosing-the-right-svg-format-in-adobe-illustrator.png\" alt=\"\" loading=\"lazy\" decoding=\"async\" /\u003e\n\u003cstrong\u003e6.\u003c/strong\u003e Click 'OK' to finalize saving the file.\n\u003cp\u003e\u003cstrong\u003e7.\u003c/strong\u003e Open the file in a text editor like Text Edit on MacOS. You will be editing the first part of the file, which should look like this:\u003c/p\u003e\n\u003cp\u003e\u003cstrong\u003e8.\u003c/strong\u003e Change these items the text file:\u003c/p\u003e\n\u003cul\u003e\u003cli\u003esvg version value is 1.2. If it’s not, change it to 1.2.- base Profile value to tiny-ps.- x and y attributes and values.\u003c/li\u003e\n\u003cli\u003eAdd a \u003ctitle\u003e tag and value as shown in the example in Step 7. The title must come after \u003csvg and before \u003cg\u003e.\u003c/li\u003e\n\u003c/ul\u003e\n\u003cstrong\u003e9.\u003c/strong\u003e Once you’re done, verify that the first part of the file appears similar to this:\n\u003cp\u003e\u003cstrong\u003e10\u003c/strong\u003e. Save your changes to the text file. The file extension must be .svg.\u003c/p\u003e\n\u003cp\u003eNext, upload the SVG file to your domain’s public web server.\u003c/p\u003e\n\u003cp\u003e\u003cstrong\u003eUploading the SVG file to your public web server\u003c/strong\u003e\u003c/p\u003e\n\u003cp\u003eOnce your SVG file is ready, the next step is to upload it to your public web server. The exact process may vary depending on your web hosting service, but generally, you would use an FTP (File Transfer Protocol) client or your hosting service's file manager.\u003c/p\u003e\n\u003cp\u003eIn the FTP client or file manager, navigate to the root directory or the desired location where you want to store the SVG file.\u003c/p\u003e\n\u003cp\u003eNext, locate the SVG file on your local machine and select 'Upload' to transfer it to the server. Make sure the file permissions are set correctly so that it's publicly accessible.\u003c/p\u003e\n\u003cp\u003eLastly, verify that the file can be viewed in a web browser by typing the file's URL directly into the browser's address bar. If everything is set up correctly, your SVG logo should now be visible and ready for use on the internet.\u003c/p\u003e\n\u003cp\u003eThe web server must be in the same domain as your outgoing email server. You can do this by adhering to the instructions provided in the \u003ca href=\"https://support.google.com/a/answer/10911321\" target=\"_blank\" rel=\"noopener noreferrer\"\u003eAdd a BIMI TXT record\u003c/a\u003e section, specifically designed for your domain provider.\u003c/p\u003e\n\u003cp\u003eYour web server should share the same domain as your outgoing email server. This is the specific domain where you will activate BIMI once all the steps have been completed.\u003c/p\u003e\n\u003cp\u003e\u003c/p\u003e\n\u003ch3 id=\"somewhat-challenging\"\u003eSomewhat challenging?\u003c/h3\u003e\n\u003cp\u003eSetting up DMARC and managing email authentication protocols like SPF and DKIM can be technically complex. If you find yourself in need of assistance with these steps, we're here to help. Our experienced team can provide you with the guidance and support you need to properly configure DMARC, SPF, and DKIM for your domain.\u003c/p\u003e\n\u003cp\u003eWhether you have questions, need clarification, or require hands-on assistance, don't hesitate to reach out to us. \u003ca href=\"https://www.palisade.email/contact-us\"\u003eGet in touch with our team\u003c/a\u003e, and we'll ensure you receive the right pointers to help you establish a robust email authentication setup and get your SVG logo done right.\u003c/p\u003e\n\u003ch2 id=\"step-2---trademarking-your-logo\"\u003eStep 2 - Trademarking Your Logo\u003c/h2\u003e\n\u003cimg src=\"/images/cms/64d2d76f1c7443da13c0403a_649c7f0e797dfd6122860e99_trademarking-your-logo.png\" alt=\"\" loading=\"lazy\" decoding=\"async\" /\u003e\nSecuring a Verified Mark Certificate (VMC) is crucial. A VMC is a digital certificate given by a certificate authority, serving as proof of your logo's ownership. To qualify for a VMC, your logo must already be a registered trademark.\n\u003cp\u003e\u003cstrong\u003eLatest news: Google has announced changes are underway as the standard is set to broaden its scope to accommodate logos that lack trademark registration.\u003c/strong\u003e\u003c/p\u003e\n\u003ch3 id=\"understanding-what-a-logo-trademark-is\"\u003eUnderstanding what a Logo Trademark is\u003c/h3\u003e\n\u003cp\u003eA logo trademark is a legally recognized and protected design or symbol that distinguishes a company's products or services from those of other entities. It serves as a unique identifier of the company's brand, enhancing its recognizability and establishing trust with customers.\u003c/p\u003e\n\u003cp\u003eOnce a logo is trademarked, it means the company has exclusive rights to use it in relation to its goods or services. Any unauthorized use by other parties can be legally challenged, preventing potential confusion in the marketplace. This protection typically extends to similar logos that could potentially be mistaken for the trademarked logo, depending on the laws of the specific jurisdiction. Trademarking a logo is a critical step in safeguarding a company's brand identity.\u003c/p\u003e\n\u003cp\u003eLogo trademarks are enforceable per country of registration. Protection is not automatically worldwide. You need to register in multiple countries to have multiple protections.\u003c/p\u003e\n\u003ch3 id=\"before-applying-for-your-logo-trademark\"\u003eBefore applying for your Logo Trademark\u003c/h3\u003e\n\u003cp\u003eBefore applying for a VMC, verify that your logo is a registered trademark on the World Intellectual Property Organization’s (WIPO) \u003ca href=\"https://www.wipo.int/branddb/en/\" target=\"_blank\" rel=\"noopener noreferrer\"\u003e\u003cstrong\u003eGlobal Brand Database\u003c/strong\u003e\u003c/a\u003e, which provides information on active registered trademarks.\u003c/p\u003e\n\u003ch3 id=\"how-to-apply-for-your-logo-trademark-for-your-vmc-certificate\"\u003eHow to Apply \u003cstrong\u003efor your Logo Trademark for your VMC Certificate\u003c/strong\u003e\u003c/h3\u003e\n\u003cp\u003e\u003cstrong\u003e1. Conduct a Trademark Search:\u003c/strong\u003e As a company with a logo and SVG file ready, your first step is to conduct a thorough trademark search. This ensures that your logo does not infringe upon any existing trademarks. Online resources such as the\u003ca href=\"https://www.uspto.gov/trademarks/search\" target=\"_blank\" rel=\"noopener noreferrer\"\u003e United States Patent and Trademark Office's (USPTO) Trademark Electronic Search System (TESS)\u003c/a\u003e can be used to start your search.\u003c/p\u003e\n\u003cp\u003e\u003cstrong\u003e2. Prepare and Submit Your Application:\u003c/strong\u003e Following the verification of your logo's uniqueness, compile all the necessary information about your logo and the goods or services it represents. You can typically submit your application online via the trademark office's website of your country.\u003c/p\u003e\n\u003cp\u003e\u003cem\u003e*It is important to verify if your country is recognized by the major VMC issuers. Please contact \u003c/em\u003e\u003ca href=\"https://www.digicert.com/tls-ssl/verified-mark-certificates\" target=\"_blank\" rel=\"noopener noreferrer\"\u003e\u003cem\u003eDigicert\u003c/em\u003e\u003c/a\u003e\u003cem\u003e or \u003c/em\u003e\u003ca href=\"https://www.entrust.com/digital-security/certificate-solutions/products/digital-certificates/verified-mark-certificates\" target=\"_blank\" rel=\"noopener noreferrer\"\u003e\u003cem\u003eEntrust\u003c/em\u003e\u003c/a\u003e\u003cem\u003e to make sure you are registering your logo in the right country.\u003c/em\u003e\u003c/p\u003e\n\u003cp\u003e\u003cstrong\u003e3. Cost and Turnaround Time:\u003c/strong\u003e Costs of logo trademark application vary depending on the country. In the U.S., it usually ranges from $225 to $400 per class of goods or services. In the UK, it's approximately £200, while in Australia, it's about $250 AUD. Keep in mind that your business might span multiple classes, which will necessitate separate fees for each. The turnaround time also varies, usually ranging from several months to more than a year, based on factors such as logo complexity, objections, and more.\u003c/p\u003e\n\u003cp\u003e\u003cstrong\u003e4. Respond to Correspondences:\u003c/strong\u003e If the trademark office contacts you regarding your application, make sure to respond promptly to prevent your application from being abandoned.\u003c/p\u003e\n\u003cp\u003e\u003cstrong\u003e5. Trademark Approval and Maintenance:\u003c/strong\u003e Upon approval, you'll receive a certificate of registration. To maintain your trademark rights, you need to continuously use your logo in commerce and file the required maintenance documents as dictated by your country's trademark office.\u003c/p\u003e\n\u003cp\u003e\u003cstrong\u003e6. Apply for a VMC:\u003c/strong\u003e With a registered logo trademark, you're now eligible to apply for a Verified Mark Certificate (VMC). This digital certificate, issued by a certificate authority, verifies your legal ownership of the logo.\u003c/p\u003e\n\u003ch3 id=\"timeline-for-a-logo-trademark-application\"\u003eTimeline for a Logo Trademark Application\u003c/h3\u003e\n\u003cp\u003eThe duration it takes to complete a logo registration can vary greatly from one country to another, primarily due to the unique processes, rules, and resources of the respective trademark offices. For instance, in the United States, the process can take anywhere from 8 to 10 months, given no oppositions or queries are raised. The United Kingdom's Intellectual Property Office typically completes the process within 4 months if no objections are raised. In Australia, the trademark registration process generally takes approximately 7.5 months.\u003c/p\u003e\n\u003cp\u003eHowever, in India, the process could stretch up to 18-24 months due to the volume of applications and the multi-step process. In the European Union, trademark registration with the EUIPO can take about 5-6 months if there are no objections. Please remember these are approximate durations and actual times may vary depending on a variety of factors including the complexity of your logo, the efficiency of the trademark office, and any objections that might be raised. Always check with your local trademark office for the most accurate information.\u003c/p\u003e\n\u003ch3 id=\"cost-of-obtaining-your-logo-trademark\"\u003eCost of Obtaining Your Logo Trademark\u003c/h3\u003e\n\u003cp\u003eBelow is a table that illustrates the cost of obtaining a logo trademark in several major countries around the world. The costs are provided in their respective local currencies:\u003c/p\u003e\n\u003cp\u003eThese figures are based on basic filing fees and can vary depending on a range of factors, such as the number of classes under which you want to register your logo and the specifics of your application. Please check with your local trademark office or a legal professional for the most accurate and current information.\u003c/p\u003e\n\u003ch3 id=\"seems-like-a-lot-to-do-on-your-own\"\u003e\u003cstrong\u003eSeems like a lot to do on your own?\u003c/strong\u003e\u003c/h3\u003e\n\u003cp\u003ePalisade does not register trademarks. Use qualified legal counsel for trademark work. After that, Palisade can help verify the email-authentication and DNS requirements that support \u003ca href=\"https://palisade.email/learning/what-is-bimi\"\u003eBIMI\u003c/a\u003e.\u003c/p\u003e\n\u003ch2 id=\"step-3-obtaining-your-verified-mark-certificate-vmc\"\u003eStep 3→ Obtaining your Verified Mark Certificate (VMC)\u003c/h2\u003e\n\u003cimg src=\"/images/cms/64d2d76e078eb7a1e83d5bc8_649c8a4b635380642bb8949c_pali-bimi-cellphone.png\" alt=\"\" loading=\"lazy\" decoding=\"async\" /\u003e\nThe third step of obtaining your blue verified Gmail checkmark is to apply for a Verified Mark Certificate. To be able to do that, you need to have Step 2 completed.\n\u003ch2 id=\"what-will-be-covered-in-step-3\"\u003eWhat will be covered in Step 3?\u003c/h2\u003e\n\u003cul\u003e\u003cli\u003eWhat is a Verified Mark Certificate (VMC)?\u003c/li\u003e\n\u003cli\u003eApplying for a VMC\u003c/li\u003e\n\u003cli\u003eUnderstanding the Costs and Timelines for VMC\u003c/li\u003e\n\u003cli\u003eFuture of VMC: Including Non-Trademarked Logos\u003c/li\u003e\n\u003cli\u003eFrequently Asked Questions about the VMC\u003c/li\u003e\n\u003c/ul\u003e\n\u003ch2 id=\"what-is-a-verified-mark-certificate-vmc\"\u003eWhat is a Verified Mark Certificate (VMC)?\u003c/h2\u003e\n\u003cp\u003eIn the digital era, establishing brand identity and ensuring the legitimacy of communication channels have become pivotal for businesses. One tool that assists in these goals is the Verified Mark Certificate (VMC). This comprehensive guide provides an overview of VMC, its importance in email marketing, the steps to obtain one, and future updates on VMC eligibility. Obtaining your VMC is the holy grail to get finally getting your BIMI record.\u003c/p\u003e\n\u003cp\u003eA Verified Mark Certificate (VMC) is a digital certificate that verifies the ownership of a logo. Issued by a Certificate Authority, it validates that the organization is the legal owner of the brand logo.\u003c/p\u003e\n\u003ch2 id=\"applying-for-a-vmc\"\u003eApplying for a VMC\u003c/h2\u003e\n\u003cp\u003e\u003cstrong\u003e1. Select a Certified Authority (CA):\u003c/strong\u003e\u003c/p\u003e\n\u003cp\u003eVerified Mark Certificates (VMC) can be obtained from recognized Certificate Authorities (CA). This certificate is a key that unlocks the ability to display your logo on verified emails and showcases the verified checkmark in email clients that support this feature, such as Gmail.\u003c/p\u003e\n\u003cp\u003eIf you need help deciding which Certificate Authorities to work with, complete our short form \u003ca href=\"https://www.palisade.email/contact-us\"\u003ehere\u003c/a\u003e and our team will help you figure out which CA is the best fit for your company.\u003c/p\u003e\n\u003cp\u003e\u003cstrong\u003e2. Establish DMARC Enforcement (Explained in Step 1):\u003c/strong\u003e\u003c/p\u003e\n\u003cp\u003eBefore your logo can be displayed, email clients need assurance that your organization is adhering to \u003ca href=\"https://palisade.email/learning/what-is-dmarc\"\u003eDomain-based Message Authentication, Reporting, and Conformance (DMARC)\u003c/a\u003e standards. These standards help curb \u003ca href=\"https://palisade.email/learning/what-is-phishing\"\u003ephishing\u003c/a\u003e and \u003ca href=\"https://palisade.email/learning/what-is-spoofing\"\u003espoofing\u003c/a\u003e attacks, providing your organization with more control over its email communications.\u003c/p\u003e\n\u003cp\u003e\u003cstrong\u003e3. Upload Your Trademarked and Validated Logo:\u003c/strong\u003e\u003c/p\u003e\n\u003cp\u003eAfter demonstrating compliance with DMARC, you're eligible to upload your validated and trademarked logo for display within supporting email clients. If your company uses multiple logos, you can specify which one should appear for each type of communication.\u003c/p\u003e\n\u003cp\u003e\u003cstrong\u003e4. Decide on Logo Hosting:\u003c/strong\u003e\u003c/p\u003e\n\u003cp\u003eYou have the option to either self-host your logo or have the chosen CA manage the hosting for you. Consider your organization's resources and technical capabilities when making this decision. Either way, your logo needs to be easily accessible and retrievable by email clients for the BIMI standard to work effectively.\u003c/p\u003e\n\u003ch2 id=\"understanding-the-costs-and-timelines-for-vmc\"\u003eUnderstanding the Costs and Timelines for VMC\u003c/h2\u003e\n\u003cp\u003eThe process of obtaining a VMC involves both financial and time investments, which can vary depending on the Certificate Authority (CA) you choose and the country in which your organization operates.\u003c/p\u003e\n\u003cul\u003e\u003cli\u003e\u003cstrong\u003eCosts:\u003c/strong\u003e The price of a VMC is set by the CA you choose. As of 2023, costs can range from several hundred to over a thousand dollars annually. It's important to consult directly with your chosen CA for accurate pricing details. Remember, this is an annual cost that you will need to budget for if you plan on continuing to use BIMI and VMC.\u003c/li\u003e\n\u003cli\u003e\u003cstrong\u003eTimelines:\u003c/strong\u003e The time it takes to process a VMC application can also vary. Generally, you should expect the process to take between a few days to several weeks. This timeline depends on multiple factors, including the efficiency of your chosen CA, the complexity of verifying your trademark, and the completeness of the information and documents you provide.\u003c/li\u003e\n\u003cli\u003e\u003cstrong\u003eRenewal:\u003c/strong\u003e VMCs are not perpetual and will need to be renewed periodically. The renewal process is similar to the initial application, although it may be quicker because your information and trademark are already on file with the CA. Be sure to keep track of your VMC's expiration date to avoid any interruption in your logo display.\u003c/li\u003e\n\u003c/ul\u003e\nUnderstanding these costs and timelines will help you plan and budget for your VMC application effectively. It's recommended to start this process well in advance of when you want your logo to start appearing in your outbound emails.\n\u003cp\u003e\n\u003cimg src=\"/images/cms/64d2d76f1c7443da13c0404a_649c8186cfc40c66070f4321_vmc-certificate.png\" alt=\"\" loading=\"lazy\" decoding=\"async\" /\u003e\n\u003cstrong\u003eFuture of VMC: Including Non-Trademarked Logos\u003c/strong\u003e\u003c/p\u003e\n\u003cp\u003eThe Verified Mark Certificate (VMC) landscape is evolving, and one significant anticipated change is the inclusion of non-trademarked logos. Currently, a VMC requires a registered trademark for your logo, validating your organization as the legal owner. This approach strengthens email security and trust, as it makes logo \u003ca href=\"https://palisade.email/learning/what-is-spoofing\"\u003espoofing\u003c/a\u003e more difficult for malicious entities.\u003c/p\u003e\n\u003cp\u003eHowever, this stipulation may change in the future. The BIMI Group, the entity responsible for developing and maintaining \u003ca href=\"https://palisade.email/learning/what-is-bimi\"\u003eBIMI (Brand Indicators for Message Identification)\u003c/a\u003e standards, is considering expanding the eligibility criteria to include logos that are not trademarked. This change will make the VMC and its associated benefits accessible to a wider range of organizations, particularly smaller businesses or nonprofits that may not have registered trademarks.\u003c/p\u003e\n\u003cp\u003eThis potential change is an exciting development in the world of email security and branding. It underscores the ongoing commitment to making email communication more secure and visually engaging, all while maintaining a high level of trust between organizations and their email recipients.\u003c/p\u003e\n\u003cp\u003e\u003c/p\u003e\n\u003ch2 id=\"step-4-bimi-records\"\u003eStep 4→ BIMI Records\u003c/h2\u003e\n\u003cimg src=\"/images/cms/64d2d76f1c7443da13c04059_649c8196a8b30513ef1608d5_bimi-record.png\" alt=\"\" loading=\"lazy\" decoding=\"async\" /\u003e\n\u003ca href=\"https://bimigroup.org/\" target=\"_blank\" rel=\"noopener noreferrer\"\u003eOfficial BIMI organization website\u003c/a\u003e\n\u003ch2 id=\"adding-your-brand-logo-to-your-outgoing-email\"\u003eAdding your brand logo to your outgoing email\u003c/h2\u003e\n\u003cp\u003eYou've made it to the final step! This stage will guide you on how to create your Brand Indicators for Message Identification (BIMI) record, integrate it into your DNS records, and assist you in verifying its functionality. If necessary, we'll also help you troubleshoot any hiccups along the way.\u003c/p\u003e\n\u003cp\u003eThe finish line is in sight! By successfully adding your BIMI record, you'll be able to display your logo in your emails and secure that coveted verified blue Gmail checkmark.\u003c/p\u003e\n\u003ch2 id=\"what-will-be-covered-in-step-4\"\u003eWhat will be covered in Step 4?\u003c/h2\u003e\n\u003cul\u003e\u003cli\u003eUnderstanding BIMI Records\u003c/li\u003e\n\u003cli\u003eCreating a BIMI Record\u003c/li\u003e\n\u003cli\u003eAdding Your BIMI Record to Your DNS\u003c/li\u003e\n\u003cli\u003eValidating Your BIMI Record\u003c/li\u003e\n\u003cli\u003eTroubleshooting possible problems\u003c/li\u003e\n\u003c/ul\u003e\n\u003ch3 id=\"understanding-bimi-records\"\u003eUnderstanding BIMI Records\u003c/h3\u003e\n\u003cp\u003eBrand Indicators for Message Identification (BIMI) records are a type of Domain-based Message Authentication, Reporting, and Conformance (DMARC) policy. They link a brand's verified logo with their domain. When set up properly, supported email clients will display this logo next to emails from the domain, providing visual authentication.\u003c/p\u003e\n\u003cp\u003eBIMI records play a pivotal role in email security. They provide a visual check against phishing and email spoofing by displaying your verified logo in the recipient's inbox. This gives instant recognition and trust. BIMI records improve email security and deliverability by showing that your emails are legitimate.\u003c/p\u003e\n\u003ch2 id=\"creating-a-bimi-record\"\u003eCreating a BIMI Record\u003c/h2\u003e\n\u003cp\u003eYour BIMI record is a string of text that incorporates the URL where your company's Scalable Vector Graphics (SVG) logo is located. To craft your own record, refer to the examples provided in this section.\u003c/p\u003e\n\u003ch3 id=\"creating-a-bimi-record-using-an-official-bimi-record-generator\"\u003e\u003cstrong\u003eCreating a BIMI record using an official BIMI record generator:\u003c/strong\u003e\u003c/h3\u003e\n\u003cp\u003eThe BIMI record generator simplifies this process by taking the brand's logo and DNS details and automatically generating a BIMI record, which can then be added to the brand's DNS settings.\u003c/p\u003e\n\u003cp\u003e\u003ca href=\"https://bimigroup.org/bimi-generator/\" target=\"_blank\" rel=\"noopener noreferrer\"\u003ehttps://bimigroup.org/bimi-generator/\u003c/a\u003e\u003c/p\u003e\n\u003ch3 id=\"examples-and-types-of-bimi-records\"\u003eExamples and types of BIMI records\u003c/h3\u003e\n\u003cp\u003eIn the syntax of BIMI records, it's crucial to distinguish between the number 1, the uppercase 'I', and the lowercase 'l'. They may look alike but are fundamentally different and can change the meaning of your BIMI record.\u003c/p\u003e\n\u003cp\u003e\u003cstrong\u003e1. Example of a BIMI Record that includes a VMC:\u003c/strong\u003e\u003c/p\u003e\n\u003cp\u003eThis record comprises two example URLs which should be replaced with the URLs of your BIMI files:\u003c/p\u003e\n\u003cul\u003e\u003cli\u003eThe URL where your SVG logo is stored on your public web server.\u003c/li\u003e\n\u003cli\u003eThe URL for your VMC on your public web server. Note that Gmail requires a VMC to display BIMI logos in Gmail's inbox.\u003c/li\u003e\n\u003c/ul\u003e\n\u003cstrong\u003e2. Example of a BIMI Record that does not include a VMC:\u003c/strong\u003e\n\u003cp\u003eRemember to replace the example URLs with the precise locations of your files to successfully create and utilize your BIMI records.\u003c/p\u003e\n\u003ch2 id=\"add-your-bimi-record-to-your-dns-manager\"\u003eAdd your BIMI record to your DNS manager\u003c/h2\u003e\n\u003cp\u003eTo activate \u003ca href=\"https://palisade.email/learning/what-is-bimi\"\u003eBIMI\u003c/a\u003e on your domain, you need to create a \u003ca href=\"https://palisade.email/learning/what-is-a-dns\"\u003eDNS\u003c/a\u003e TXT record for BIMI through your DNS manager.\u003c/p\u003e\n\u003cp\u003eIf you need help publishing a DNS record, Palisade can provide the required record and manage supported hosted records. A DNS administrator may still need to approve the change when Palisade does not control the zone.\u003c/p\u003e\n\u003ch3 id=\"to-add-a-dns-txt-bimi-record-to-your-domain-follow-these-steps\"\u003eTo add a DNS TXT BIMI record to your domain, follow these steps\u003c/h3\u003e\n\u003cp\u003e1 - First, log into your domain DNS management console. (example in CloudFlare)\u003c/p\u003e\n\u003cp\u003e2- Input the required values into the form designated for your domain provider's DNS records:\u003c/p\u003e\n\u003cp\u003e3- Save the record and verify it is correctly displaying in the DNS Manager:\n\u003cimg src=\"/images/cms/64d2d76eef8053e52583aeb7_649c7f5aff511fa3f3bfd99b_screenshot-2023-06-12-at-3.11.01-pm.png\" alt=\"\" loading=\"lazy\" decoding=\"async\" /\u003e\n\u003ch2 id=\"validating-your-bimi-record\"\u003eValidating your BIMI Record\u003c/h2\u003e\u003c/p\u003e\n\u003cp\u003eUsing this tool, you can ensure that your BIMI record has been correctly added and is properly propagated. Don’t forget that it can take up to 48 hours to fully propagate.\u003c/p\u003e\n\u003cp\u003e\u003ca href=\"https://bimigroup.org/bimi-generator/\" target=\"_blank\" rel=\"noopener noreferrer\"\u003ehttps://bimigroup.org/bimi-generator/\u003c/a\u003e\n\u003cimg src=\"/images/cms/64d2d76eef8053e52583aebc_649c7f69bfab66d1b23c8b77_screenshot-2023-06-12-at-3.21.38-pm.png\" alt=\"\" loading=\"lazy\" decoding=\"async\" /\u003e\n\u003ch2 id=\"troubleshooting-common-bimi-record-issues\"\u003eTroubleshooting Common BIMI Record Issues\u003c/h2\u003e\u003c/p\u003e\n\u003ch3 id=\"logo-not-displaying-in-recipients-inbox\"\u003eLogo Not Displaying in Recipient's Inbox\u003c/h3\u003e\n\u003cul\u003e\u003cli\u003ePossible Causes: The most common causes are incorrect or invalid BIMI record syntax, a BIMI record that isn't correctly connected to your DNS, or SVG files that don't meet the standards or are unreachable.\u003c/li\u003e\n\u003cli\u003eRemedial Steps: Review your BIMI record syntax to ensure it matches the format needed. Verify that your SVG file is reachable from the internet and meets BIMI standards. Also, check that your BIMI record is properly linked to your DNS.\u003c/li\u003e\n\u003c/ul\u003e\n\u003ch3 id=\"messages-from-your-organization-are-sent-to-spam\"\u003eMessages From Your Organization Are Sent to Spam\u003c/h3\u003e\n\u003cul\u003e\u003cli\u003ePotential Reasons: This could occur due to weak or non-existent DMARC policies, an email system that's not properly authenticated, or content within your messages that email clients perceive as spam.\u003c/li\u003e\n\u003cli\u003eWays to Fix the Issue: Strengthen your DMARC policies and ensure SPF and DKIM records are properly set up to authenticate your email system. Also, review the content of your messages to ensure they don't contain elements often associated with spam, such as aggressive promotional language or an excessive number of links.\u003c/li\u003e\n\u003c/ul\u003e\n\u003ch3 id=\"need-help\"\u003eNeed help?\u003c/h3\u003e\n\u003cp\u003ePalisade can help validate the DNS and authentication work behind \u003ca href=\"https://palisade.email/learning/what-is-bimi\"\u003eBIMI\u003c/a\u003e. Logo formatting, trademark eligibility, and certificate issuance still depend on external requirements and providers.\u003c/p\u003e\n\u003cp\u003e\u003c/p\u003e"])</script><script>self.__next_f.push([1,"34:[\"$\",\"div\",null,{\"className\":\"prose mt-10\",\"children\":[\"$\",\"div\",null,{\"dangerouslySetInnerHTML\":{\"__html\":\"$3c\"}}]}]\n"])</script><script>self.__next_f.push([1,"35:[\"$\",\"section\",null,{\"aria-label\":\"Ask AI about this article\",\"className\":\"mt-12 rounded-[20px] bg-white p-6\",\"children\":[[\"$\",\"p\",null,{\"className\":\"text-xs font-bold uppercase tracking-wide text-palisade-gray-500\",\"children\":\"Keep going with AI\"}],[\"$\",\"h2\",null,{\"className\":\"mt-1 text-xl font-bold text-palisade-dark\",\"children\":\"Ask AI how this applies to you\"}],[\"$\",\"p\",null,{\"className\":\"mt-2 text-sm text-palisade-gray-600\",\"children\":\"Take this guide to your assistant — each question opens pre-filled, with a link back to this page so it can read the details.\"}],[\"$\",\"ul\",null,{\"className\":\"mt-4\",\"children\":[[\"$\",\"li\",\"core\",{\"className\":\"flex flex-wrap items-center justify-between gap-x-6 gap-y-2 border-t border-palisade-border py-3 first:border-t-0 first:pt-0 last:pb-0\",\"children\":[[\"$\",\"span\",null,{\"className\":\"min-w-0 flex-1 basis-60 text-sm font-medium text-palisade-dark\",\"children\":\"Why Set Up SPF, DKIM, and DMARC for Your Domain?\"}],[\"$\",\"span\",null,{\"className\":\"flex shrink-0 items-center gap-2\",\"children\":[[\"$\",\"$L2f\",\"chatgpt\",{\"href\":\"https://chatgpt.com/?q=I%20just%20read%20Palisade's%20guide%20%22Master%20Guide%3A%20Obtaining%20your%20blue%20verified%20Gmail%20checkmark%22%20(https%3A%2F%2Fwww.palisade.email%2Fresources-post%2Fhow-to-get-gmail-blue-verified-checkmark).%20Why%20Set%20Up%20SPF%2C%20DKIM%2C%20and%20DMARC%20for%20Your%20Domain%3F%20Explain%20it%20in%20plain%20terms%2C%20using%20the%20guide%20as%20your%20starting%20point%2C%20and%20flag%20anything%20important%20it%20doesn't%20cover.\",\"event\":\"ask_ai_clicked\",\"eventProps\":{\"platform\":\"chatgpt\",\"question\":\"core\",\"placement\":\"article_end\"},\"target\":\"_blank\",\"rel\":\"noopener noreferrer\",\"title\":\"Ask ChatGPT\",\"aria-label\":\"Ask ChatGPT: Why Set Up SPF, DKIM, and DMARC for Your Domain?\",\"className\":\"flex h-9 w-9 items-center justify-center rounded-full border-card bg-white transition-colors hover:border-palisade-blue-light\",\"children\":[\"$\",\"$L15\",null,{\"src\":\"/images/ai/chatgpt.png\",\"alt\":\"\",\"width\":18,\"height\":18,\"className\":\"h-[18px] w-[18px] shrink-0 rounded-[3px] object-contain\"}]}],[\"$\",\"$L2f\",\"claude\",{\"href\":\"https://claude.ai/new?q=I%20just%20read%20Palisade's%20guide%20%22Master%20Guide%3A%20Obtaining%20your%20blue%20verified%20Gmail%20checkmark%22%20(https%3A%2F%2Fwww.palisade.email%2Fresources-post%2Fhow-to-get-gmail-blue-verified-checkmark).%20Why%20Set%20Up%20SPF%2C%20DKIM%2C%20and%20DMARC%20for%20Your%20Domain%3F%20Explain%20it%20in%20plain%20terms%2C%20using%20the%20guide%20as%20your%20starting%20point%2C%20and%20flag%20anything%20important%20it%20doesn't%20cover.\",\"event\":\"ask_ai_clicked\",\"eventProps\":{\"platform\":\"claude\",\"question\":\"core\",\"placement\":\"article_end\"},\"target\":\"_blank\",\"rel\":\"noopener noreferrer\",\"title\":\"Ask Claude\",\"aria-label\":\"Ask Claude: Why Set Up SPF, DKIM, and DMARC for Your Domain?\",\"className\":\"flex h-9 w-9 items-center justify-center rounded-full border-card bg-white transition-colors hover:border-palisade-blue-light\",\"children\":[\"$\",\"$L15\",null,{\"src\":\"/images/ai/claude.png\",\"alt\":\"\",\"width\":18,\"height\":18,\"className\":\"h-[18px] w-[18px] shrink-0 rounded-[3px] object-contain\"}]}],[\"$\",\"$L2f\",\"gemini\",{\"href\":\"https://gemini.google.com/app?q=I%20just%20read%20Palisade's%20guide%20%22Master%20Guide%3A%20Obtaining%20your%20blue%20verified%20Gmail%20checkmark%22%20(https%3A%2F%2Fwww.palisade.email%2Fresources-post%2Fhow-to-get-gmail-blue-verified-checkmark).%20Why%20Set%20Up%20SPF%2C%20DKIM%2C%20and%20DMARC%20for%20Your%20Domain%3F%20Explain%20it%20in%20plain%20terms%2C%20using%20the%20guide%20as%20your%20starting%20point%2C%20and%20flag%20anything%20important%20it%20doesn't%20cover.\",\"event\":\"ask_ai_clicked\",\"eventProps\":{\"platform\":\"gemini\",\"question\":\"core\",\"placement\":\"article_end\"},\"target\":\"_blank\",\"rel\":\"noopener noreferrer\",\"title\":\"Ask Gemini\",\"aria-label\":\"Ask Gemini: Why Set Up SPF, DKIM, and DMARC for Your Domain?\",\"className\":\"flex h-9 w-9 items-center justify-center rounded-full border-card bg-white transition-colors hover:border-palisade-blue-light\",\"children\":\"$L3d\"}],\"$L3e\",\"$L3f\"]}]]}],\"$L40\",\"$L41\"]}]]}]\n"])</script><script>self.__next_f.push([1,"36:[\"$\",\"div\",null,{\"className\":\"mt-12 border-t border-palisade-border pt-6\",\"children\":[[\"$\",\"p\",null,{\"className\":\"mb-3 text-sm font-medium text-palisade-dark\",\"children\":\"Share this article\"}],[\"$\",\"div\",null,{\"className\":\"flex items-center gap-3\",\"children\":[[\"$\",\"a\",null,{\"href\":\"https://twitter.com/intent/tweet?url=https%3A%2F%2Fwww.palisade.email%2Fresources-post%2Fhow-to-get-gmail-blue-verified-checkmark\u0026text=Master%20Guide%3A%20Obtaining%20your%20blue%20verified%20Gmail%20checkmark\",\"target\":\"_blank\",\"rel\":\"noopener noreferrer\",\"aria-label\":\"Share on X\",\"className\":\"card-hover flex h-10 w-10 items-center justify-center rounded-full border border-palisade-border text-palisade-gray-600 hover:text-palisade-blue-light\",\"children\":[\"$\",\"svg\",null,{\"className\":\"h-4 w-4\",\"viewBox\":\"0 0 20 20\",\"fill\":\"currentColor\",\"children\":[\"$\",\"path\",null,{\"d\":\"M15.3 1.7h2.9l-6.4 7.3 7.5 9.9h-5.9l-4.6-6-5.3 6H0.6l6.8-7.8L0 1.7h6l4.2 5.5 4.6-5.5zm-1 14.7h1.6L5.3 3.3H3.6l10.7 13.1z\"}]}]}],[\"$\",\"a\",null,{\"href\":\"https://www.linkedin.com/sharing/share-offsite/?url=https%3A%2F%2Fwww.palisade.email%2Fresources-post%2Fhow-to-get-gmail-blue-verified-checkmark\",\"target\":\"_blank\",\"rel\":\"noopener noreferrer\",\"aria-label\":\"Share on LinkedIn\",\"className\":\"card-hover flex h-10 w-10 items-center justify-center rounded-full border border-palisade-border text-palisade-gray-600 hover:text-palisade-blue-light\",\"children\":[\"$\",\"svg\",null,{\"className\":\"h-4 w-4\",\"viewBox\":\"0 0 20 20\",\"fill\":\"currentColor\",\"children\":[\"$\",\"path\",null,{\"d\":\"M18.52 0H1.48C0.66 0 0 0.66 0 1.48v17.04C0 19.34 0.66 20 1.48 20h17.04c0.82 0 1.48-0.66 1.48-1.48V1.48C20 0.66 19.34 0 18.52 0zM5.96 17.04H2.95V7.49h3.01v9.55zM4.46 6.16a1.75 1.75 0 110-3.5 1.75 1.75 0 010 3.5zm12.58 10.88h-3v-4.82c0-1.54-0.65-2.01-1.5-2.01-0.89 0-1.77 0.67-1.77 2.05v4.78h-3V7.49h2.89v1.32h0.04c0.29-0.59 1.31-1.59 2.86-1.59 1.68 0 3.49 1 3.49 3.91v5.91z\"}]}]}]]}]]}]\n"])</script><script>self.__next_f.push([1,"37:[\"$\",\"div\",null,{\"className\":\"mt-10\",\"children\":[\"$\",\"div\",null,{\"className\":\"flex items-start gap-4\",\"children\":[[\"$\",\"$L14\",null,{\"href\":\"/author/samuel-chenard\",\"className\":\"relative block h-16 w-16 shrink-0 overflow-hidden rounded-full\",\"children\":[\"$\",\"$L15\",null,{\"src\":\"/images/Palisade-Profess-Sam.jpg\",\"alt\":\"Samuel Chenard\",\"fill\":true,\"className\":\"object-cover\",\"sizes\":\"64px\"}]}],[\"$\",\"div\",null,{\"className\":\"min-w-0\",\"children\":[[\"$\",\"p\",null,{\"className\":\"text-xs font-bold uppercase tracking-wide text-palisade-gray-500\",\"children\":\"Written by\"}],[\"$\",\"$L14\",null,{\"href\":\"/author/samuel-chenard\",\"className\":\"mt-1 inline-block text-lg font-semibold text-palisade-dark hover:text-palisade-blue-light\",\"children\":\"Samuel Chenard\"}],[\"$\",\"p\",null,{\"className\":\"text-sm text-palisade-gray-500\",\"children\":\"CEO \u0026 Co-Founder, Palisade\"}],[\"$\",\"p\",null,{\"className\":\"mt-2 text-sm leading-relaxed text-palisade-gray-600\",\"children\":\"Samuel Chenard is the CEO and co-founder of Palisade, AI-first DMARC software for IT teams and MSPs, from one domain to thousands.\"}],[\"$\",\"$L14\",null,{\"href\":\"/author/samuel-chenard\",\"className\":\"mt-2 inline-block text-sm font-medium text-palisade-blue-light hover:underline\",\"children\":[\"More from \",\"Samuel\",\" →\"]}],[\"$\",\"div\",null,{\"className\":\"mt-4 flex items-center gap-2\",\"children\":[\"\",[\"$\",\"a\",null,{\"href\":\"https://www.linkedin.com/in/samuelchenard/\",\"target\":\"_blank\",\"rel\":\"noopener noreferrer\",\"aria-label\":\"Samuel Chenard on LinkedIn\",\"className\":\"card-hover flex h-9 w-9 items-center justify-center rounded-full border border-palisade-border text-palisade-gray-600 hover:text-palisade-blue-light\",\"children\":[\"$\",\"svg\",null,{\"className\":\"h-4 w-4\",\"viewBox\":\"0 0 20 20\",\"fill\":\"currentColor\",\"children\":[\"$\",\"path\",null,{\"d\":\"M18.52 0H1.48C0.66 0 0 0.66 0 1.48v17.04C0 19.34 0.66 20 1.48 20h17.04c0.82 0 1.48-0.66 1.48-1.48V1.48C20 0.66 19.34 0 18.52 0zM5.96 17.04H2.95V7.49h3.01v9.55zM4.46 6.16a1.75 1.75 0 110-3.5 1.75 1.75 0 010 3.5zm12.58 10.88h-3v-4.82c0-1.54-0.65-2.01-1.5-2.01-0.89 0-1.77 0.67-1.77 2.05v4.78h-3V7.49h2.89v1.32h0.04c0.29-0.59 1.31-1.59 2.86-1.59 1.68 0 3.49 1 3.49 3.91v5.91z\"}]}]}]]}]]}]]}]}]\n"])</script><script>self.__next_f.push([1,"38:[\"$\",\"aside\",null,{\"children\":[[\"$\",\"nav\",null,{\"aria-label\":\"Table of contents\",\"className\":\"mb-6 hidden lg:block\",\"children\":[[\"$\",\"p\",null,{\"className\":\"text-xs font-bold uppercase tracking-wide text-palisade-gray-500\",\"children\":\"On this page\"}],[\"$\",\"ul\",null,{\"className\":\"mt-3 flex flex-col gap-2\",\"children\":[[\"$\",\"li\",\"step-1-configuring-your-dns-and-preparing-to-set-up-your-bimi-record-laying-the--0\",{\"className\":\"\",\"children\":[\"$\",\"a\",null,{\"href\":\"#step-1-configuring-your-dns-and-preparing-to-set-up-your-bimi-record-laying-the-\",\"className\":\"text-sm leading-snug text-palisade-gray-600 hover:text-palisade-blue-light\",\"children\":\"Step 1→ Configuring your DNS and Preparing to set up your BIMI record – laying the necessary groundwork.\"}]}],[\"$\",\"li\",\"dns-records-what-they-are-why-they-matter-and-how-to-set-them-up-1\",{\"className\":\"\",\"children\":[\"$\",\"a\",null,{\"href\":\"#dns-records-what-they-are-why-they-matter-and-how-to-set-them-up\",\"className\":\"text-sm leading-snug text-palisade-gray-600 hover:text-palisade-blue-light\",\"children\":\"DNS Records: What They Are, Why They Matter, and How to Set Them Up\"}]}],[\"$\",\"li\",\"why-set-up-spf-dkim-and-dmarc-for-your-domain-2\",{\"className\":\"\",\"children\":[\"$\",\"a\",null,{\"href\":\"#why-set-up-spf-dkim-and-dmarc-for-your-domain\",\"className\":\"text-sm leading-snug text-palisade-gray-600 hover:text-palisade-blue-light\",\"children\":\"Why Set Up SPF, DKIM, and DMARC for Your Domain?\"}]}],[\"$\",\"li\",\"understanding-propagation-3\",{\"className\":\"pl-3\",\"children\":[\"$\",\"a\",null,{\"href\":\"#understanding-propagation\",\"className\":\"text-sm leading-snug text-palisade-gray-600 hover:text-palisade-blue-light\",\"children\":\"Understanding Propagation\"}]}],[\"$\",\"li\",\"gathering-your-dns-manager-credentials-4\",{\"className\":\"\",\"children\":[\"$\",\"a\",null,{\"href\":\"#gathering-your-dns-manager-credentials\",\"className\":\"text-sm leading-snug text-palisade-gray-600 hover:text-palisade-blue-light\",\"children\":\"Gathering Your DNS Manager Credentials\"}]}],[\"$\",\"li\",\"setting-up-your-spf-record-5\",{\"className\":\"pl-3\",\"children\":[\"$\",\"a\",null,{\"href\":\"#setting-up-your-spf-record\",\"className\":\"text-sm leading-snug text-palisade-gray-600 hover:text-palisade-blue-light\",\"children\":\"Setting up your SPF Record\"}]}],[\"$\",\"li\",\"setting-up-your-spf-record-6\",{\"className\":\"\",\"children\":[\"$\",\"a\",null,{\"href\":\"#setting-up-your-spf-record\",\"className\":\"text-sm leading-snug text-palisade-gray-600 hover:text-palisade-blue-light\",\"children\":\"Setting Up Your SPF Record\"}]}],[\"$\",\"li\",\"setting-up-your-dkim-dns-record-7\",{\"className\":\"pl-3\",\"children\":[\"$\",\"a\",null,{\"href\":\"#setting-up-your-dkim-dns-record\",\"className\":\"text-sm leading-snug text-palisade-gray-600 hover:text-palisade-blue-light\",\"children\":\"Setting up your DKIM DNS record\"}]}],[\"$\",\"li\",\"setup-dmarc-for-your-domain-8\",{\"className\":\"pl-3\",\"children\":[\"$\",\"a\",null,{\"href\":\"#setup-dmarc-for-your-domain\",\"className\":\"text-sm leading-snug text-palisade-gray-600 hover:text-palisade-blue-light\",\"children\":\"Setup DMARC for your Domain\"}]}],[\"$\",\"li\",\"checking-for-an-existing-bimi-record-9\",{\"className\":\"\",\"children\":[\"$\",\"a\",null,{\"href\":\"#checking-for-an-existing-bimi-record\",\"className\":\"text-sm leading-snug text-palisade-gray-600 hover:text-palisade-blue-light\",\"children\":\"Checking for an existing BIMI record\"}]}],[\"$\",\"li\",\"step-2-logo---svg-trademark-10\",{\"className\":\"\",\"children\":[\"$\",\"a\",null,{\"href\":\"#step-2-logo---svg-trademark\",\"className\":\"text-sm leading-snug text-palisade-gray-600 hover:text-palisade-blue-light\",\"children\":\"Step 2 → Logo - SVG \u0026 Trademark\"}]}],[\"$\",\"li\",\"step-1---obtaining-configuring-your-companys-logo-svg-11\",{\"className\":\"\",\"children\":[\"$\",\"a\",null,{\"href\":\"#step-1---obtaining-configuring-your-companys-logo-svg\",\"className\":\"text-sm leading-snug text-palisade-gray-600 hover:text-palisade-blue-light\",\"children\":\"Step 1 - Obtaining \u0026 Configuring Your Company's Logo SVG\"}]}],\"$L42\",\"$L43\",\"$L44\",\"$L45\",\"$L46\",\"$L47\",\"$L48\",\"$L49\",\"$L4a\",\"$L4b\",\"$L4c\",\"$L4d\",\"$L4e\",\"$L4f\",\"$L50\",\"$L51\",\"$L52\",\"$L53\",\"$L54\",\"$L55\",\"$L56\",\"$L57\",\"$L58\",\"$L59\",\"$L5a\",\"$L5b\",\"$L5c\",\"$L5d\",\"$L5e\",\"$L5f\",\"$L60\",\"$L61\",\"$L62\",\"$L63\",\"$L64\"]}]]}],\"$L65\"]}]\n"])</script><script>self.__next_f.push([1,"39:[\"$\",\"$L15\",null,{\"src\":\"/images/editorial/8-best-dmarc-tools-for-msps-expert-tested-picks-for-2025/8-best-dmarc-tools-for-msps-expert-tested-picks-for-2025-hero.png\",\"alt\":\"8 DMARC tools for MSPs compared in 2026\",\"fill\":true,\"className\":\"object-cover transition-transform group-hover:scale-[1.02]\",\"sizes\":\"(max-width: 640px) 100vw, (max-width: 1024px) 50vw, 25vw\"}]\n3a:[\"$\",\"span\",null,{\"className\":\"text-base font-semibold leading-snug text-palisade-dark group-hover:text-palisade-blue-light\",\"children\":\"8 DMARC tools for MSPs compared in 2026\"}]\n3b:[\"$\",\"span\",null,{\"className\":\"mt-2 text-sm text-palisade-gray-500\",\"children\":\"October 2, 2025\"}]\n"])</script><script>self.__next_f.push([1,"6a:I[48312,[\"/_next/static/chunks/3c22aeb80bdabc4f.js?dpl=dpl_G6WMfMehfVJz6P5qTrAU7i6T7SYx\",\"/_next/static/chunks/874f0e9db4f593ca.js?dpl=dpl_G6WMfMehfVJz6P5qTrAU7i6T7SYx\",\"/_next/static/chunks/b2d09427a4dc1cc9.js?dpl=dpl_G6WMfMehfVJz6P5qTrAU7i6T7SYx\",\"/_next/static/chunks/49eb543f4b7c43a6.js?dpl=dpl_G6WMfMehfVJz6P5qTrAU7i6T7SYx\",\"/_next/static/chunks/6103dac3ac1256f1.js?dpl=dpl_G6WMfMehfVJz6P5qTrAU7i6T7SYx\"],\"default\"]\n6b:I[31494,[\"/_next/static/chunks/3c22aeb80bdabc4f.js?dpl=dpl_G6WMfMehfVJz6P5qTrAU7i6T7SYx\",\"/_next/static/chunks/874f0e9db4f593ca.js?dpl=dpl_G6WMfMehfVJz6P5qTrAU7i6T7SYx\",\"/_next/static/chunks/b2d09427a4dc1cc9.js?dpl=dpl_G6WMfMehfVJz6P5qTrAU7i6T7SYx\",\"/_next/static/chunks/49eb543f4b7c43a6.js?dpl=dpl_G6WMfMehfVJz6P5qTrAU7i6T7SYx\",\"/_next/static/chunks/6103dac3ac1256f1.js?dpl=dpl_G6WMfMehfVJz6P5qTrAU7i6T7SYx\"],\"default\"]\n3d:[\"$\",\"$L15\",null,{\"src\":\"/images/ai/gemini.png\",\"alt\":\"\",\"width\":18,\"height\":18,\"className\":\"h-[18px] w-[18px] shrink-0 rounded-[3px] object-contain\"}]\n3e:[\"$\",\"$L2f\",\"perplexity\",{\"href\":\"https://www.perplexity.ai/search?q=I%20just%20read%20Palisade's%20guide%20%22Master%20Guide%3A%20Obtaining%20your%20blue%20verified%20Gmail%20checkmark%22%20(https%3A%2F%2Fwww.palisade.email%2Fresources-post%2Fhow-to-get-gmail-blue-verified-checkmark).%20Why%20Set%20Up%20SPF%2C%20DKIM%2C%20and%20DMARC%20for%20Your%20Domain%3F%20Explain%20it%20in%20plain%20terms%2C%20using%20the%20guide%20as%20your%20starting%20point%2C%20and%20flag%20anything%20important%20it%20doesn't%20cover.\",\"event\":\"ask_ai_clicked\",\"eventProps\":{\"platform\":\"perplexity\",\"question\":\"core\",\"placement\":\"article_end\"},\"target\":\"_blank\",\"rel\":\"noopener noreferrer\",\"title\":\"Ask Perplexity\",\"aria-label\":\"Ask Perplexity: Why Set Up SPF, DKIM, and DMARC for Your Domain?\",\"className\":\"flex h-9 w-9 items-center justify-center rounded-full border-card bg-white transition-colors hover:border-palisade-blue-light\",\"children\":[\"$\",\"$L15\",null,{\"src\":\"/images/ai/perplexity.png\",\"alt\":\"\",\"width\":18,\"height\":18,\"className\":\"h-[18px] w-[18px] shrink-0 rounded-[3px] object-contain\"}]}]\n3f:[\"$\",\"$L2f\",\"grok\",{\"href\":\"https://grok.com/?q=I%20just%20read%20Palisade's%20guide%20%22Master%20Guide%3A%20Obtaining%20your%20blue%20verified%20Gmail%20checkmark%22%20(https%3A%2F%2Fwww.palisade.email%2Fresources-post%2Fhow-to-get-gmail-blue-verified-checkmark).%20Why%20Set%20Up%20SPF%2C%20DKIM%2C%20and%20DMARC%20for%20Your%20Domain%3F%20Explain%20it%20in%20plain%20terms%2C%20using%20the%20guide%20as%20your%20starting%20point%2C%20and%20flag%20anything%20important%20it%20doesn't%20cover.\",\"event\":\"ask_ai_clicked\",\"eventProps\":{\"platform\":\"grok\",\"question\":\"core\",\"placement\":\"article_end\"},\"target\":\"_blank\",\"rel\":\"noopener noreferrer\",\"title\":\"Ask Grok\",\"aria-label\":\"Ask Grok: Why Set Up SPF, DKIM, and DMARC for Your Domain?\",\"className\":\"flex h-9 w-9 items-center justify-center rounded-full border-card bg-white transition-colors hover:border-palisade-blue-light\",\"children\":[\"$\",\"$L15\",null,{\"src\":\"/images/ai/grok.png\",\"alt\":\"\",\"width\":18,\"height\":18,\"className\":\"h-[18px] w-[18px] shrink-0 rounded-[3px] object-contain\"}]}]\n"])</script><script>self.__next_f.push([1,"40:[\"$\",\"li\",\"apply\",{\"className\":\"flex flex-wrap items-center justify-between gap-x-6 gap-y-2 border-t border-palisade-border py-3 first:border-t-0 first:pt-0 last:pb-0\",\"children\":[[\"$\",\"span\",null,{\"className\":\"min-w-0 flex-1 basis-60 text-sm font-medium text-palisade-dark\",\"children\":\"How does this apply to my domain?\"}],[\"$\",\"span\",null,{\"className\":\"flex shrink-0 items-center gap-2\",\"children\":[[\"$\",\"$L2f\",\"chatgpt\",{\"href\":\"https://chatgpt.com/?q=I%20just%20read%20Palisade's%20guide%20%22Master%20Guide%3A%20Obtaining%20your%20blue%20verified%20Gmail%20checkmark%22%20(https%3A%2F%2Fwww.palisade.email%2Fresources-post%2Fhow-to-get-gmail-blue-verified-checkmark).%20How%20does%20this%20apply%20to%20my%20domain%20and%20email%20setup%20%E2%80%94%20or%20my%20clients'%20domains%2C%20if%20I%20manage%20several%3F%20Ask%20me%20what%20you%20need%20to%20know%2C%20then%20tell%20me%20what%20to%20check%20first.\",\"event\":\"ask_ai_clicked\",\"eventProps\":{\"platform\":\"chatgpt\",\"question\":\"apply\",\"placement\":\"article_end\"},\"target\":\"_blank\",\"rel\":\"noopener noreferrer\",\"title\":\"Ask ChatGPT\",\"aria-label\":\"Ask ChatGPT: How does this apply to my domain?\",\"className\":\"flex h-9 w-9 items-center justify-center rounded-full border-card bg-white transition-colors hover:border-palisade-blue-light\",\"children\":[\"$\",\"$L15\",null,{\"src\":\"/images/ai/chatgpt.png\",\"alt\":\"\",\"width\":18,\"height\":18,\"className\":\"h-[18px] w-[18px] shrink-0 rounded-[3px] object-contain\"}]}],[\"$\",\"$L2f\",\"claude\",{\"href\":\"https://claude.ai/new?q=I%20just%20read%20Palisade's%20guide%20%22Master%20Guide%3A%20Obtaining%20your%20blue%20verified%20Gmail%20checkmark%22%20(https%3A%2F%2Fwww.palisade.email%2Fresources-post%2Fhow-to-get-gmail-blue-verified-checkmark).%20How%20does%20this%20apply%20to%20my%20domain%20and%20email%20setup%20%E2%80%94%20or%20my%20clients'%20domains%2C%20if%20I%20manage%20several%3F%20Ask%20me%20what%20you%20need%20to%20know%2C%20then%20tell%20me%20what%20to%20check%20first.\",\"event\":\"ask_ai_clicked\",\"eventProps\":{\"platform\":\"claude\",\"question\":\"apply\",\"placement\":\"article_end\"},\"target\":\"_blank\",\"rel\":\"noopener noreferrer\",\"title\":\"Ask Claude\",\"aria-label\":\"Ask Claude: How does this apply to my domain?\",\"className\":\"flex h-9 w-9 items-center justify-center rounded-full border-card bg-white transition-colors hover:border-palisade-blue-light\",\"children\":[\"$\",\"$L15\",null,{\"src\":\"/images/ai/claude.png\",\"alt\":\"\",\"width\":18,\"height\":18,\"className\":\"h-[18px] w-[18px] shrink-0 rounded-[3px] object-contain\"}]}],[\"$\",\"$L2f\",\"gemini\",{\"href\":\"https://gemini.google.com/app?q=I%20just%20read%20Palisade's%20guide%20%22Master%20Guide%3A%20Obtaining%20your%20blue%20verified%20Gmail%20checkmark%22%20(https%3A%2F%2Fwww.palisade.email%2Fresources-post%2Fhow-to-get-gmail-blue-verified-checkmark).%20How%20does%20this%20apply%20to%20my%20domain%20and%20email%20setup%20%E2%80%94%20or%20my%20clients'%20domains%2C%20if%20I%20manage%20several%3F%20Ask%20me%20what%20you%20need%20to%20know%2C%20then%20tell%20me%20what%20to%20check%20first.\",\"event\":\"ask_ai_clicked\",\"eventProps\":{\"platform\":\"gemini\",\"question\":\"apply\",\"placement\":\"article_end\"},\"target\":\"_blank\",\"rel\":\"noopener noreferrer\",\"title\":\"Ask Gemini\",\"aria-label\":\"Ask Gemini: How does this apply to my domain?\",\"className\":\"flex h-9 w-9 items-center justify-center rounded-full border-card bg-white transition-colors hover:border-palisade-blue-light\",\"children\":[\"$\",\"$L15\",null,{\"src\":\"/images/ai/gemini.png\",\"alt\":\"\",\"width\":18,\"height\":18,\"className\":\"h-[18px] w-[18px] shrink-0 rounded-[3px] object-contain\"}]}],[\"$\",\"$L2f\",\"perplexity\",{\"href\":\"https://www.perplexity.ai/search?q=I%20just%20read%20Palisade's%20guide%20%22Master%20Guide%3A%20Obtaining%20your%20blue%20verified%20Gmail%20checkmark%22%20(https%3A%2F%2Fwww.palisade.email%2Fresources-post%2Fhow-to-get-gmail-blue-verified-checkmark).%20How%20does%20this%20apply%20to%20my%20domain%20and%20email%20setup%20%E2%80%94%20or%20my%20clients'%20domains%2C%20if%20I%20manage%20several%3F%20Ask%20me%20what%20you%20need%20to%20know%2C%20then%20tell%20me%20what%20to%20check%20first.\",\"event\":\"ask_ai_clicked\",\"eventProps\":{\"platform\":\"perplexity\",\"question\":\"apply\",\"placement\":\"article_end\"},\"target\":\"_blank\",\"rel\":\"noopener noreferrer\",\"title\":\"Ask Perplexity\",\"aria-label\":\"Ask Perplexity: How does this apply to my domain?\",\"className\":\"flex h-9 w-9 items-center justify-center rounded-full border-card bg-white transition-colors hover:border-palisade-blue-light\",\"children\":\"$L66\"}],\"$L67\"]}]]}]\n"])</script><script>self.__next_f.push([1,"41:[\"$\",\"li\",\"solve\",{\"className\":\"flex flex-wrap items-center justify-between gap-x-6 gap-y-2 border-t border-palisade-border py-3 first:border-t-0 first:pt-0 last:pb-0\",\"children\":[[\"$\",\"span\",null,{\"className\":\"min-w-0 flex-1 basis-60 text-sm font-medium text-palisade-dark\",\"children\":\"What should I do about it, step by step?\"}],[\"$\",\"span\",null,{\"className\":\"flex shrink-0 items-center gap-2\",\"children\":[[\"$\",\"$L2f\",\"chatgpt\",{\"href\":\"https://chatgpt.com/?q=I%20just%20read%20Palisade's%20guide%20%22Master%20Guide%3A%20Obtaining%20your%20blue%20verified%20Gmail%20checkmark%22%20(https%3A%2F%2Fwww.palisade.email%2Fresources-post%2Fhow-to-get-gmail-blue-verified-checkmark).%20Turn%20it%20into%20a%20practical%20step-by-step%20action%20plan%20for%20my%20situation%2C%20and%20say%20where%20automation%20would%20save%20me%20time.\",\"event\":\"ask_ai_clicked\",\"eventProps\":{\"platform\":\"chatgpt\",\"question\":\"solve\",\"placement\":\"article_end\"},\"target\":\"_blank\",\"rel\":\"noopener noreferrer\",\"title\":\"Ask ChatGPT\",\"aria-label\":\"Ask ChatGPT: What should I do about it, step by step?\",\"className\":\"flex h-9 w-9 items-center justify-center rounded-full border-card bg-white transition-colors hover:border-palisade-blue-light\",\"children\":[\"$\",\"$L15\",null,{\"src\":\"/images/ai/chatgpt.png\",\"alt\":\"\",\"width\":18,\"height\":18,\"className\":\"h-[18px] w-[18px] shrink-0 rounded-[3px] object-contain\"}]}],[\"$\",\"$L2f\",\"claude\",{\"href\":\"https://claude.ai/new?q=I%20just%20read%20Palisade's%20guide%20%22Master%20Guide%3A%20Obtaining%20your%20blue%20verified%20Gmail%20checkmark%22%20(https%3A%2F%2Fwww.palisade.email%2Fresources-post%2Fhow-to-get-gmail-blue-verified-checkmark).%20Turn%20it%20into%20a%20practical%20step-by-step%20action%20plan%20for%20my%20situation%2C%20and%20say%20where%20automation%20would%20save%20me%20time.\",\"event\":\"ask_ai_clicked\",\"eventProps\":{\"platform\":\"claude\",\"question\":\"solve\",\"placement\":\"article_end\"},\"target\":\"_blank\",\"rel\":\"noopener noreferrer\",\"title\":\"Ask Claude\",\"aria-label\":\"Ask Claude: What should I do about it, step by step?\",\"className\":\"flex h-9 w-9 items-center justify-center rounded-full border-card bg-white transition-colors hover:border-palisade-blue-light\",\"children\":[\"$\",\"$L15\",null,{\"src\":\"/images/ai/claude.png\",\"alt\":\"\",\"width\":18,\"height\":18,\"className\":\"h-[18px] w-[18px] shrink-0 rounded-[3px] object-contain\"}]}],[\"$\",\"$L2f\",\"gemini\",{\"href\":\"https://gemini.google.com/app?q=I%20just%20read%20Palisade's%20guide%20%22Master%20Guide%3A%20Obtaining%20your%20blue%20verified%20Gmail%20checkmark%22%20(https%3A%2F%2Fwww.palisade.email%2Fresources-post%2Fhow-to-get-gmail-blue-verified-checkmark).%20Turn%20it%20into%20a%20practical%20step-by-step%20action%20plan%20for%20my%20situation%2C%20and%20say%20where%20automation%20would%20save%20me%20time.\",\"event\":\"ask_ai_clicked\",\"eventProps\":{\"platform\":\"gemini\",\"question\":\"solve\",\"placement\":\"article_end\"},\"target\":\"_blank\",\"rel\":\"noopener noreferrer\",\"title\":\"Ask Gemini\",\"aria-label\":\"Ask Gemini: What should I do about it, step by step?\",\"className\":\"flex h-9 w-9 items-center justify-center rounded-full border-card bg-white transition-colors hover:border-palisade-blue-light\",\"children\":[\"$\",\"$L15\",null,{\"src\":\"/images/ai/gemini.png\",\"alt\":\"\",\"width\":18,\"height\":18,\"className\":\"h-[18px] w-[18px] shrink-0 rounded-[3px] object-contain\"}]}],[\"$\",\"$L2f\",\"perplexity\",{\"href\":\"https://www.perplexity.ai/search?q=I%20just%20read%20Palisade's%20guide%20%22Master%20Guide%3A%20Obtaining%20your%20blue%20verified%20Gmail%20checkmark%22%20(https%3A%2F%2Fwww.palisade.email%2Fresources-post%2Fhow-to-get-gmail-blue-verified-checkmark).%20Turn%20it%20into%20a%20practical%20step-by-step%20action%20plan%20for%20my%20situation%2C%20and%20say%20where%20automation%20would%20save%20me%20time.\",\"event\":\"ask_ai_clicked\",\"eventProps\":{\"platform\":\"perplexity\",\"question\":\"solve\",\"placement\":\"article_end\"},\"target\":\"_blank\",\"rel\":\"noopener noreferrer\",\"title\":\"Ask Perplexity\",\"aria-label\":\"Ask Perplexity: What should I do about it, step by step?\",\"className\":\"flex h-9 w-9 items-center justify-center rounded-full border-card bg-white transition-colors hover:border-palisade-blue-light\",\"children\":\"$L68\"}],\"$L69\"]}]]}]\n"])</script><script>self.__next_f.push([1,"42:[\"$\",\"li\",\"step-2---trademarking-your-logo-12\",{\"className\":\"\",\"children\":[\"$\",\"a\",null,{\"href\":\"#step-2---trademarking-your-logo\",\"className\":\"text-sm leading-snug text-palisade-gray-600 hover:text-palisade-blue-light\",\"children\":\"Step 2 - Trademarking Your Logo\"}]}]\n43:[\"$\",\"li\",\"obtaining-configuring-your-companys-logo-svg-13\",{\"className\":\"\",\"children\":[\"$\",\"a\",null,{\"href\":\"#obtaining-configuring-your-companys-logo-svg\",\"className\":\"text-sm leading-snug text-palisade-gray-600 hover:text-palisade-blue-light\",\"children\":\"Obtaining \u0026 Configuring Your Company's Logo SVG\"}]}]\n44:[\"$\",\"li\",\"understanding-what-an-svg-is-14\",{\"className\":\"pl-3\",\"children\":[\"$\",\"a\",null,{\"href\":\"#understanding-what-an-svg-is\",\"className\":\"text-sm leading-snug text-palisade-gray-600 hover:text-palisade-blue-light\",\"children\":\"Understanding what an SVG is\"}]}]\n45:[\"$\",\"li\",\"determining-if-your-company-logo-is-already-in-svg-format-15\",{\"className\":\"pl-3\",\"children\":[\"$\",\"a\",null,{\"href\":\"#determining-if-your-company-logo-is-already-in-svg-format\",\"className\":\"text-sm leading-snug text-palisade-gray-600 hover:text-palisade-blue-light\",\"children\":\"Determining if your company logo is already in SVG format\"}]}]\n46:[\"$\",\"li\",\"bimi-svg-file-requirements-and-recommendations-16\",{\"className\":\"pl-3\",\"children\":[\"$\",\"a\",null,{\"href\":\"#bimi-svg-file-requirements-and-recommendations\",\"className\":\"text-sm leading-snug text-palisade-gray-600 hover:text-palisade-blue-light\",\"children\":\"BIMI SVG file requirements and recommendations\"}]}]\n47:[\"$\",\"li\",\"creating-your-brand-logo-svg-file-17\",{\"className\":\"\",\"children\":[\"$\",\"a\",null,{\"href\":\"#creating-your-brand-logo-svg-file\",\"className\":\"text-sm leading-snug text-palisade-gray-600 hover:text-palisade-blue-light\",\"children\":\"Creating your Brand Logo SVG file\"}]}]\n48:[\"$\",\"li\",\"converting-your-logo-to-an-svg-format-18\",{\"className\":\"pl-3\",\"children\":[\"$\",\"a\",null,{\"href\":\"#converting-your-logo-to-an-svg-format\",\"className\":\"text-sm leading-snug text-palisade-gray-600 hover:text-palisade-blue-light\",\"children\":\"Converting your logo to an SVG format\"}]}]\n49:[\"$\",\"li\",\"heres-a-step-by-step-guide-on-how-to-create-your-svg-file-using-adobe-illustrato-19\",{\"className\":\"pl-3\",\"children\":[\"$\",\"a\",null,{\"href\":\"#heres-a-step-by-step-guide-on-how-to-create-your-svg-file-using-adobe-illustrato\",\"className\":\"text-sm leading-snug text-palisade-gray-600 hover:text-palisade-blue-light\",\"children\":\"Here’s a step-by-step guide on how to create your SVG file using Adobe Illustrator\"}]}]\n4a:[\"$\",\"li\",\"somewhat-challenging-20\",{\"className\":\"pl-3\",\"children\":[\"$\",\"a\",null,{\"href\":\"#somewhat-challenging\",\"className\":\"text-sm leading-snug text-palisade-gray-600 hover:text-palisade-blue-light\",\"children\":\"Somewhat challenging?\"}]}]\n4b:[\"$\",\"li\",\"step-2---trademarking-your-logo-21\",{\"className\":\"\",\"children\":[\"$\",\"a\",null,{\"href\":\"#step-2---trademarking-your-logo\",\"className\":\"text-sm leading-snug text-palisade-gray-600 hover:text-palisade-blue-light\",\"children\":\"Step 2 - Trademarking Your Logo\"}]}]\n4c:[\"$\",\"li\",\"understanding-what-a-logo-trademark-is-22\",{\"className\":\"pl-3\",\"children\":[\"$\",\"a\",null,{\"href\":\"#understanding-what-a-logo-trademark-is\",\"className\":\"text-sm leading-snug text-palisade-gray-600 hover:text-palisade-blue-light\",\"children\":\"Understanding what a Logo Trademark is\"}]}]\n4d:[\"$\",\"li\",\"before-applying-for-your-logo-trademark-23\",{\"className\":\"pl-3\",\"children\":[\"$\",\"a\",null,{\"href\":\"#before-applying-for-your-logo-trademark\",\"className\":\"text-sm leading-snug text-palisade-gray-600 hover:text-palisade-blue-light\",\"children\":\"Before applying for your Logo Trademark\"}]}]\n4e:[\"$\",\"li\",\"how-to-apply-for-your-logo-trademark-for-your-vmc-certificate-24\",{\"className\":\"pl-3\",\"children\":[\"$\",\"a\",null,{\"href\":\"#how-to-apply-for-your-logo-trademark-for-your-vmc-certificate\",\"className\":\"text-sm leading-snug text-palisade-gray-600 hover:text-palisade-blue-light\",\"children\":\"How to Apply for your Logo Trademark for your VMC Certificate\"}]}]\n4f:[\"$\",\"li\",\"timeline-for-a-logo-trademark-application-25\",{\"className\":\"pl-3\",\"children\""])</script><script>self.__next_f.push([1,":[\"$\",\"a\",null,{\"href\":\"#timeline-for-a-logo-trademark-application\",\"className\":\"text-sm leading-snug text-palisade-gray-600 hover:text-palisade-blue-light\",\"children\":\"Timeline for a Logo Trademark Application\"}]}]\n50:[\"$\",\"li\",\"cost-of-obtaining-your-logo-trademark-26\",{\"className\":\"pl-3\",\"children\":[\"$\",\"a\",null,{\"href\":\"#cost-of-obtaining-your-logo-trademark\",\"className\":\"text-sm leading-snug text-palisade-gray-600 hover:text-palisade-blue-light\",\"children\":\"Cost of Obtaining Your Logo Trademark\"}]}]\n51:[\"$\",\"li\",\"seems-like-a-lot-to-do-on-your-own-27\",{\"className\":\"pl-3\",\"children\":[\"$\",\"a\",null,{\"href\":\"#seems-like-a-lot-to-do-on-your-own\",\"className\":\"text-sm leading-snug text-palisade-gray-600 hover:text-palisade-blue-light\",\"children\":\"Seems like a lot to do on your own?\"}]}]\n52:[\"$\",\"li\",\"step-3-obtaining-your-verified-mark-certificate-vmc-28\",{\"className\":\"\",\"children\":[\"$\",\"a\",null,{\"href\":\"#step-3-obtaining-your-verified-mark-certificate-vmc\",\"className\":\"text-sm leading-snug text-palisade-gray-600 hover:text-palisade-blue-light\",\"children\":\"Step 3→ Obtaining your Verified Mark Certificate (VMC)\"}]}]\n53:[\"$\",\"li\",\"what-will-be-covered-in-step-3-29\",{\"className\":\"\",\"children\":[\"$\",\"a\",null,{\"href\":\"#what-will-be-covered-in-step-3\",\"className\":\"text-sm leading-snug text-palisade-gray-600 hover:text-palisade-blue-light\",\"children\":\"What will be covered in Step 3?\"}]}]\n54:[\"$\",\"li\",\"what-is-a-verified-mark-certificate-vmc-30\",{\"className\":\"\",\"children\":[\"$\",\"a\",null,{\"href\":\"#what-is-a-verified-mark-certificate-vmc\",\"className\":\"text-sm leading-snug text-palisade-gray-600 hover:text-palisade-blue-light\",\"children\":\"What is a Verified Mark Certificate (VMC)?\"}]}]\n55:[\"$\",\"li\",\"applying-for-a-vmc-31\",{\"className\":\"\",\"children\":[\"$\",\"a\",null,{\"href\":\"#applying-for-a-vmc\",\"className\":\"text-sm leading-snug text-palisade-gray-600 hover:text-palisade-blue-light\",\"children\":\"Applying for a VMC\"}]}]\n56:[\"$\",\"li\",\"understanding-the-costs-and-timelines-for-vmc-32\",{\"className\":\"\",\"children\":[\"$\",\"a\",null,{\"href\":\"#understanding-the-costs-and-timelines-for-vmc\",\"className\":\"text-sm leading-snug text-palisade-gray-600 hover:text-palisade-blue-light\",\"children\":\"Understanding the Costs and Timelines for VMC\"}]}]\n57:[\"$\",\"li\",\"step-4-bimi-records-33\",{\"className\":\"\",\"children\":[\"$\",\"a\",null,{\"href\":\"#step-4-bimi-records\",\"className\":\"text-sm leading-snug text-palisade-gray-600 hover:text-palisade-blue-light\",\"children\":\"Step 4→ BIMI Records\"}]}]\n58:[\"$\",\"li\",\"adding-your-brand-logo-to-your-outgoing-email-34\",{\"className\":\"\",\"children\":[\"$\",\"a\",null,{\"href\":\"#adding-your-brand-logo-to-your-outgoing-email\",\"className\":\"text-sm leading-snug text-palisade-gray-600 hover:text-palisade-blue-light\",\"children\":\"Adding your brand logo to your outgoing email\"}]}]\n59:[\"$\",\"li\",\"what-will-be-covered-in-step-4-35\",{\"className\":\"\",\"children\":[\"$\",\"a\",null,{\"href\":\"#what-will-be-covered-in-step-4\",\"className\":\"text-sm leading-snug text-palisade-gray-600 hover:text-palisade-blue-light\",\"children\":\"What will be covered in Step 4?\"}]}]\n5a:[\"$\",\"li\",\"understanding-bimi-records-36\",{\"className\":\"pl-3\",\"children\":[\"$\",\"a\",null,{\"href\":\"#understanding-bimi-records\",\"className\":\"text-sm leading-snug text-palisade-gray-600 hover:text-palisade-blue-light\",\"children\":\"Understanding BIMI Records\"}]}]\n5b:[\"$\",\"li\",\"creating-a-bimi-record-37\",{\"className\":\"\",\"children\":[\"$\",\"a\",null,{\"href\":\"#creating-a-bimi-record\",\"className\":\"text-sm leading-snug text-palisade-gray-600 hover:text-palisade-blue-light\",\"children\":\"Creating a BIMI Record\"}]}]\n5c:[\"$\",\"li\",\"creating-a-bimi-record-using-an-official-bimi-record-generator-38\",{\"className\":\"pl-3\",\"children\":[\"$\",\"a\",null,{\"href\":\"#creating-a-bimi-record-using-an-official-bimi-record-generator\",\"className\":\"text-sm leading-snug text-palisade-gray-600 hover:text-palisade-blue-light\",\"children\":\"Creating a BIMI record using an official BIMI record generator:\"}]}]\n5d:[\"$\",\"li\",\"examples-and-types-of-bimi-records-39\",{\"className\":\"pl-3\",\"children\":[\"$\",\"a\",null,{\"href\":\"#examples-and-types-of-bimi-records\",\"cla"])</script><script>self.__next_f.push([1,"ssName\":\"text-sm leading-snug text-palisade-gray-600 hover:text-palisade-blue-light\",\"children\":\"Examples and types of BIMI records\"}]}]\n5e:[\"$\",\"li\",\"add-your-bimi-record-to-your-dns-manager-40\",{\"className\":\"\",\"children\":[\"$\",\"a\",null,{\"href\":\"#add-your-bimi-record-to-your-dns-manager\",\"className\":\"text-sm leading-snug text-palisade-gray-600 hover:text-palisade-blue-light\",\"children\":\"Add your BIMI record to your DNS manager\"}]}]\n5f:[\"$\",\"li\",\"to-add-a-dns-txt-bimi-record-to-your-domain-follow-these-steps-41\",{\"className\":\"pl-3\",\"children\":[\"$\",\"a\",null,{\"href\":\"#to-add-a-dns-txt-bimi-record-to-your-domain-follow-these-steps\",\"className\":\"text-sm leading-snug text-palisade-gray-600 hover:text-palisade-blue-light\",\"children\":\"To add a DNS TXT BIMI record to your domain, follow these steps\"}]}]\n60:[\"$\",\"li\",\"validating-your-bimi-record-42\",{\"className\":\"\",\"children\":[\"$\",\"a\",null,{\"href\":\"#validating-your-bimi-record\",\"className\":\"text-sm leading-snug text-palisade-gray-600 hover:text-palisade-blue-light\",\"children\":\"Validating your BIMI Record\"}]}]\n61:[\"$\",\"li\",\"troubleshooting-common-bimi-record-issues-43\",{\"className\":\"\",\"children\":[\"$\",\"a\",null,{\"href\":\"#troubleshooting-common-bimi-record-issues\",\"className\":\"text-sm leading-snug text-palisade-gray-600 hover:text-palisade-blue-light\",\"children\":\"Troubleshooting Common BIMI Record Issues\"}]}]\n62:[\"$\",\"li\",\"logo-not-displaying-in-recipients-inbox-44\",{\"className\":\"pl-3\",\"children\":[\"$\",\"a\",null,{\"href\":\"#logo-not-displaying-in-recipients-inbox\",\"className\":\"text-sm leading-snug text-palisade-gray-600 hover:text-palisade-blue-light\",\"children\":\"Logo Not Displaying in Recipient's Inbox\"}]}]\n63:[\"$\",\"li\",\"messages-from-your-organization-are-sent-to-spam-45\",{\"className\":\"pl-3\",\"children\":[\"$\",\"a\",null,{\"href\":\"#messages-from-your-organization-are-sent-to-spam\",\"className\":\"text-sm leading-snug text-palisade-gray-600 hover:text-palisade-blue-light\",\"children\":\"Messages From Your Organization Are Sent to Spam\"}]}]\n64:[\"$\",\"li\",\"need-help-46\",{\"className\":\"pl-3\",\"children\":[\"$\",\"a\",null,{\"href\":\"#need-help\",\"className\":\"text-sm leading-snug text-palisade-gray-600 hover:text-palisade-blue-light\",\"children\":\"Need help?\"}]}]\n65:[\"$\",\"div\",null,{\"className\":\"lg:sticky lg:top-24\",\"children\":[\"$\",\"div\",null,{\"className\":\"rounded-[20px] border border-palisade-border bg-white p-6 shadow-card\",\"children\":[[\"$\",\"div\",null,{\"className\":\"flex items-center gap-2.5\",\"children\":[[\"$\",\"$L6a\",null,{\"href\":\"/tools/email-security-score\",\"size\":24,\"className\":\"shrink-0 text-palisade-blue-light\"}],[\"$\",\"h2\",null,{\"className\":\"text-base font-bold text-palisade-dark\",\"children\":\"Email Security Score\"}]]}],[\"$\",\"p\",null,{\"className\":\"mt-2 text-sm text-palisade-gray-600\",\"children\":\"Score your domain's DMARC, SPF, DKIM, and BIMI in one free check.\"}],[\"$\",\"$L6b\",null,{\"href\":\"/tools/email-security-score\",\"buttonLabel\":\"Get your score\",\"location\":\"article-sidebar\",\"stacked\":true,\"className\":\"mt-1\",\"buttonClassName\":\"btn-primary inline-flex w-full items-center justify-center\"}]]}]}]\n"])</script><script>self.__next_f.push([1,"66:[\"$\",\"$L15\",null,{\"src\":\"/images/ai/perplexity.png\",\"alt\":\"\",\"width\":18,\"height\":18,\"className\":\"h-[18px] w-[18px] shrink-0 rounded-[3px] object-contain\"}]\n67:[\"$\",\"$L2f\",\"grok\",{\"href\":\"https://grok.com/?q=I%20just%20read%20Palisade's%20guide%20%22Master%20Guide%3A%20Obtaining%20your%20blue%20verified%20Gmail%20checkmark%22%20(https%3A%2F%2Fwww.palisade.email%2Fresources-post%2Fhow-to-get-gmail-blue-verified-checkmark).%20How%20does%20this%20apply%20to%20my%20domain%20and%20email%20setup%20%E2%80%94%20or%20my%20clients'%20domains%2C%20if%20I%20manage%20several%3F%20Ask%20me%20what%20you%20need%20to%20know%2C%20then%20tell%20me%20what%20to%20check%20first.\",\"event\":\"ask_ai_clicked\",\"eventProps\":{\"platform\":\"grok\",\"question\":\"apply\",\"placement\":\"article_end\"},\"target\":\"_blank\",\"rel\":\"noopener noreferrer\",\"title\":\"Ask Grok\",\"aria-label\":\"Ask Grok: How does this apply to my domain?\",\"className\":\"flex h-9 w-9 items-center justify-center rounded-full border-card bg-white transition-colors hover:border-palisade-blue-light\",\"children\":[\"$\",\"$L15\",null,{\"src\":\"/images/ai/grok.png\",\"alt\":\"\",\"width\":18,\"height\":18,\"className\":\"h-[18px] w-[18px] shrink-0 rounded-[3px] object-contain\"}]}]\n68:[\"$\",\"$L15\",null,{\"src\":\"/images/ai/perplexity.png\",\"alt\":\"\",\"width\":18,\"height\":18,\"className\":\"h-[18px] w-[18px] shrink-0 rounded-[3px] object-contain\"}]\n69:[\"$\",\"$L2f\",\"grok\",{\"href\":\"https://grok.com/?q=I%20just%20read%20Palisade's%20guide%20%22Master%20Guide%3A%20Obtaining%20your%20blue%20verified%20Gmail%20checkmark%22%20(https%3A%2F%2Fwww.palisade.email%2Fresources-post%2Fhow-to-get-gmail-blue-verified-checkmark).%20Turn%20it%20into%20a%20practical%20step-by-step%20action%20plan%20for%20my%20situation%2C%20and%20say%20where%20automation%20would%20save%20me%20time.\",\"event\":\"ask_ai_clicked\",\"eventProps\":{\"platform\":\"grok\",\"question\":\"solve\",\"placement\":\"article_end\"},\"target\":\"_blank\",\"rel\":\"noopener noreferrer\",\"title\":\"Ask Grok\",\"aria-label\":\"Ask Grok: What should I do about it, step by step?\",\"className\":\"flex h-9 w-9 items-center justify-center rounded-full border-card bg-white transition-colors hover:border-palisade-blue-light\",\"children\":[\"$\",\"$L15\",null,{\"src\":\"/images/ai/grok.png\",\"alt\":\"\",\"width\":18,\"height\":18,\"className\":\"h-[18px] w-[18px] shrink-0 rounded-[3px] object-contain\"}]}]\n"])</script><script>self.__next_f.push([1,"29:[[\"$\",\"meta\",\"0\",{\"charSet\":\"utf-8\"}],[\"$\",\"meta\",\"1\",{\"name\":\"viewport\",\"content\":\"width=device-width, initial-scale=1\"}]]\n"])</script><script>self.__next_f.push([1,"6c:I[27201,[\"/_next/static/chunks/ff1a16fafef87110.js?dpl=dpl_G6WMfMehfVJz6P5qTrAU7i6T7SYx\",\"/_next/static/chunks/5d2013ea39502e59.js?dpl=dpl_G6WMfMehfVJz6P5qTrAU7i6T7SYx\"],\"IconMark\"]\n27:null\n"])</script><script>self.__next_f.push([1,"2b:[[\"$\",\"title\",\"0\",{\"children\":\"Master Guide: Obtaining your blue verified Gmail checkmark | Palisade\"}],[\"$\",\"meta\",\"1\",{\"name\":\"description\",\"content\":\"Guide to Gmail’s blue checkmark, mastering BIMI, SPF, DKIM, DMARC with Palisade’s AI Workflow.\"}],[\"$\",\"link\",\"2\",{\"rel\":\"canonical\",\"href\":\"https://www.palisade.email/resources-post/how-to-get-gmail-blue-verified-checkmark\"}],[\"$\",\"link\",\"3\",{\"rel\":\"alternate\",\"type\":\"text/markdown\",\"href\":\"https://www.palisade.email/resources-post/how-to-get-gmail-blue-verified-checkmark.md\"}],[\"$\",\"meta\",\"4\",{\"property\":\"og:title\",\"content\":\"Master Guide: Obtaining your blue verified Gmail checkmark\"}],[\"$\",\"meta\",\"5\",{\"property\":\"og:description\",\"content\":\"Guide to Gmail’s blue checkmark, mastering BIMI, SPF, DKIM, DMARC with Palisade’s AI Workflow.\"}],[\"$\",\"meta\",\"6\",{\"property\":\"og:url\",\"content\":\"https://www.palisade.email/resources-post/how-to-get-gmail-blue-verified-checkmark\"}],[\"$\",\"meta\",\"7\",{\"property\":\"og:image\",\"content\":\"https://www.palisade.email/images/editorial/how-to-get-gmail-blue-verified-checkmark/how-to-get-gmail-blue-verified-checkmark-hero.png\"}],[\"$\",\"meta\",\"8\",{\"property\":\"og:type\",\"content\":\"article\"}],[\"$\",\"meta\",\"9\",{\"property\":\"article:published_time\",\"content\":\"2023-08-09T00:01:51.518Z\"}],[\"$\",\"meta\",\"10\",{\"property\":\"article:modified_time\",\"content\":\"2025-06-10T16:03:29.148Z\"}],[\"$\",\"meta\",\"11\",{\"property\":\"article:author\",\"content\":\"Samuel Chenard\"}],[\"$\",\"meta\",\"12\",{\"name\":\"twitter:card\",\"content\":\"summary_large_image\"}],[\"$\",\"meta\",\"13\",{\"name\":\"twitter:title\",\"content\":\"Master Guide: Obtaining your blue verified Gmail checkmark\"}],[\"$\",\"meta\",\"14\",{\"name\":\"twitter:description\",\"content\":\"Guide to Gmail’s blue checkmark, mastering BIMI, SPF, DKIM, DMARC with Palisade’s AI Workflow.\"}],[\"$\",\"meta\",\"15\",{\"name\":\"twitter:image\",\"content\":\"https://www.palisade.email/images/editorial/how-to-get-gmail-blue-verified-checkmark/how-to-get-gmail-blue-verified-checkmark-hero.png\"}],[\"$\",\"link\",\"16\",{\"rel\":\"icon\",\"href\":\"/favicon.ico?favicon.0b3bf435.ico\",\"sizes\":\"256x256\",\"type\":\"image/x-icon\"}],[\"$\",\"link\",\"17\",{\"rel\":\"icon\",\"href\":\"/images/favicon.png\",\"type\":\"image/png\"}],[\"$\",\"link\",\"18\",{\"rel\":\"icon\",\"href\":\"/images/favicon-palisade-256-2.png\",\"sizes\":\"256x256\",\"type\":\"image/png\"}],[\"$\",\"link\",\"19\",{\"rel\":\"apple-touch-icon\",\"href\":\"/images/favicon-palisade-256-2.png\"}],[\"$\",\"$L6c\",\"20\",{}]]\n"])</script></body></html>