How to Set Up a BIMI Record (Cloudflare & Any DNS)
 ChatGPT
 Claude
 Gemini
 Perplexity
 Grok
GrokIn brief
Create and publish a BIMI record so your logo shows in inboxes: exact DNS values, a Cloudflare walkthrough, and a free BIMI checker to verify it.

Adding your brand logo to your outgoing email
You've made it to the final step! This stage will guide you on how to create your Brand Indicators for Message Identification (BIMI) record, integrate it into your DNS records, and assist you in verifying its functionality. If necessary, we'll also help you troubleshoot any hickups along the way.
The finish line is in sight! Adding your BIMI record is the DNS half of the job. Gmail and Apple Mail also need a mark certificate before they will show your logo, and that coveted blue Gmail checkmark specifically requires a Verified Mark Certificate.
What this step covers
- Understanding BIMI Records
- Step 1 - Creating a BIMI Record
- Step 2 - Adding Your BIMI Record to Your DNS
- Step 3 - Validating Your BIMI Record
- Troubleshooting possible problems
Understanding BIMI Records
Brand Indicators for Message Identification (BIMI) records are a type of Domain-based Message Authentication, Reporting, and Conformance (DMARC) policy. They link a brand's verified logo with brand's registered domain. When set up properly, supported email clients will display this logo next to emails from the domain, providing visual authentication.
BIMI records play a pivotal role in email security. They provide a visual check against phishing and email spoofing by displaying your verified logo in the recipient's inbox. This gives instant recognition and trust. BIMI records improve email security and deliverability by showing that your emails are legitimate.
Step 1 - Creating a BIMI Record
Your BIMI record is a string of text that incorporates the URL where your company's Scalable Vector Graphics (SVG) logo is located. To craft your own record, refer to the examples provided in this section.
Creating a BIMI record using a BIMI record generator
The BIMI record generator simplifies this process by taking the brand's logo and DNS details and automatically generating a BIMI record, which can then be added to the brand's DNS settings.
Examples and types of BIMI records
In the syntax of BIMI records, it's crucial to distinguish between the number 1, the uppercase 'I', and the lowercase 'l'. They may look alike but are fundamentally different and can change the meaning of your BIMI record.
Example of a BIMI Record that includes a VMC:
v=BIMI1; l=https://assets.example.com/logo.svg; a=https://assets.example.com/mark.pemThis record comprises two example URLs which should be replaced with the URLs of your BIMI files:
- The URL where your SVG logo is stored on your public web server.
- The URL for your VMC on your public web server. Gmail needs a mark certificate to display a BIMI logo: a Verified Mark Certificate (VMC), or since September 2024 a Common Mark Certificate (CMC). Only a VMC adds the blue verified checkmark.
v=BIMI1; l=https://assets.example.com/logo.svg;Yahoo displays a logo from a self-asserted record like this one, given DMARC enforcement and sufficient sender reputation. Gmail and Apple Mail will not. They need the a= tag pointing at a certificate.
Watch the tags: l points to the logo, a points to the certificate. Replace both example URLs with your own locations. Do not publish the examples above.
Example of a BIMI Record without a certificate:
v=BIMI1; l=https://assets.example.com/logo.svg;Yahoo displays a logo from a self-asserted record like this one, given DMARC enforcement and sufficient sender reputation. Gmail and Apple Mail will not. They need the a= tag pointing at a certificate.
Watch the tags: l points to the logo, a points to the certificate. Replace both example URLs with your own locations. Do not publish the examples above.
Step 2 - Add your BIMI record to your DNS manager
To activate BIMI on your domain, you need to create a DNS TXT record for BIMI through your DNS manager.
If you require assistance with adding a DNS record to your DNS manager, you can contact us for assistance through our contact form. Please note that the process can differ from one provider to another.
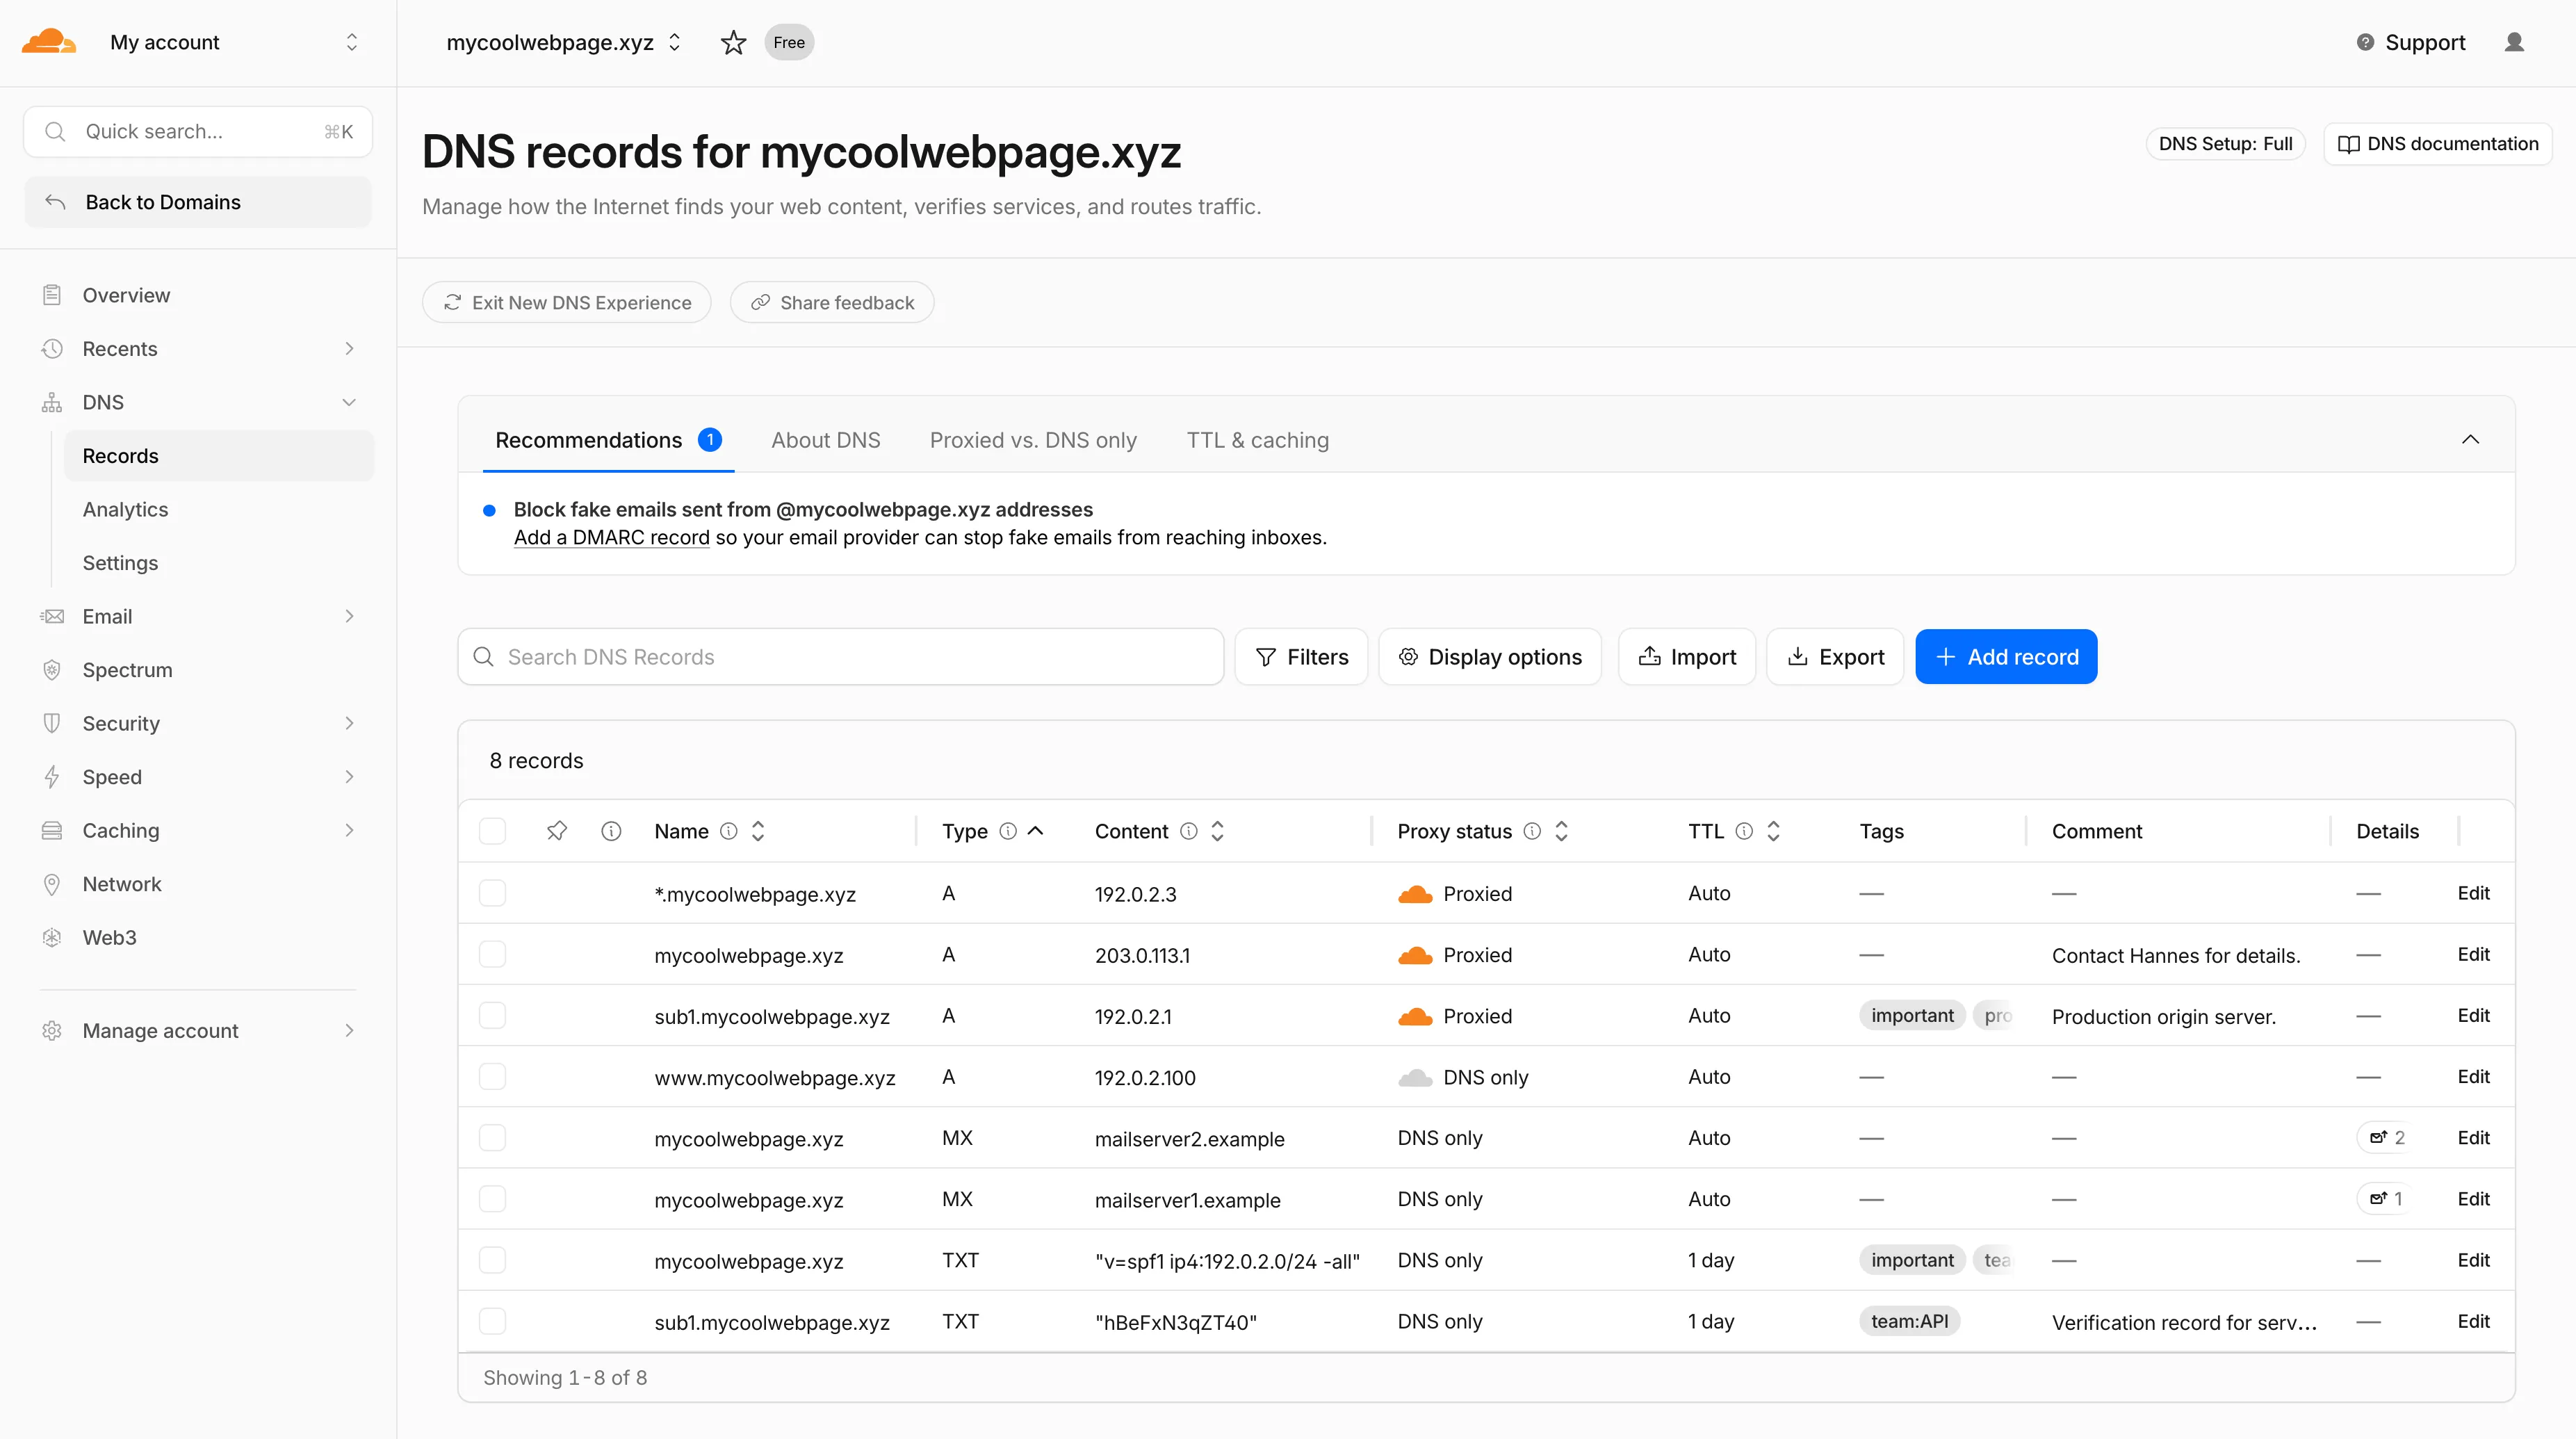
To add a DNS TXT BIMI record to your domain, follow these steps:

1 - First, log into your domain's DNS management console. (example below is in CloudFlare)
2- Input the required values into the form designated for your domain provider's DNS records:
| Field | Value |
|---|---|
| Type | TXT |
| Name / Host | default._bimi |
| Content / Value | v=BIMI1; l=https://assets.example.com/logo.svg; a=https://assets.example.com/mark.pem |
| TTL | Auto, or 3600 |
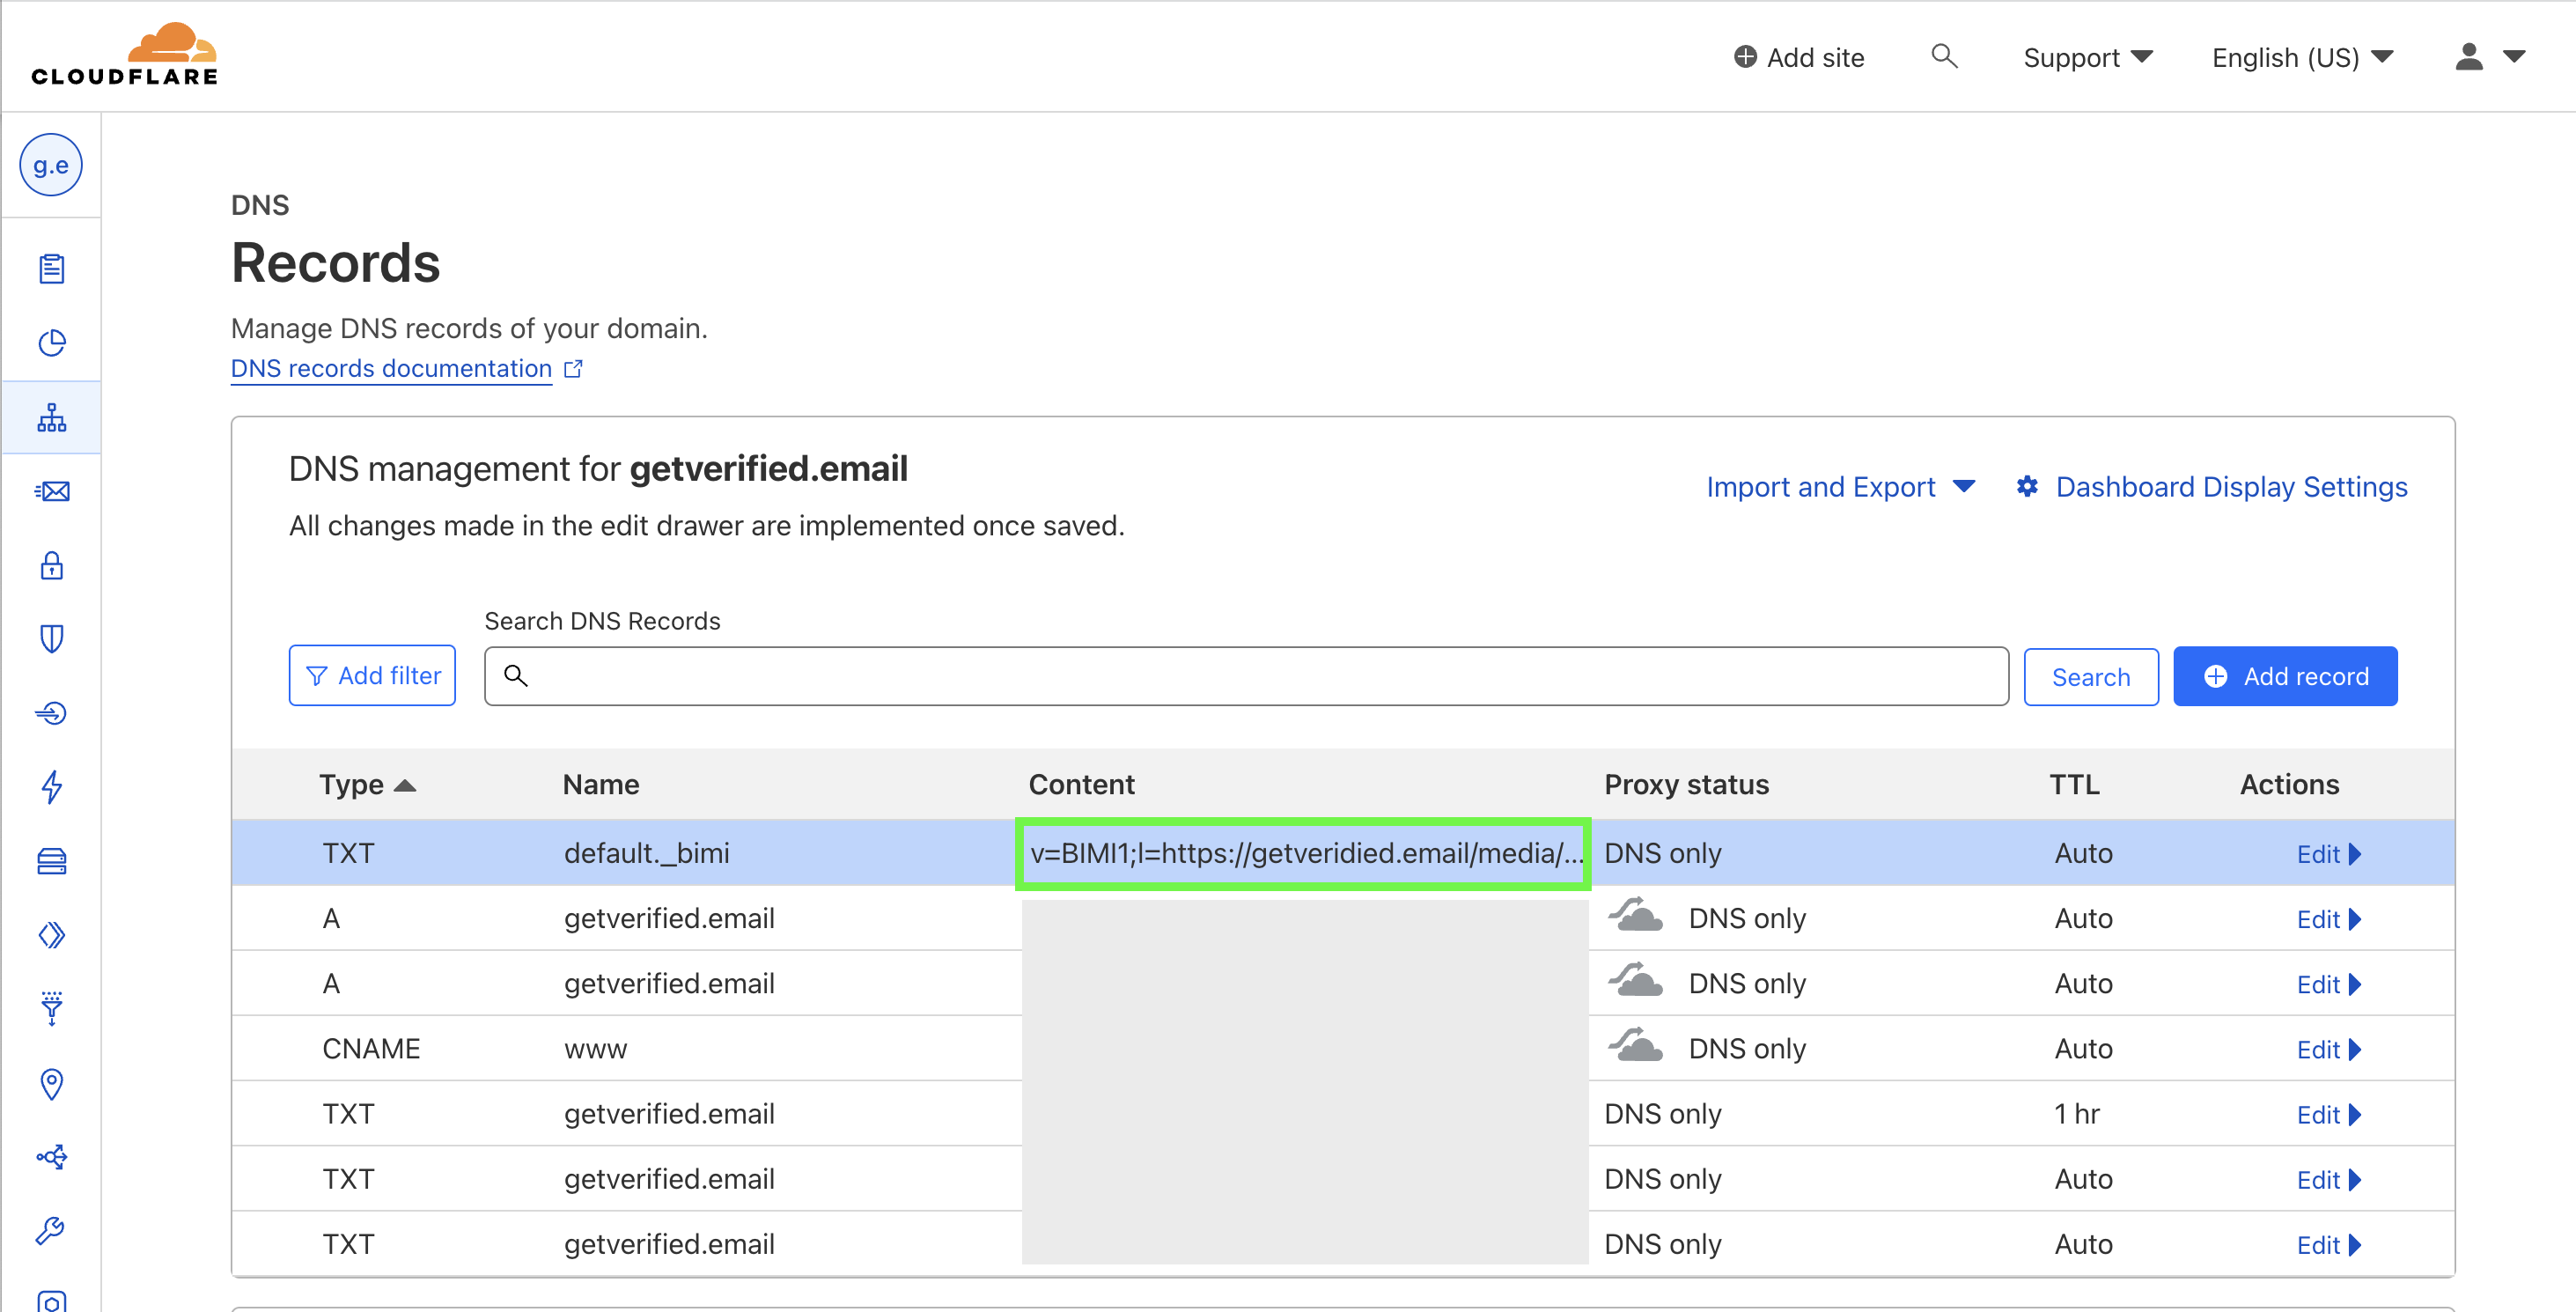
Swap both assets.example.com URLs for your own hosted logo and certificate before you save. Most DNS managers append your domain automatically, so entering default._bimi publishes default._bimi.yourdomain.com. Check the published record with a TXT record lookup of default._bimi.yourdomain.com if you are unsure.
3- Save the record and verify it is correctly displaying in the DNS Manager:
Validating Your BIMI Record
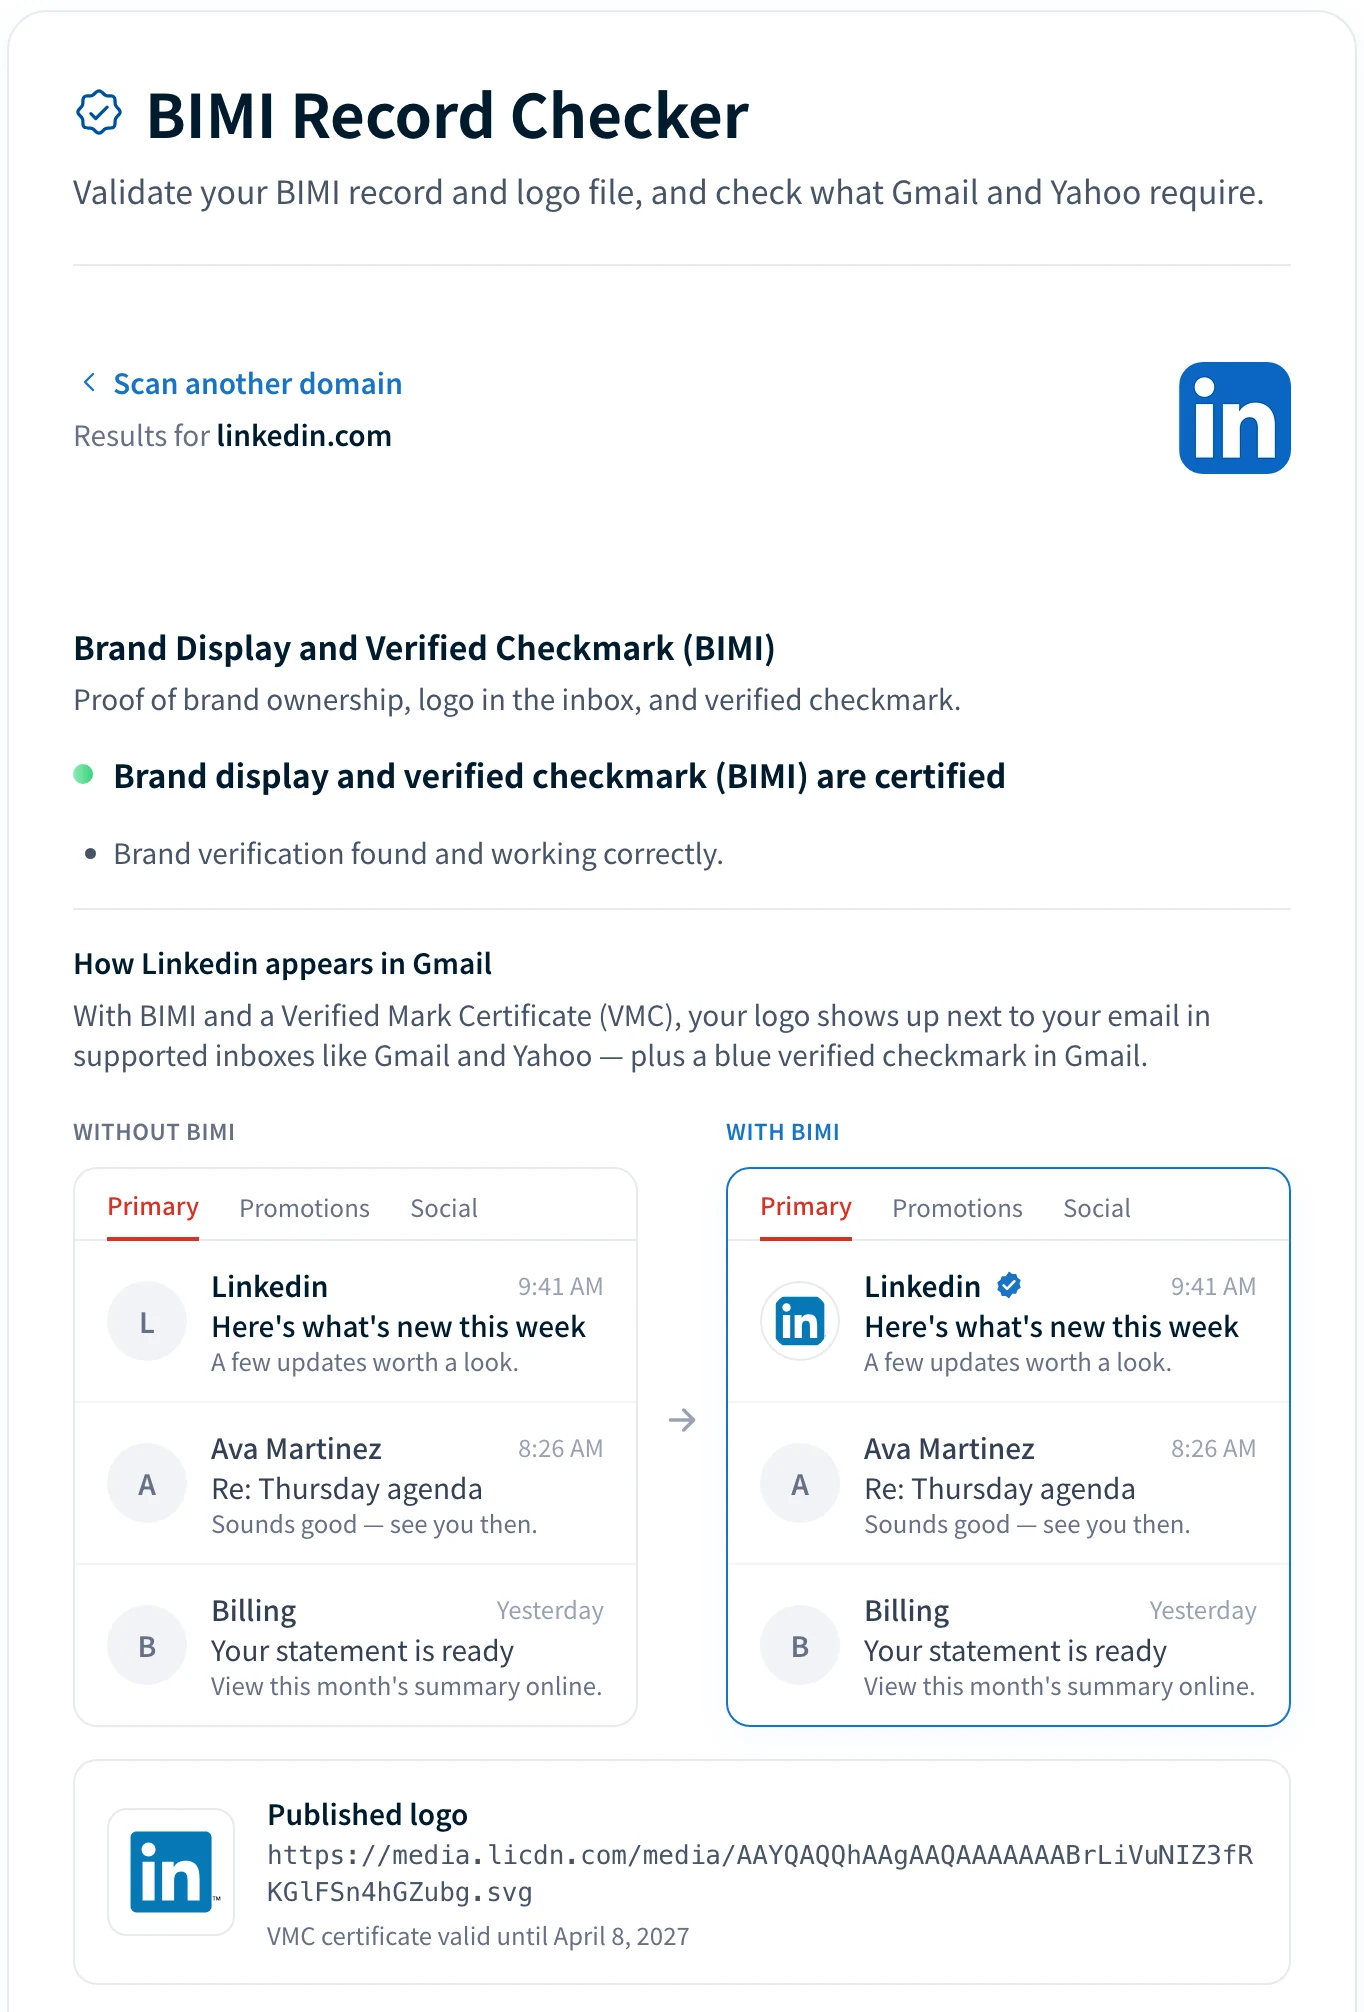
Using our free BIMI checker, you can ensure that your BIMI record has been correctly added and is properly propagated. Don’t forget that it can take up to 48 hours to fully propagate.
Troubleshooting Common BIMI Record Issues
Logo Not Displaying in Recipient's Inbox:
- Possible Causes: The most common causes are incorrect or invalid BIMI record syntax, a BIMI record that isn't correctly connected to your DNS, or SVG files that don't meet the standards or are unreachable.
- Remedial Steps: Review your BIMI record syntax to ensure it matches the format needed. Verify that your SVG file is reachable from the internet and meets BIMI standards. Also, check that your BIMI record is properly linked to your DNS.
Messages From Your Organization Are Sent to Spam:
- Potential Reasons: This could occur due to weak or non-existent DMARC policies, an email system that's not properly authenticated, or content within your messages that email clients perceive as spam.
- Ways to Fix the Issue: Strengthen your DMARC policies and ensure SPF and DKIM records are properly set up to authenticate your email system. Also, review the content of your messages to ensure they don't contain elements often associated with spam, such as aggressive promotional language or an excessive number of links.
Get help with your BIMI record
We understand that setting up a BIMI record can be quite intricate and, at times, daunting. If you're encountering difficulties or are simply unsure about certain aspects, don't worry, we're here to help!
We have a team of experts ready to assist you in making this process as smooth as possible. Feel free to fill out our contact form, and we'll get in touch with you for free guidance and troubleshooting.

Written by
Johanie DupontBrand & Ecommerce Email
Johanie Dupont works on brand and ecommerce email at Palisade: BIMI and verified marks, sender requirements, and getting marketing mail into the inbox.
More from Johanie →