DMARC Policy Not Enabled: How to Fix It Safely
 ChatGPT
 Claude
 Gemini
 Perplexity
 Grok
GrokIn brief
Fix the 'DMARC policy not enabled' warning: check p=none, verify every legitimate sender, then move to quarantine and reject without disrupting real mail.
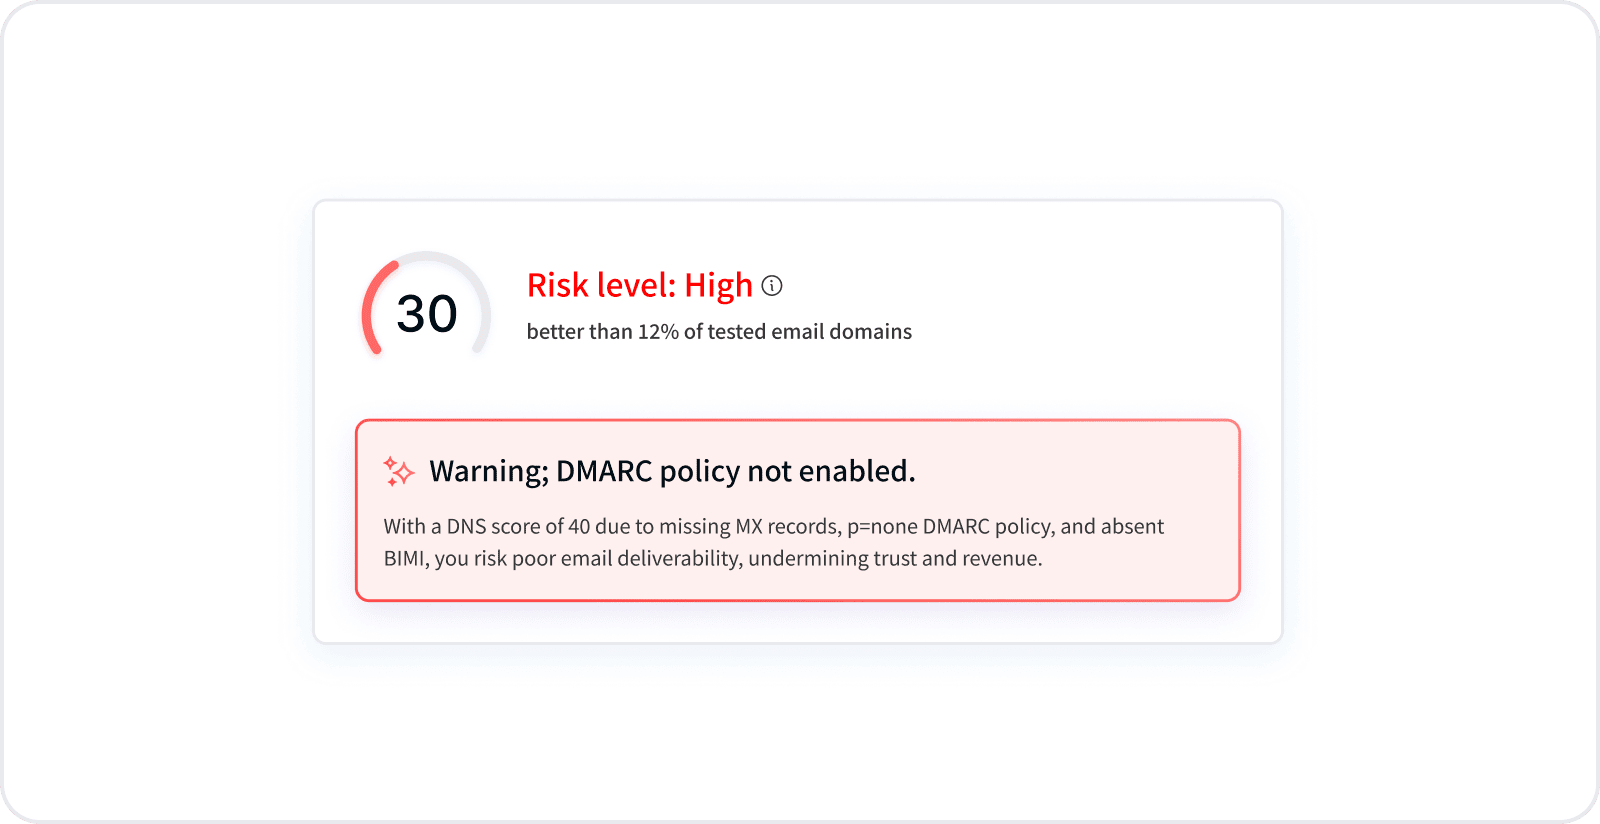
“DMARC policy not enabled” usually means the domain has a valid DMARC record but its policy is p=none. That record can collect reports, but it does not ask receiving systems to quarantine or reject messages that fail DMARC.
Check the live record with the DMARC checker. Do not replace p=none with p=reject until aggregate reports and representative message tests show every legitimate sender passes SPF or DKIM with alignment.
Enforcement readiness checklist
| Check | Ready to proceed when |
|---|---|
| Published record | One valid record resolves at _dmarc.example.com |
| Sender inventory | Every business, marketing, support, and transactional sender has an owner |
| Authentication | Each legitimate stream passes SPF or DKIM and aligns with the visible From domain |
| Reporting window | Reports cover at least one complete business sending cycle |
| Subdomains | Sending and non-sending subdomains have an intentional p, sp, or np outcome |
| Verification | A real message from each important stream has been tested after its last change |
| Rollback | The DNS owner, previous value, TTL, and rollback trigger are recorded |
What "DMARC policy not enabled" means
If a checker warns that your DMARC quarantine/reject policy is not enabled, it means your domain publishes a DMARC record set to p=none. That policy requests monitoring rather than enforcement. It is useful for discovering senders, but it does not ask receivers to change handling for messages that fail DMARC and does not by itself prove or improve deliverability.
The fix is to move your policy to p=quarantine or p=reject, but only after confirming that every legitimate sender passes SPF or DKIM with alignment. Enforcing too early can cause receivers to quarantine or reject legitimate mail that still fails. This guide walks the safer path, whether DNS is on Cloudflare, GoDaddy, or another provider. Public checkers show the record; to confirm a specific stream actually passes and aligns, run the email deliverability test on a message sent through that stream.
The gap is common, not theoretical: Palisade's 100,000-domain DMARC study found that 36.0% of domains publishing a valid DMARC record had not reached p=quarantine or p=reject.
How to fix it, step by step
Step 1: Check your existing DMARC record
Verify your current configuration with a DNS checker. A DMARC record typically looks like this:
v=DMARC1; p=none; rua=mailto:reports@example.com;
Use the DNS lookup tool to pull your live record, then read the p= tag to see your current policy.
Step 2: Understand the three policies
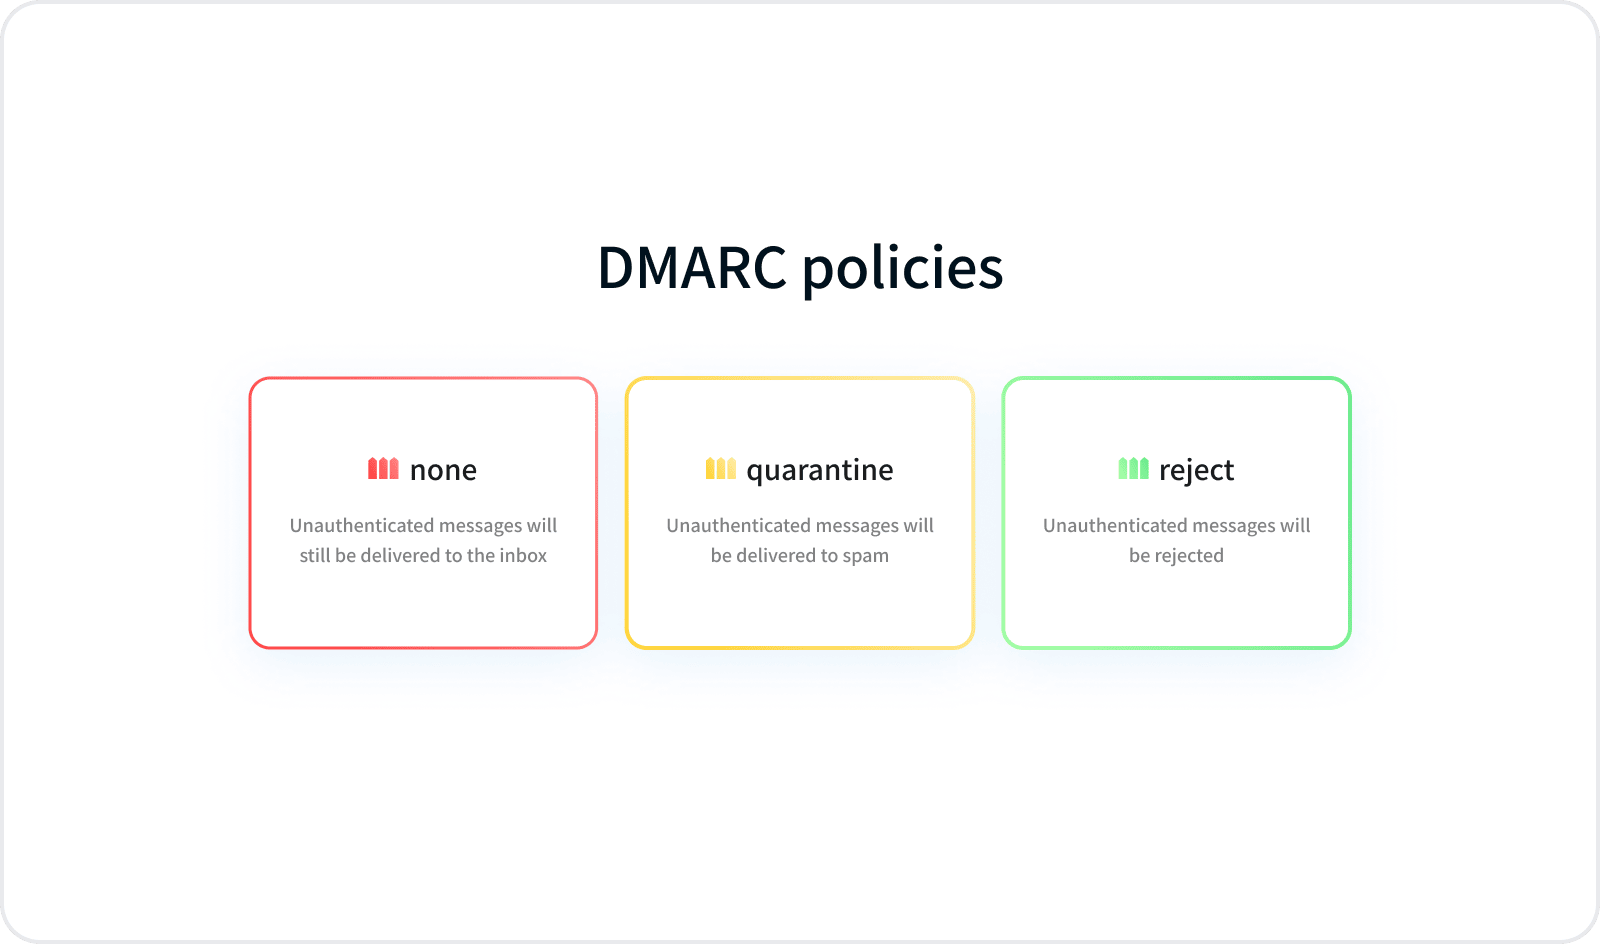
- None: requests monitoring and reporting without an enforcement handling preference.
- Quarantine: asks receivers to treat failed messages as suspicious, often by placing them in spam.
- Reject: asks receivers to reject failed messages during SMTP handling.
Step 3: Start with monitoring
Begin with a p=none policy to gather data on your email streams and check SPF and DKIM alignment. This generates XML aggregate (RUA) reports like this:
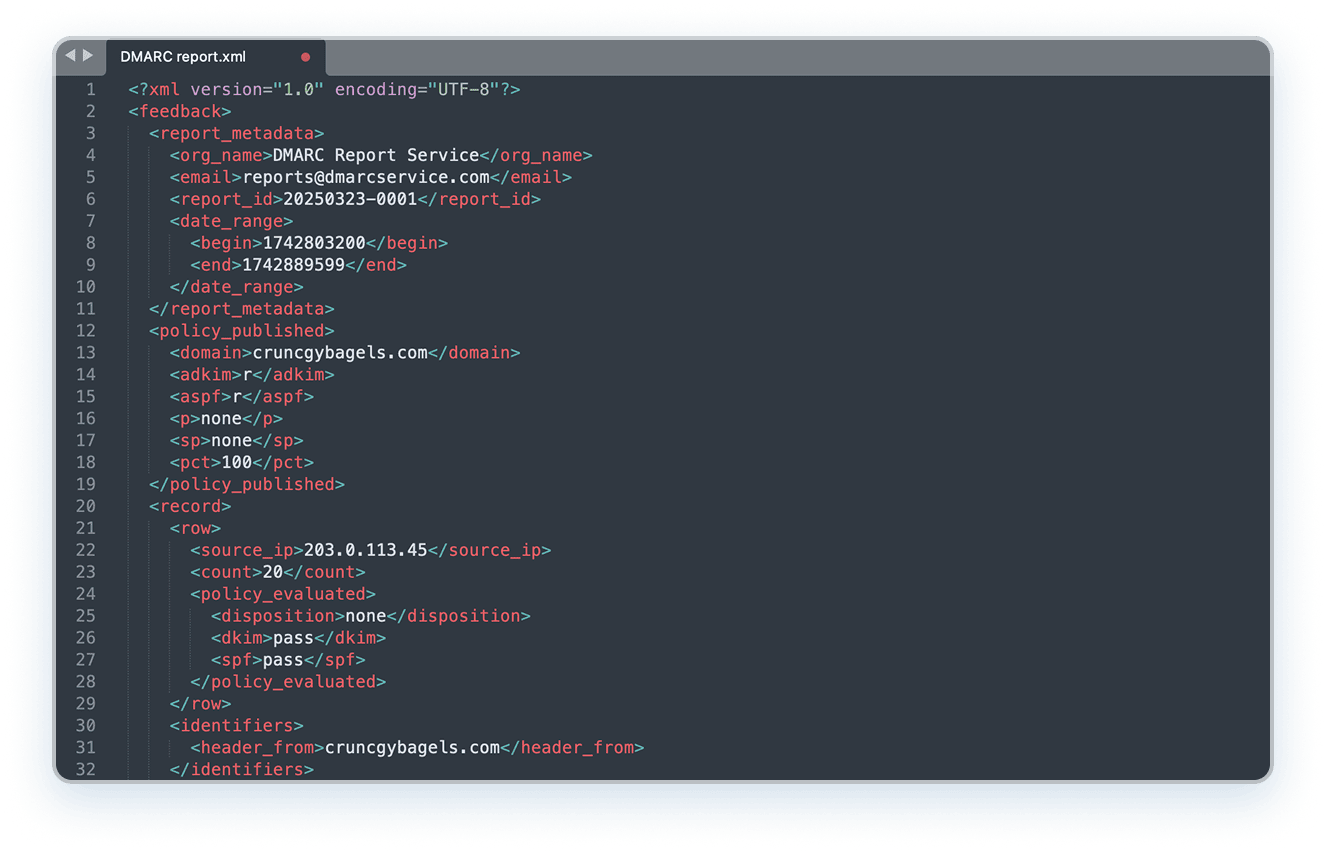
You can read these DMARC reports manually in your inbox, or use a monitoring tool to parse them. Let reports collect for at least one full sending cycle, long enough to capture every third-party service (marketing and transactional) that sends as your domain, so you can fully assess SPF and DKIM alignment.
Step 4: Align SPF and DKIM
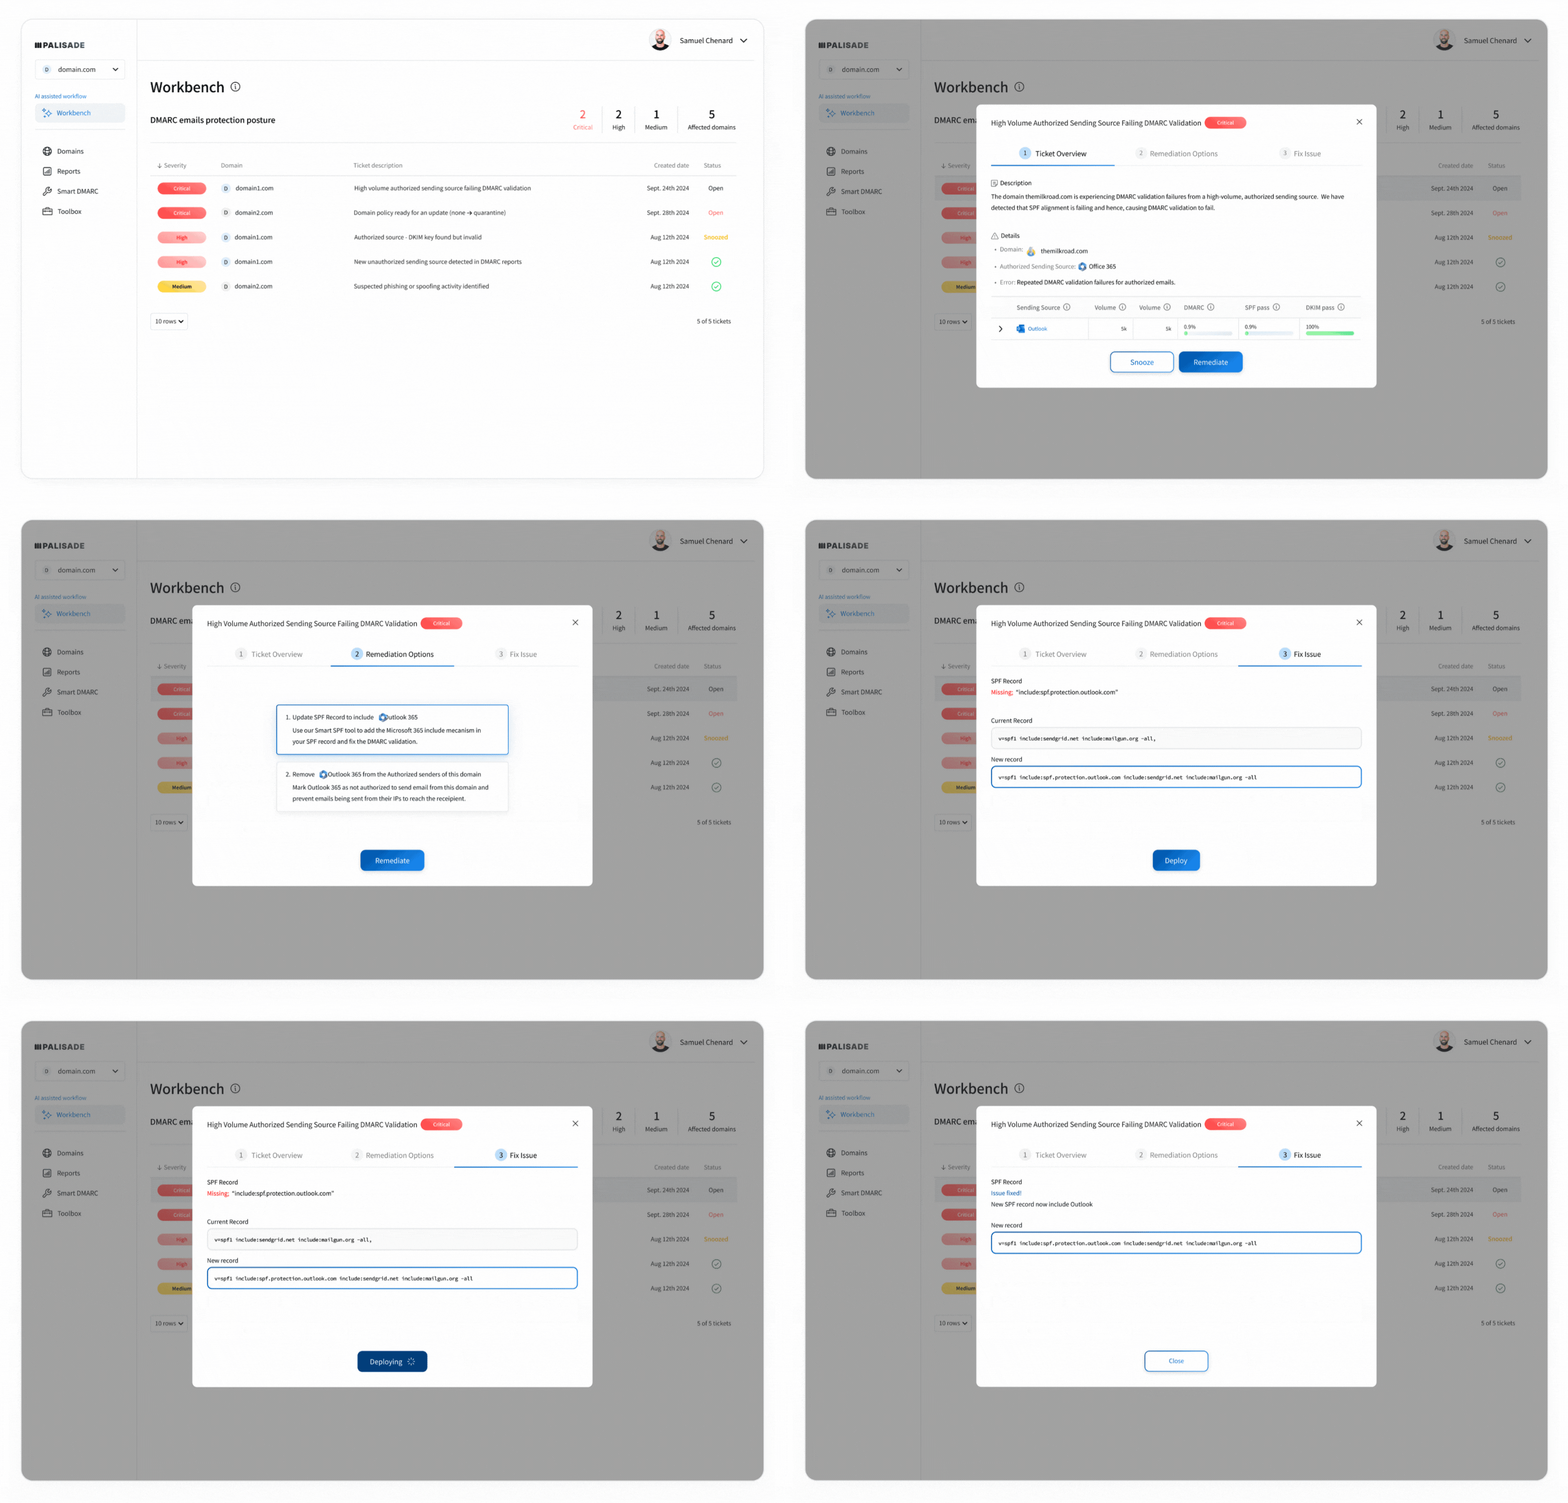
Read your aggregate reports to identify which authorized senders pass SPF and DKIM and which fail. For each failing sender, update your SPF record or DKIM keys so it aligns with your From: domain. Only enforce a stronger policy once every legitimate sender passes.
Step 5: Move to quarantine or reject
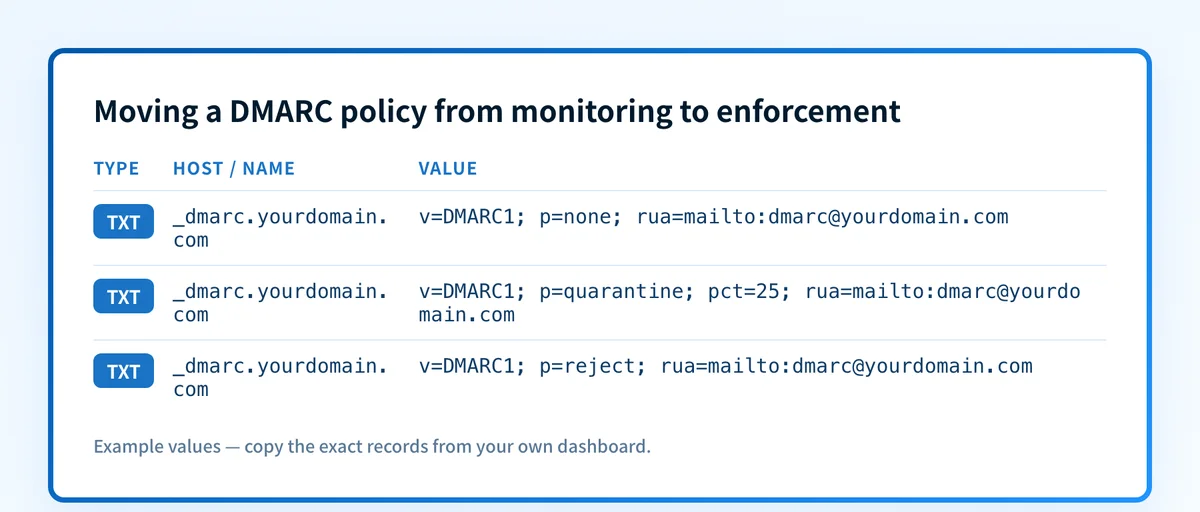
Once SPF and DKIM are aligned and verified, upgrade the policy. Move deliberately from monitoring to quarantine and then reject, validating reports and real message paths between changes:
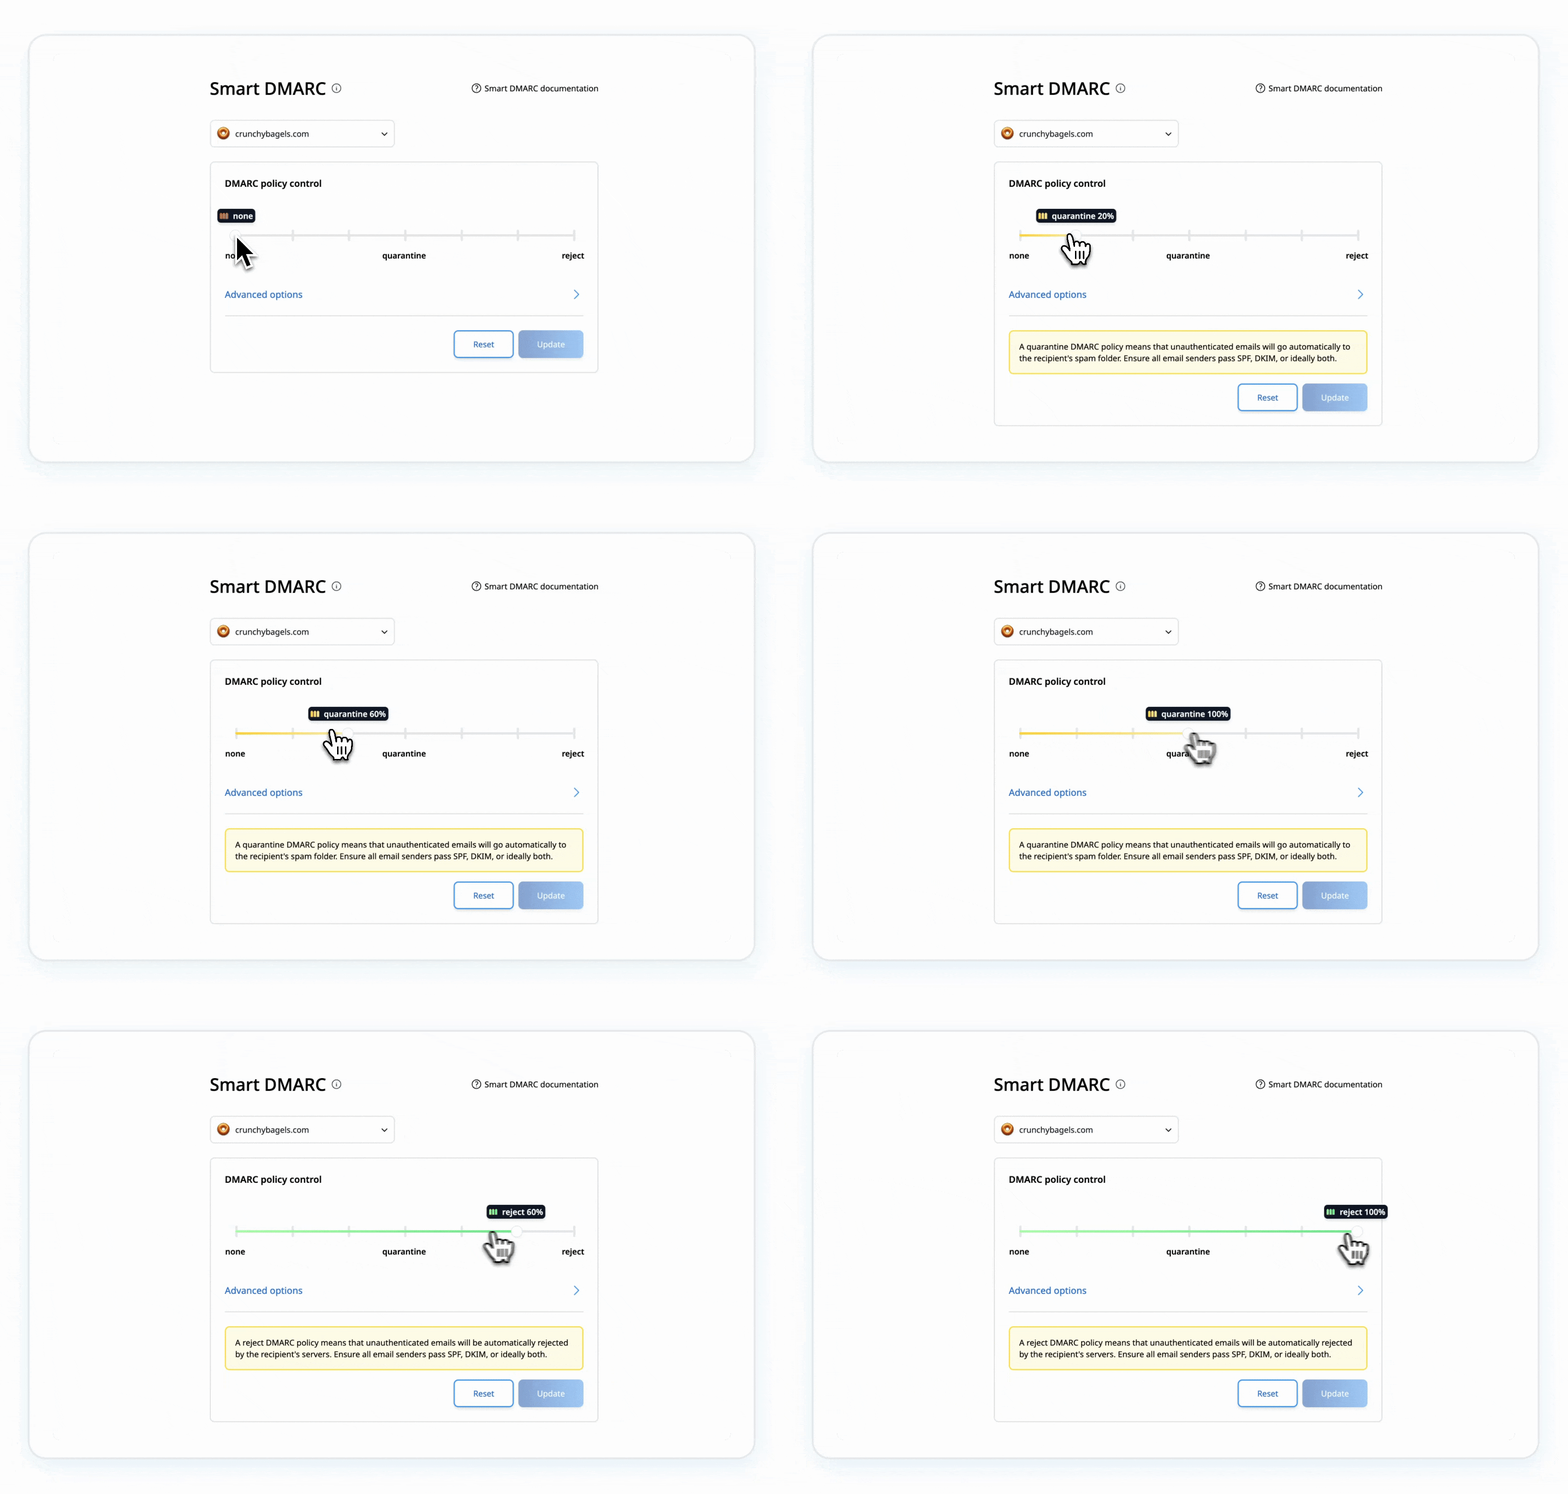
- Quarantine:
v=DMARC1; p=quarantine; rua=mailto:reports@example.com; - Reject:
v=DMARC1; p=reject; rua=mailto:reports@example.com;
Step 6: Monitor and adjust
Keep reviewing DMARC reports to confirm the policy protects your domain without catching legitimate mail. This is ongoing, not a one-time change.
Fixing it on Cloudflare
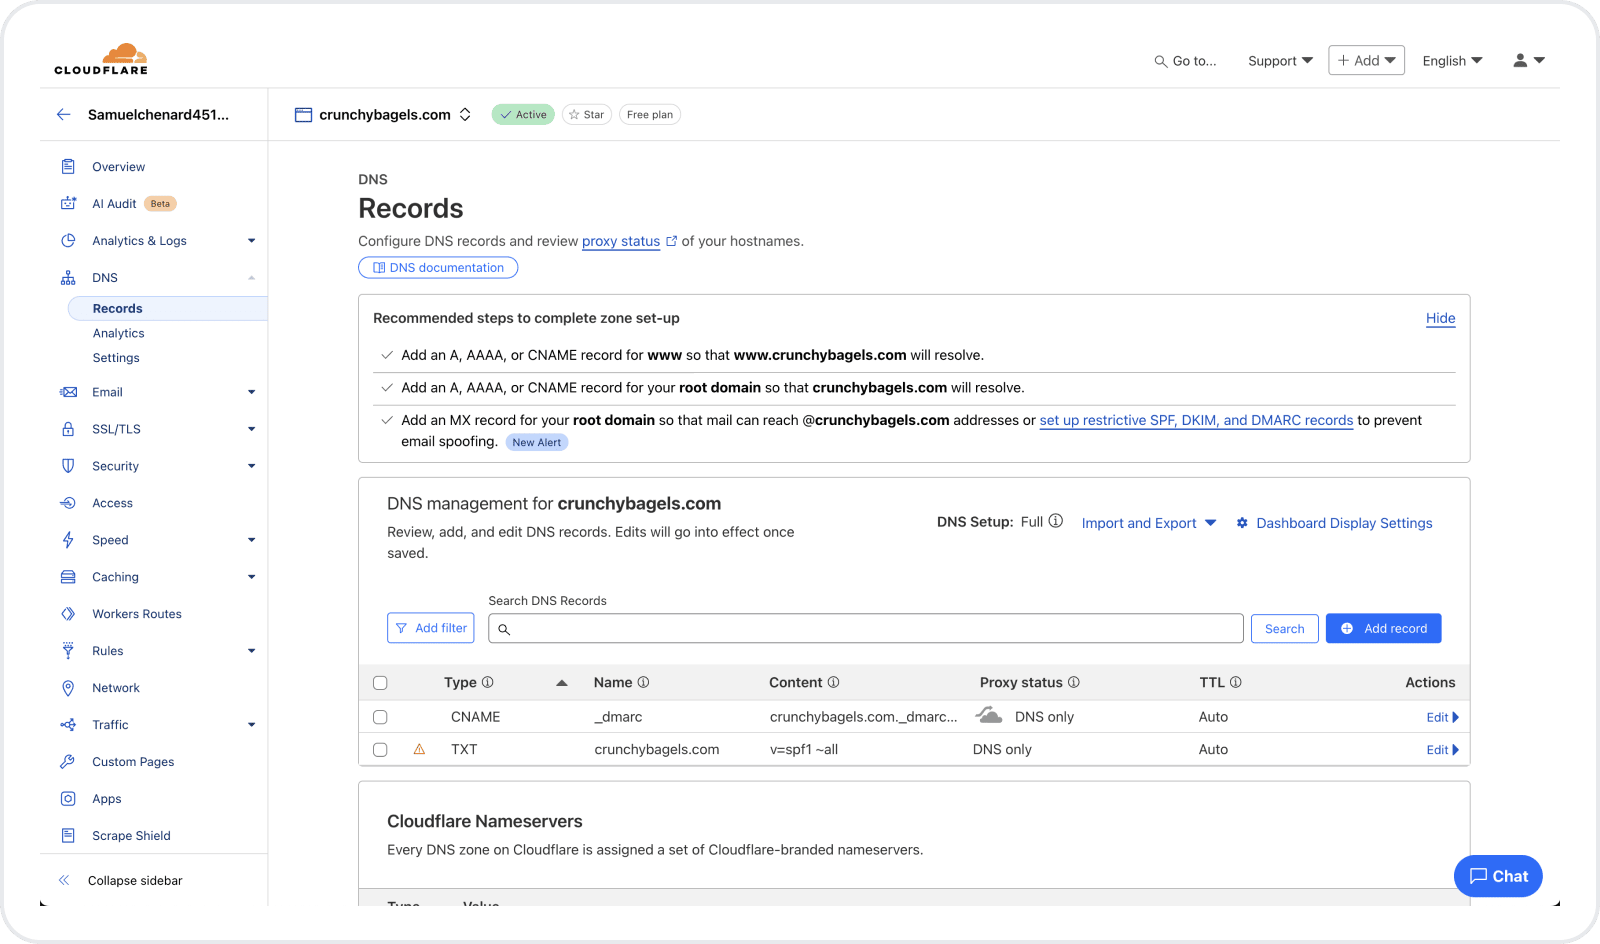
- Log in to Cloudflare and open the DNS section for your domain.
- Click Add record.
- Set Type to
TXT, Name to_dmarc, and paste your record as the value, for examplev=DMARC1; p=none; rua=mailto:reports@example.com; - Save the record.
Fixing it on GoDaddy
- Log in to GoDaddy and open DNS Management for your domain.
- Add a new record: set Type to
TXTand Name to_dmarc. - Enter a DMARC value starting at
p=none, for examplev=DMARC1; p=none; rua=mailto:reports@example.com; - Save the record and allow up to 48 hours for propagation.
- Monitor the reports, align your senders, then tighten the policy.
Best practices
Enabling an enforcement policy isn't a one-time fix. Keep your domain protected by:
- Reviewing DMARC reports regularly.
- Keeping SPF and DKIM aligned as you add or remove senders.
- Raising the policy in stages (
none → quarantine → reject) rather than jumping straight to reject. - Avoiding legacy
pct=rollout advice: RFC 9989 removed thepcttag because receivers applied intermediate percentages inconsistently.
Questions readers ask
Frequently asked questions
What does "DMARC quarantine/reject policy not enabled" mean?
It means your DMARC record is set to p=none, so it requests monitoring but no enforcement handling for failed messages. Your domain can still collect reports, but the policy does not ask receivers to quarantine or reject a spoof that fails DMARC.
What's the difference between quarantine and reject?
Quarantine asks receivers to treat failed mail as suspicious, often by placing it in spam. Reject asks receivers to refuse failed mail. Receivers retain final handling control, so verify real message outcomes rather than assuming identical behavior everywhere.
How do I check my current DMARC policy?
Query your record with a DMARC checker or the command line (dig TXT _dmarc.yourdomain.com) and read the p= tag. If it shows none, monitoring is on but enforcement isn't. The DMARC lookup tool shows the same result in the browser.
What should I do before switching from p=none?
Let aggregate reports run for at least one full sending cycle, then confirm every legitimate sender passes SPF or DKIM and aligns with your From: domain. Skipping this is the most common way domains block their own mail when they enforce.
Why is p=none not enough on its own?
p=none gives you visibility but requests no enforcement. It is a starting point for gathering data, not the usual finished policy for a domain that is ready to ask receivers to act on DMARC failures.

Written by
Samuel ChenardCEO & Co-Founder, Palisade
Samuel Chenard is the CEO and co-founder of Palisade, agentic DMARC software for IT teams and MSPs, from one domain to thousands.
More from Samuel →